Trustlines App User Guide
 Español
Note
The images in this guide are for educational purposes and might not represent all the latest changes in the app

You can get the Trustlines App for Android and iOS from https://trustlines.app
Note to iOS users upgrading from an earlier version
If you have the beta version Trustlines App installed on an iOS device with TestFlight, you will have to uninstall the beta version before installing the production version. First of all, you need to securely back up your passphrase, uninstall the beta version, and install the production version. You also need to do a backup of your account's data and content before uninstalling the beta version.
Introduction
In order for markets to function correctly, people need reliable access to a medium of exchange. Historically, due to how the world's banking system functions, this has been a difficult goal to reach. Even in times of abundance, a lack of access to simple financial tools can cause a breakdown in the availability of a medium of exchange (e.g., think of the many hardships associated with being "unbanked"). The problem becomes especially urgent in the face of economic recessions (which cause a scarcity of money). That is why we need a new form of money that can provide a medium of exchange that anyone can access: "People Powered Money."
Mutual Credit
The Trustlines App is your key to using a form of money based on the idea of mutual credit. Mutual credit is an organic and accessible form of money that consists simply of credits and debits between two mutually trusted parties. Any two people can choose to transact with each other using the principle of mutual credit by creating an informal two-way credit line between them, referred to as a "trustline."
If you formalize these natural, informal agreements between trusted friends on a digital database, it becomes possible to "ripple" transactions through your network of connected friends-of-friends. That's the brilliant thing about using Trustlines: it turns trusted relationships into a payments network that looks and acts like "real" money.
Getting started with the Trustlines App
You might have received an invite link from someone to get started with the Trustlines App, or perhaps you've just downloaded the app and are ready to get started. These two processes differ a bit, and we have a guide for each approach.
Select the appropriate choice for you, Starting via an invite link or Starting with a sign up in the app.
Note to iOS users upgrading from an earlier version
If you have the beta version Trustlines App installed on an iOS device with TestFlight, you will have to uninstall the beta version before installing the production version. First of all, you need to securely back up your passphrase, uninstall the beta version, and install the production version. You also need to do a backup of your account's data and content before uninstalling the beta version.
Starting via an invite link
You might have received an invite link from someone to get started with the Trustlines App. This link will allow you to easily set up your account as well as create your first trustline!
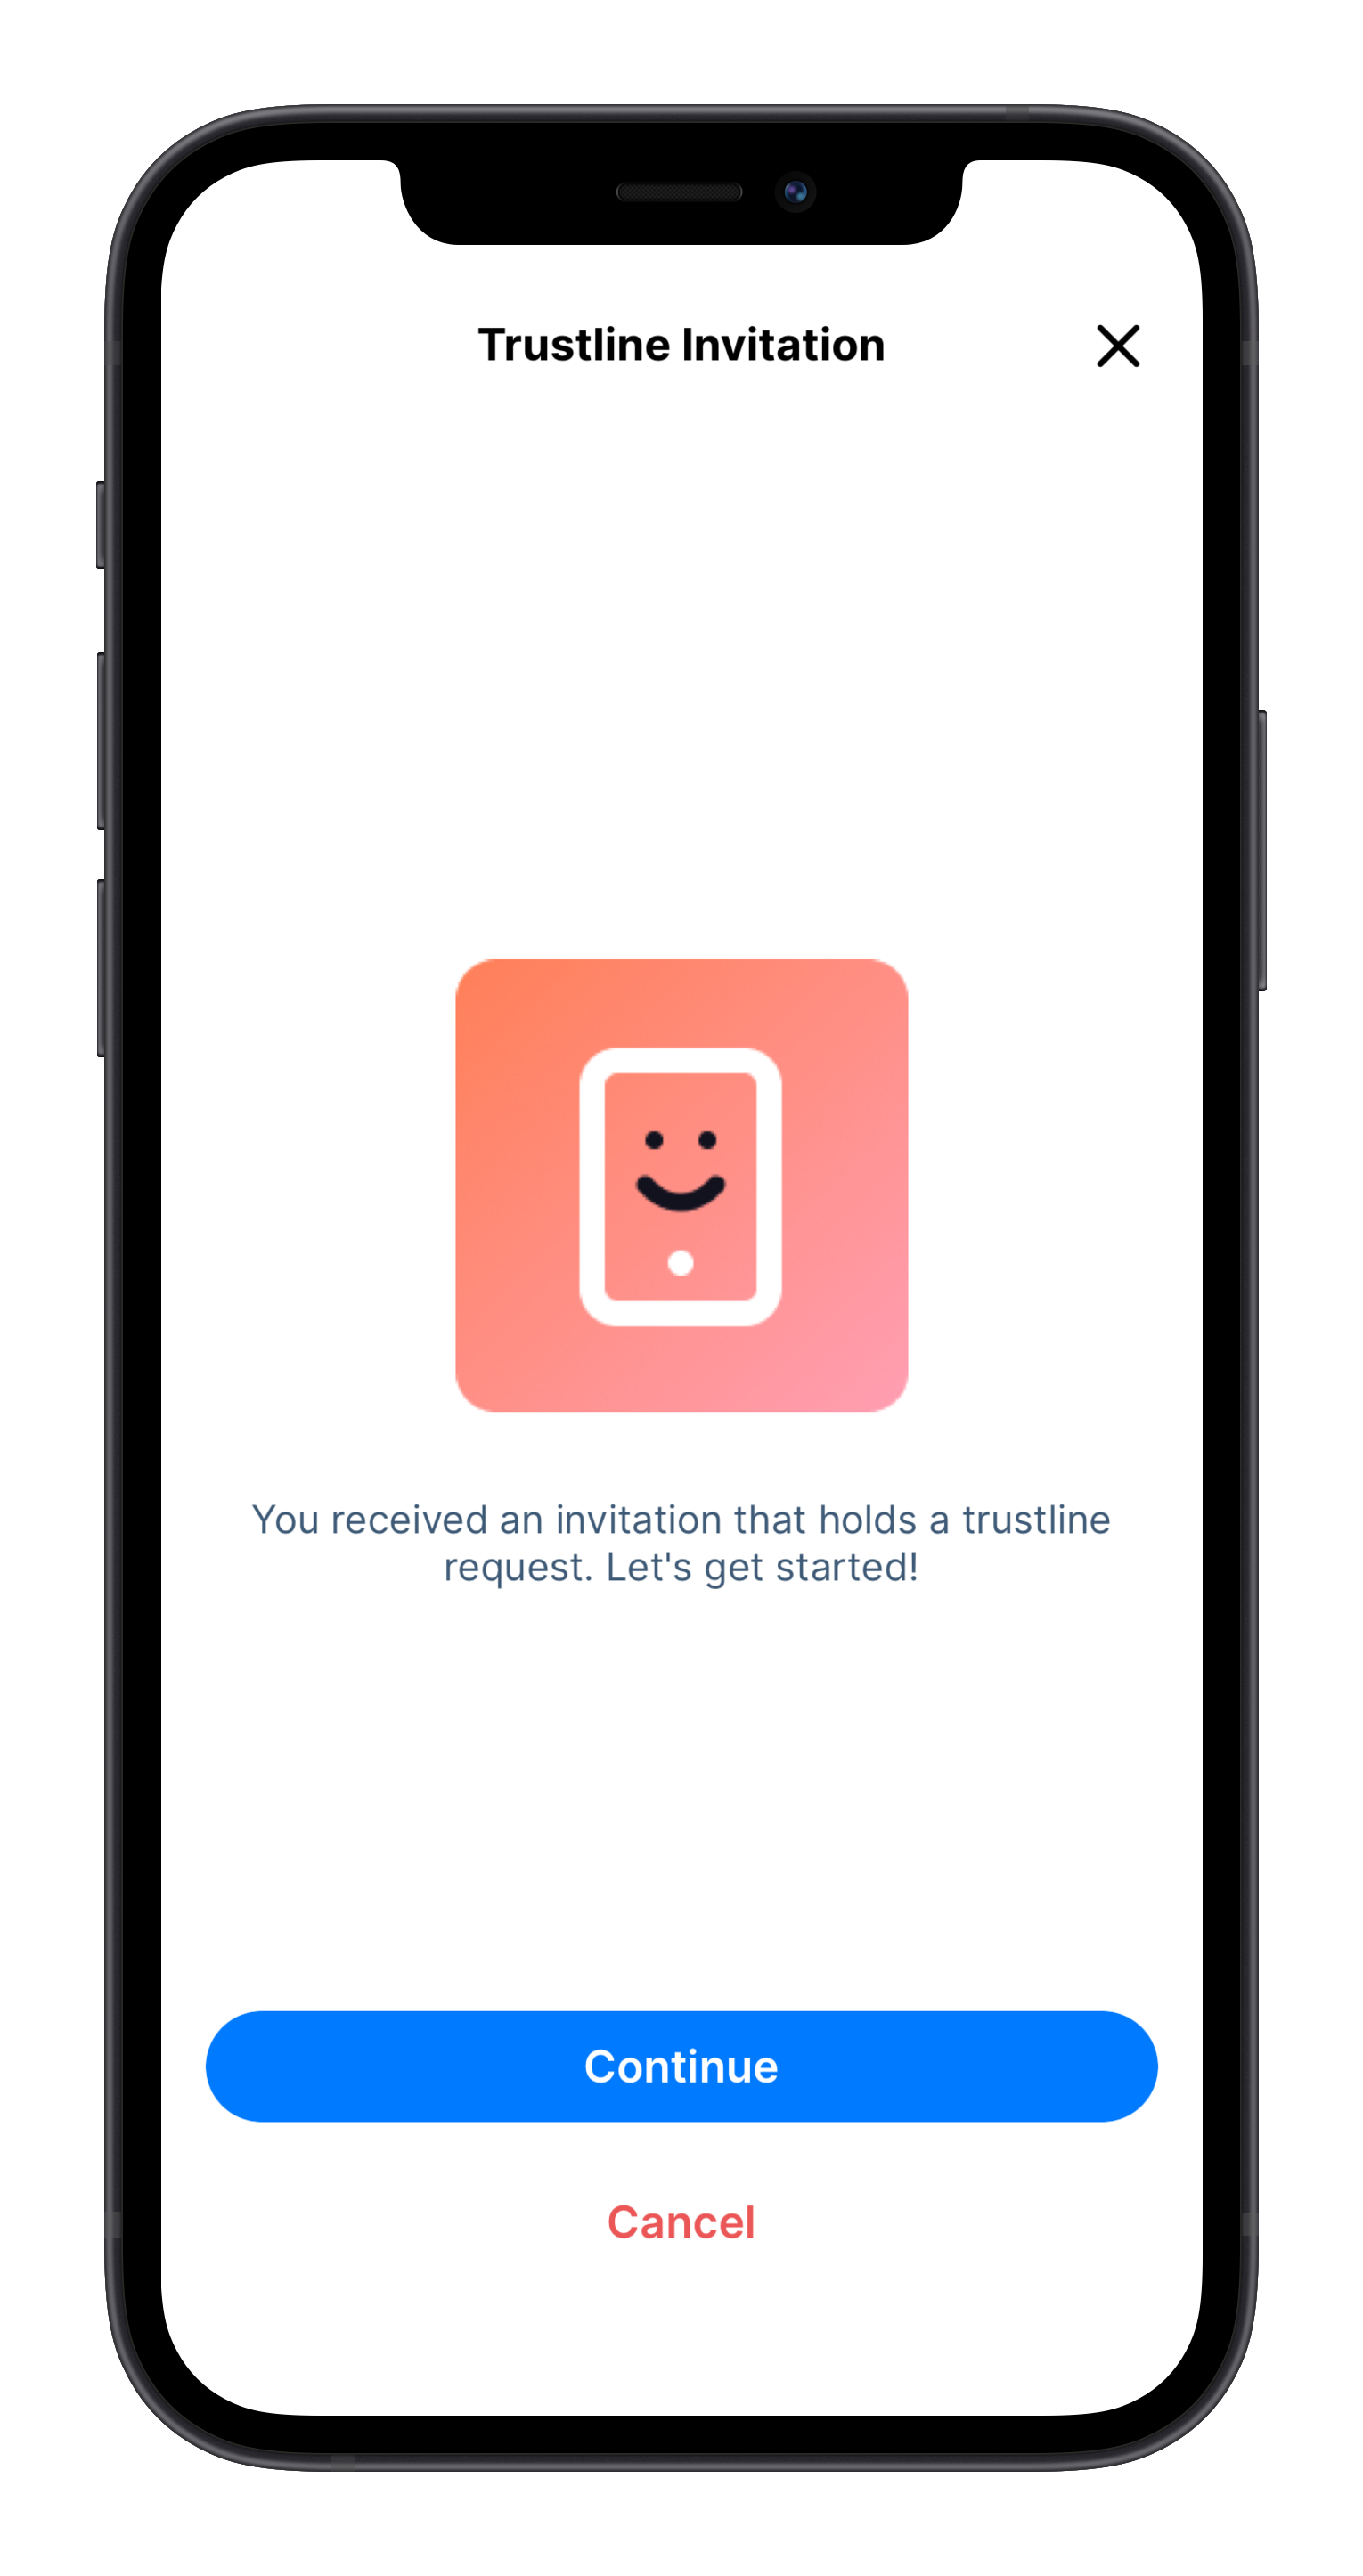
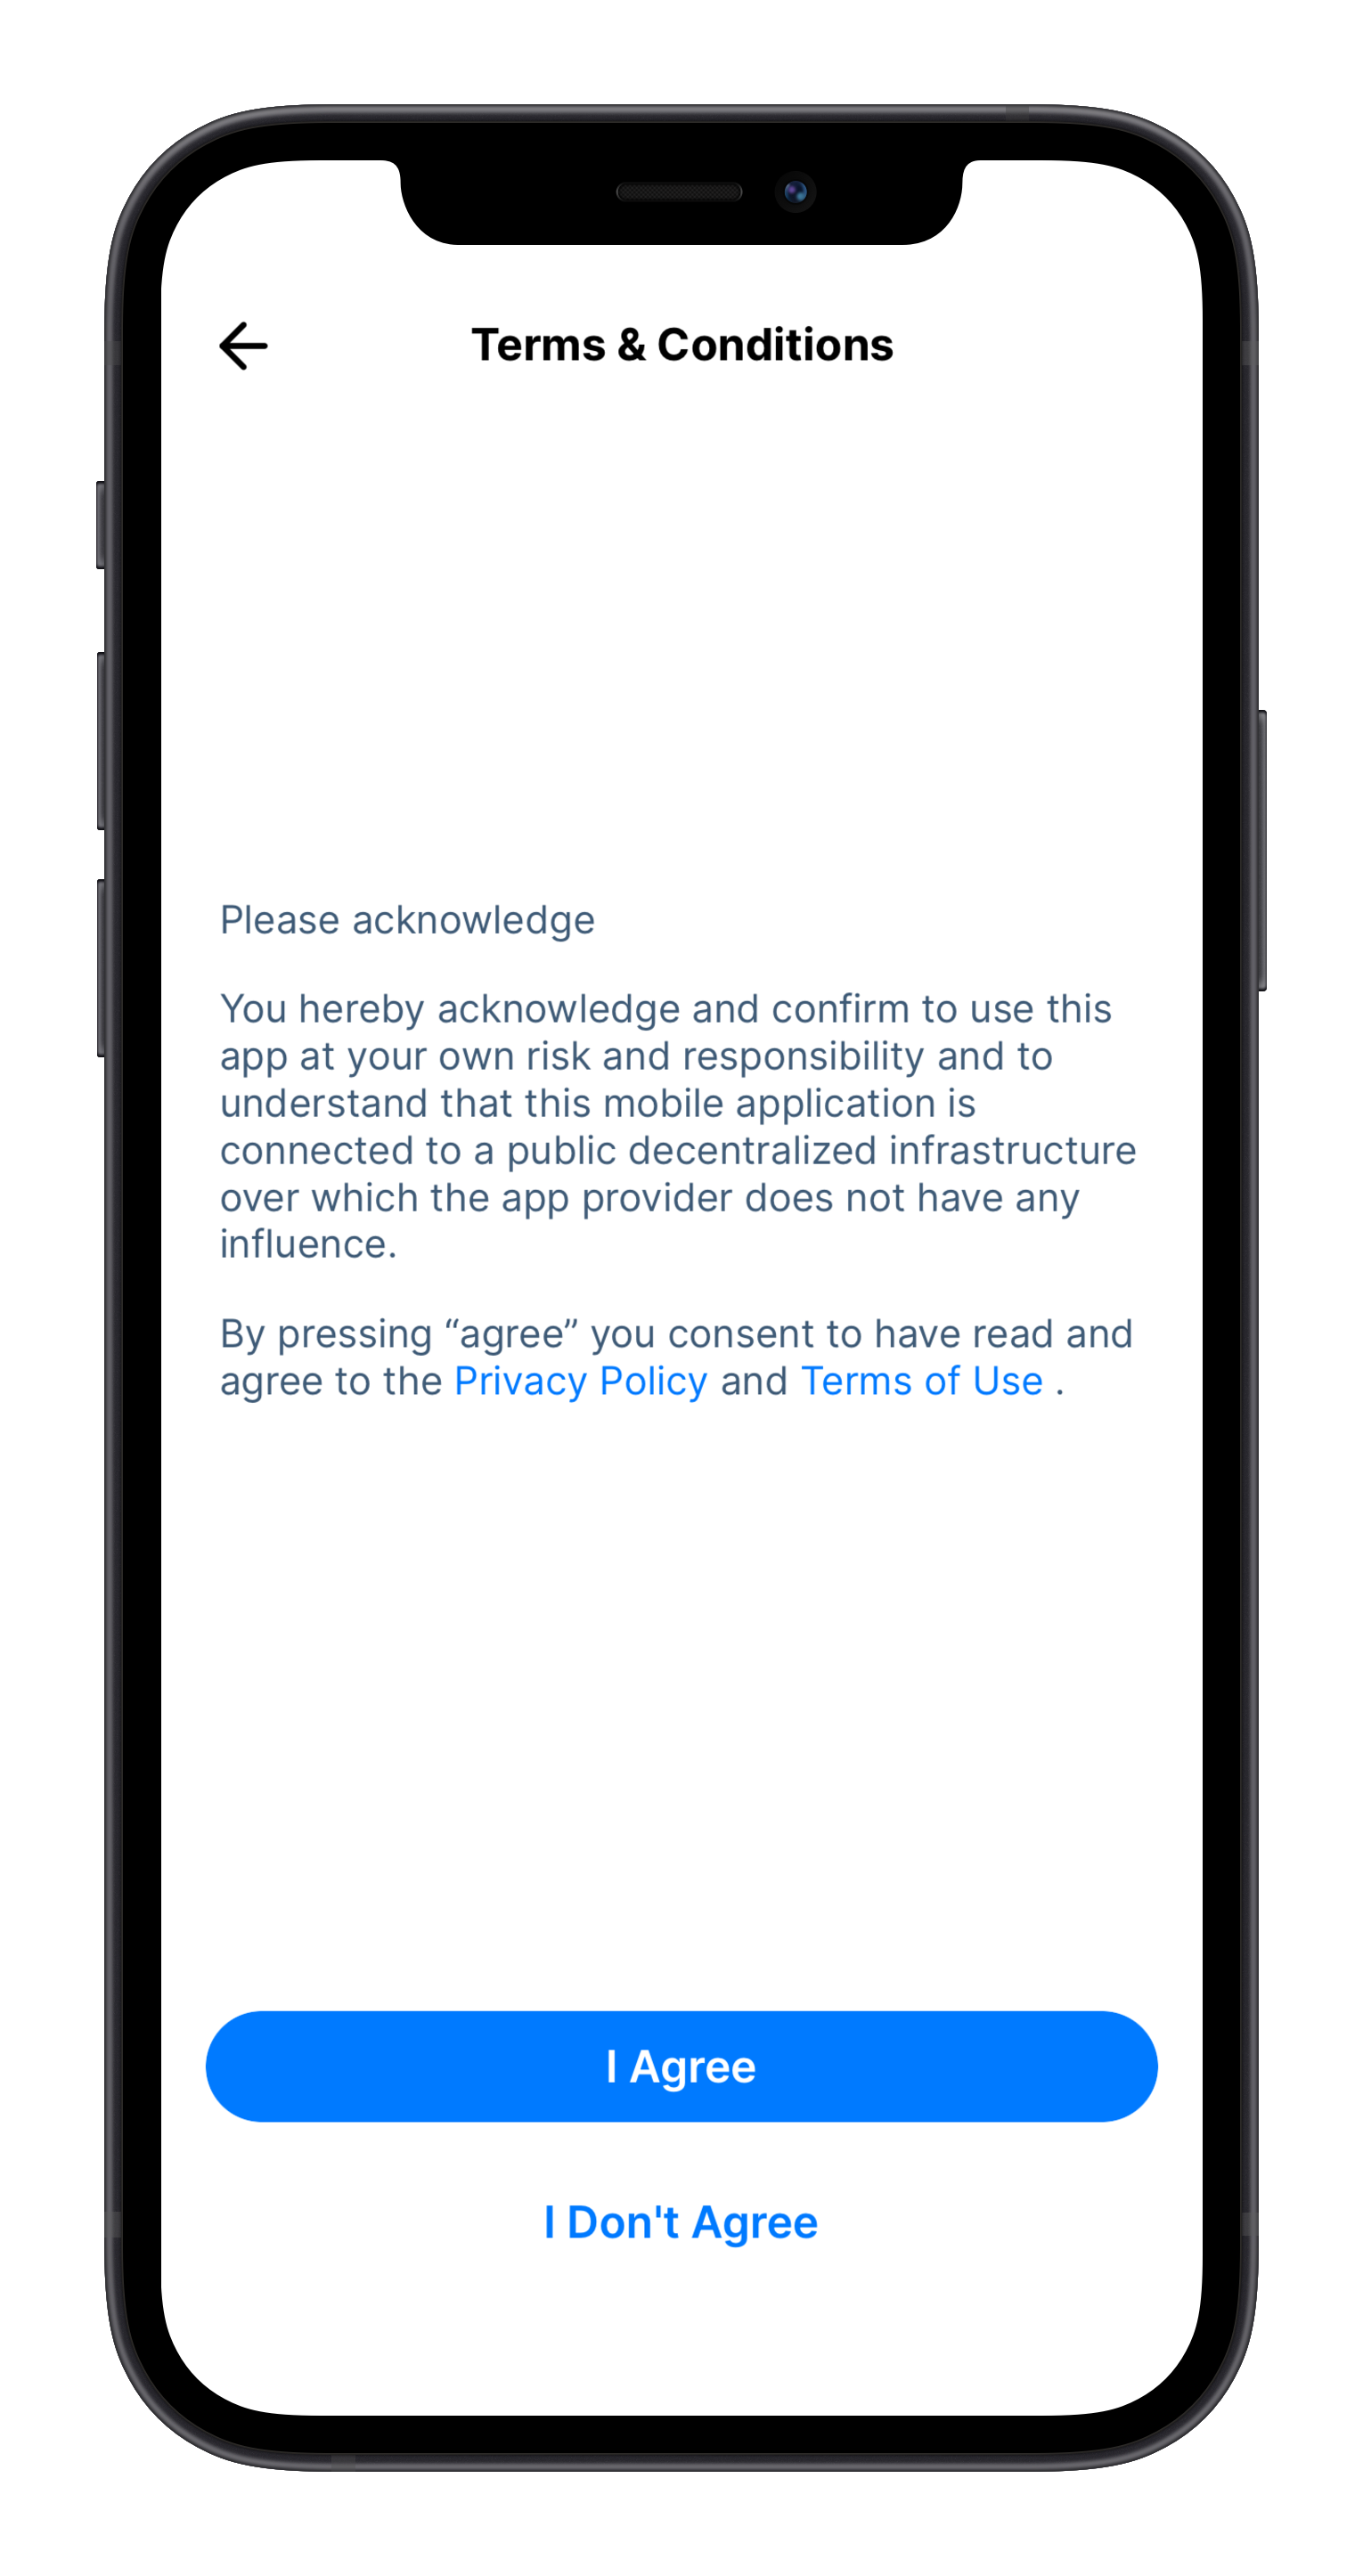
The first thing you need to do when signing up for a new account is to accept the Terms & Conditions. Upon accepting the Terms & Conditions, the app will automatically generate a new account for you.

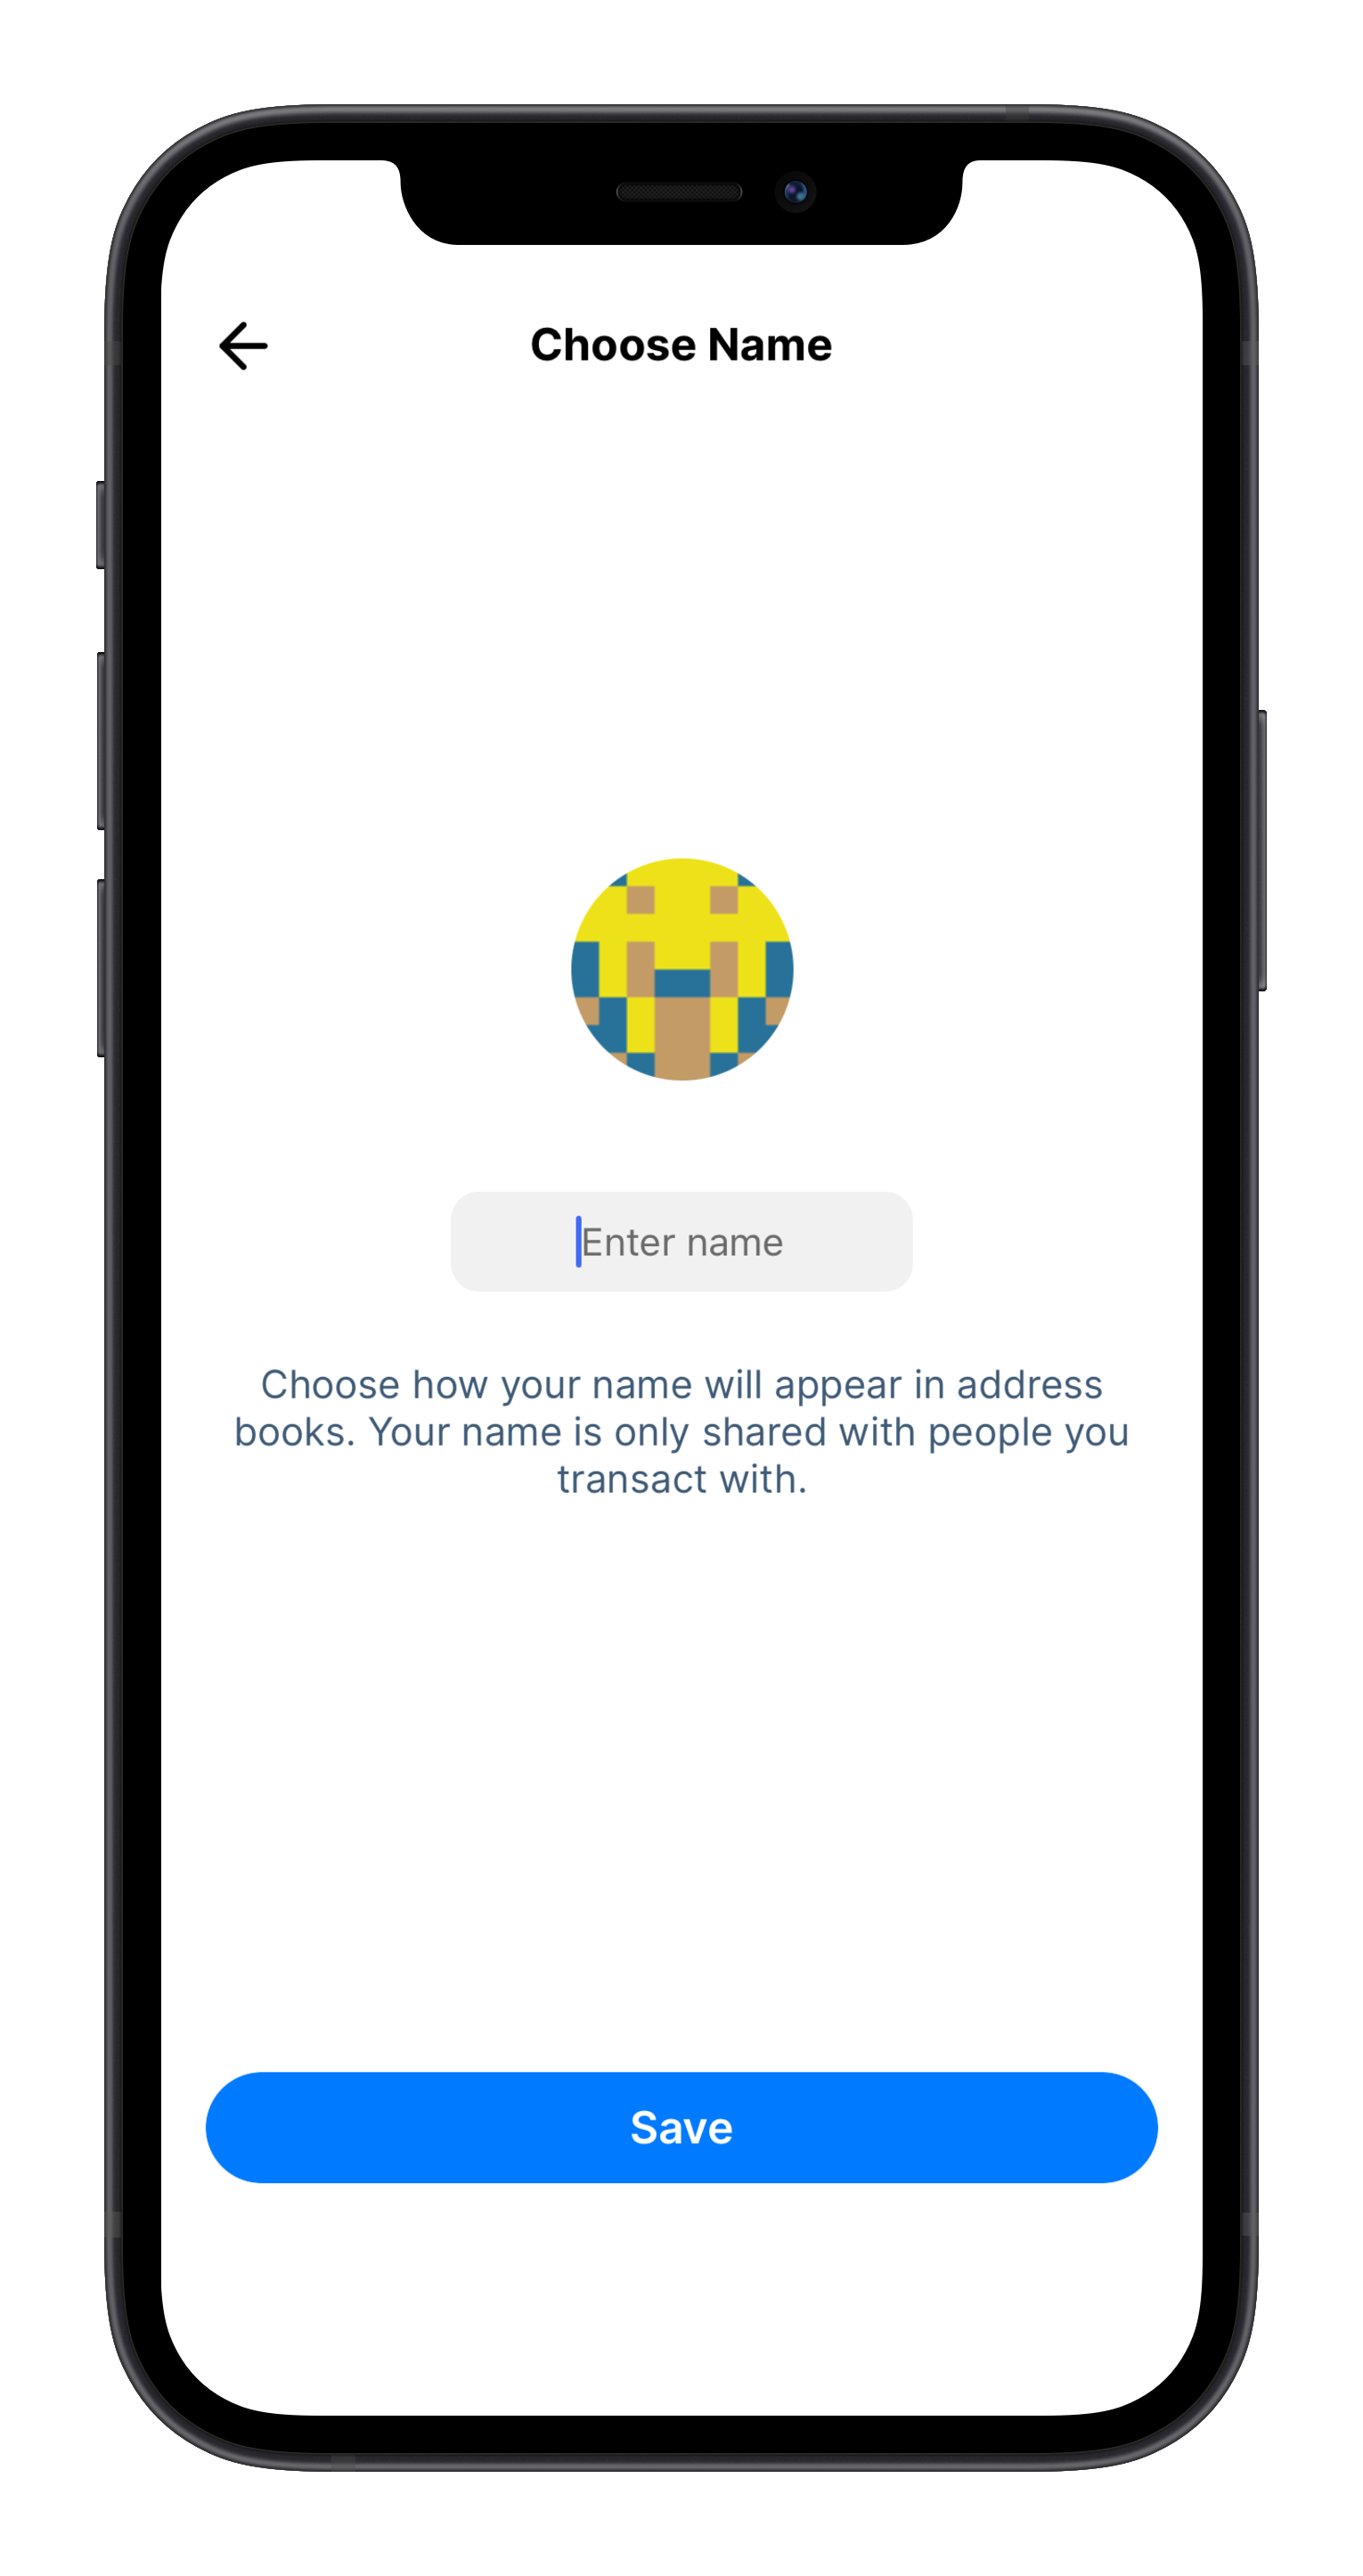
Once the account generation is complete, you get to choose the name displayed for yourself. Choose a name you want to use in the app, and you're ready to create your first trustline!

Since you created your account via an invite link, there is already a trustline request ready for you to review. This will show the name that the other person has picked for themselves, which currency network they are suggesting for the trustline, as well as the suggested credit limit(s). A trustline request from a new invite link is slightly different from others you will receive, and will become active only after it is sent back to your new partner for a final approval.


That's it. You're ready to start using the Trustlines App!
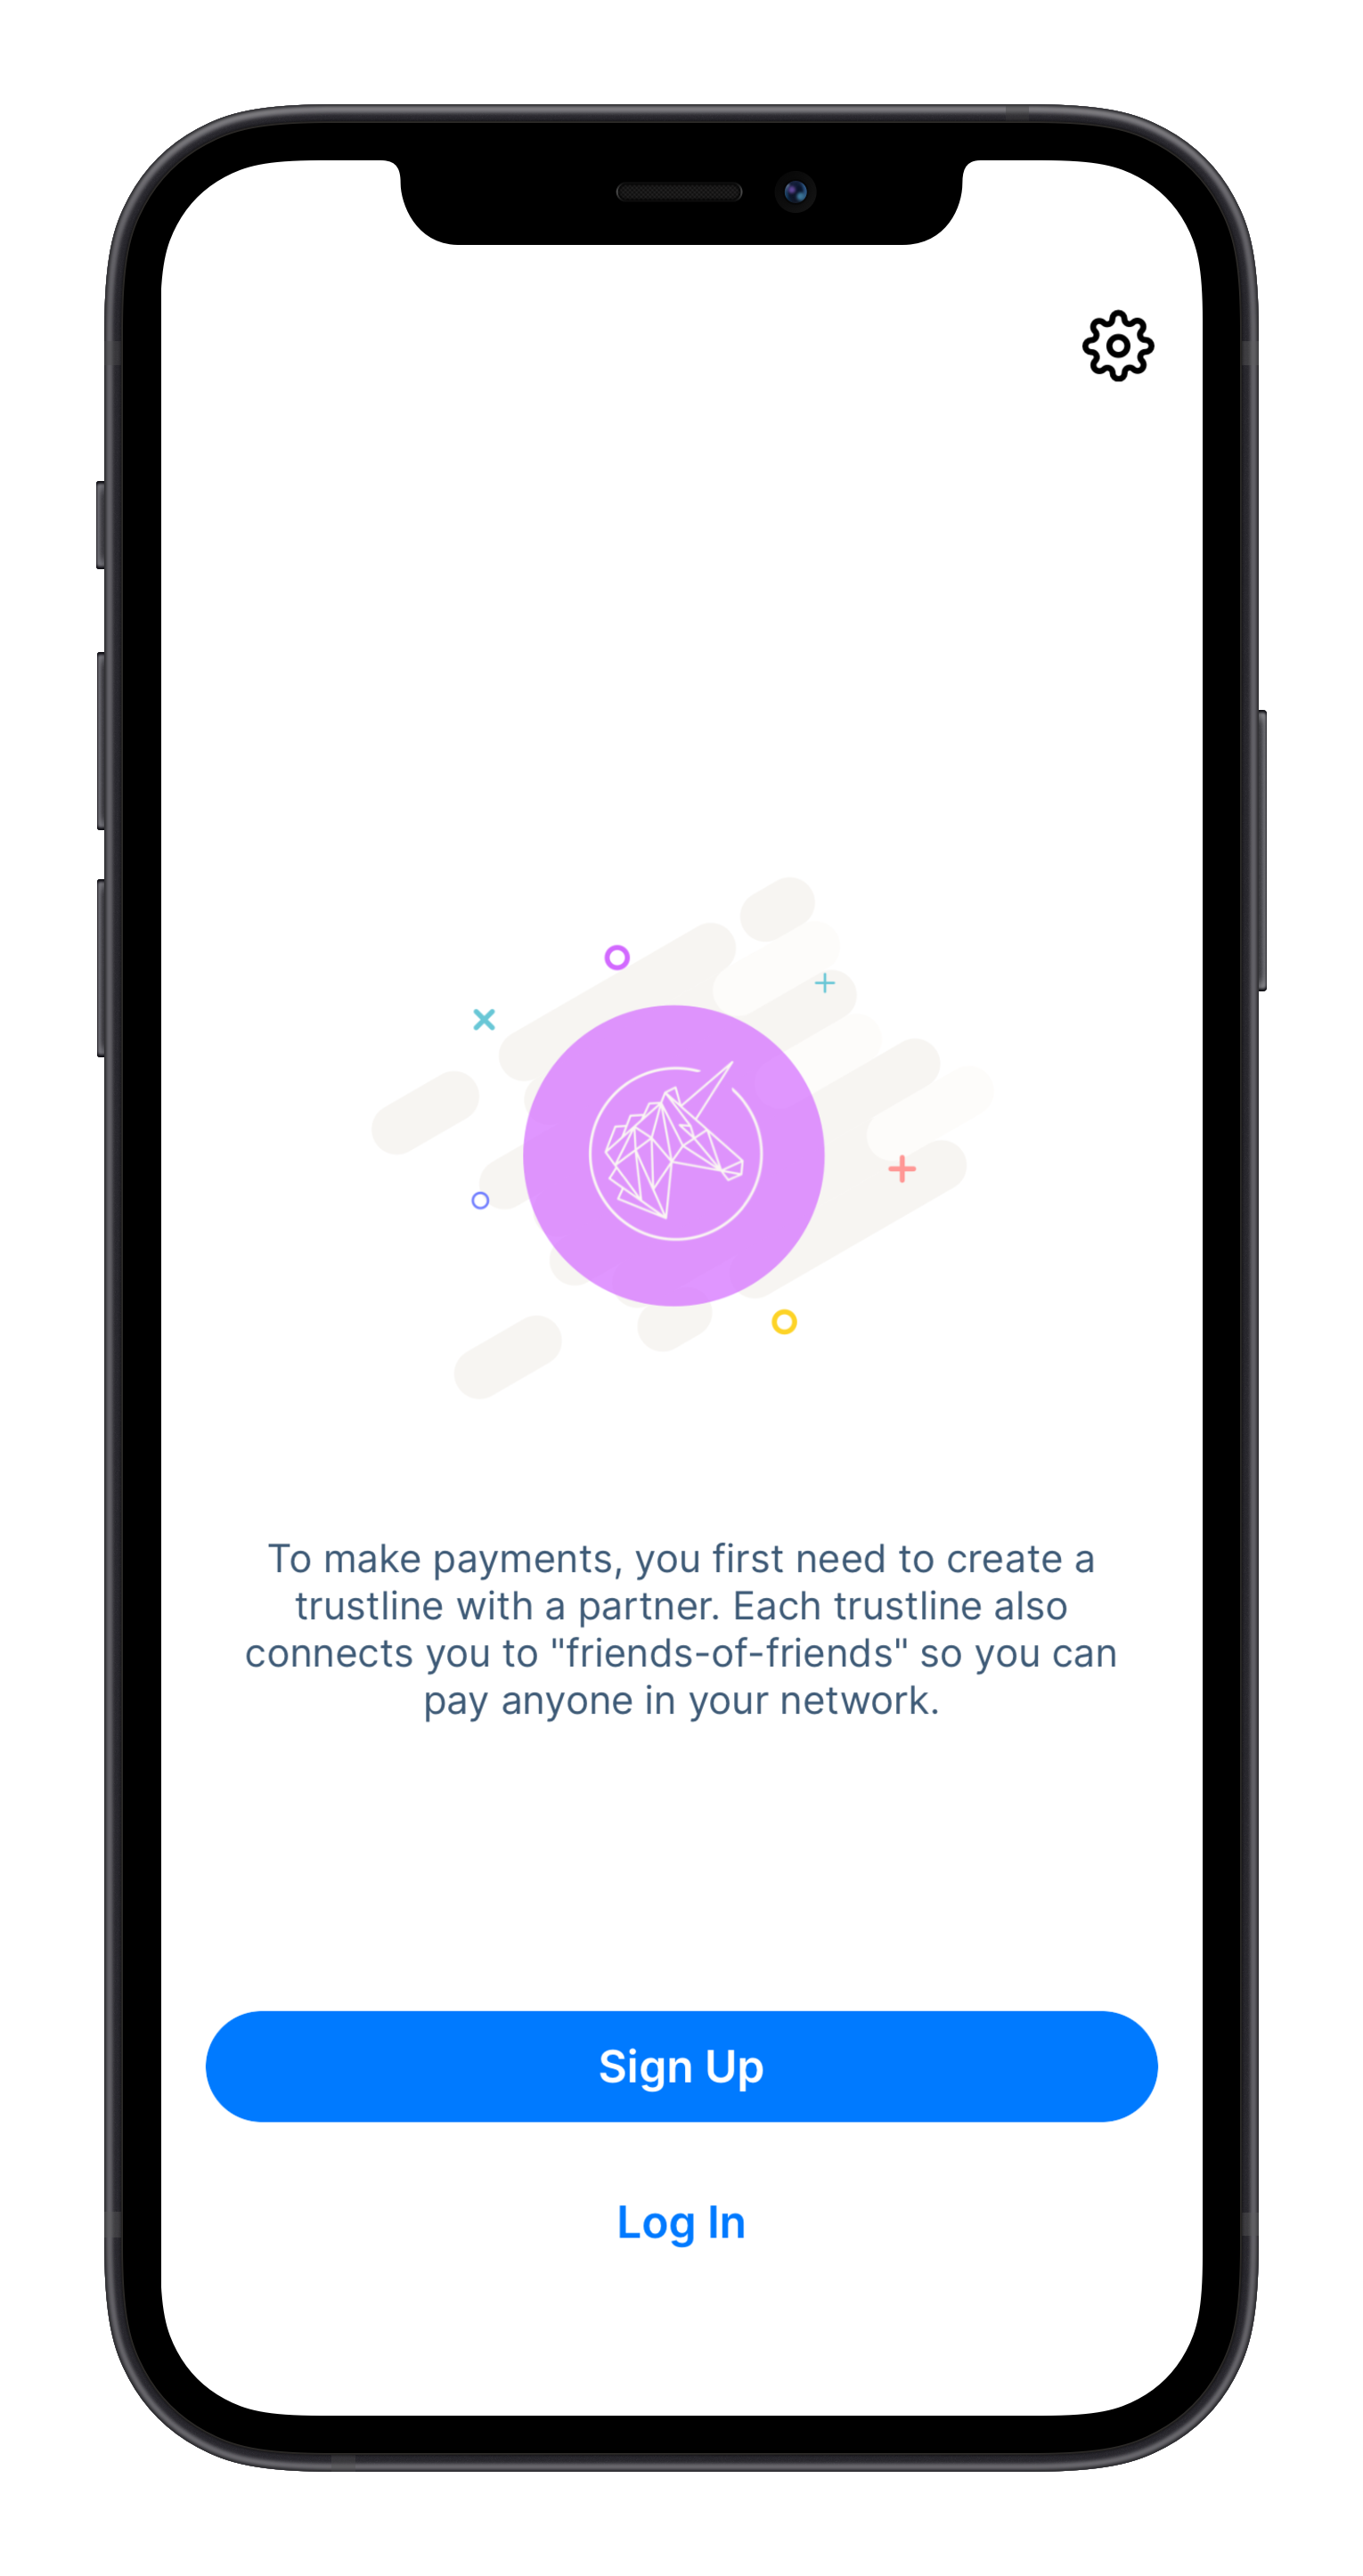
Starting with a sign up in the app
Starting with a sign up in the app is pretty similar to starting via an invite link. There are a couple of fewer steps to take before getting to the Dashboard, but the app won't be very useful at this point until you create a trustline with someone.
If you already went through the starting via an invite link steps, feel free to skip this section.
The first thing you need to do when signing up for a new account is to accept the Terms & Conditions.
Upon accepting the Terms & Conditions, the app will automatically generate a new account for you. Once the account generation is complete, you get to choose the name displayed for yourself.
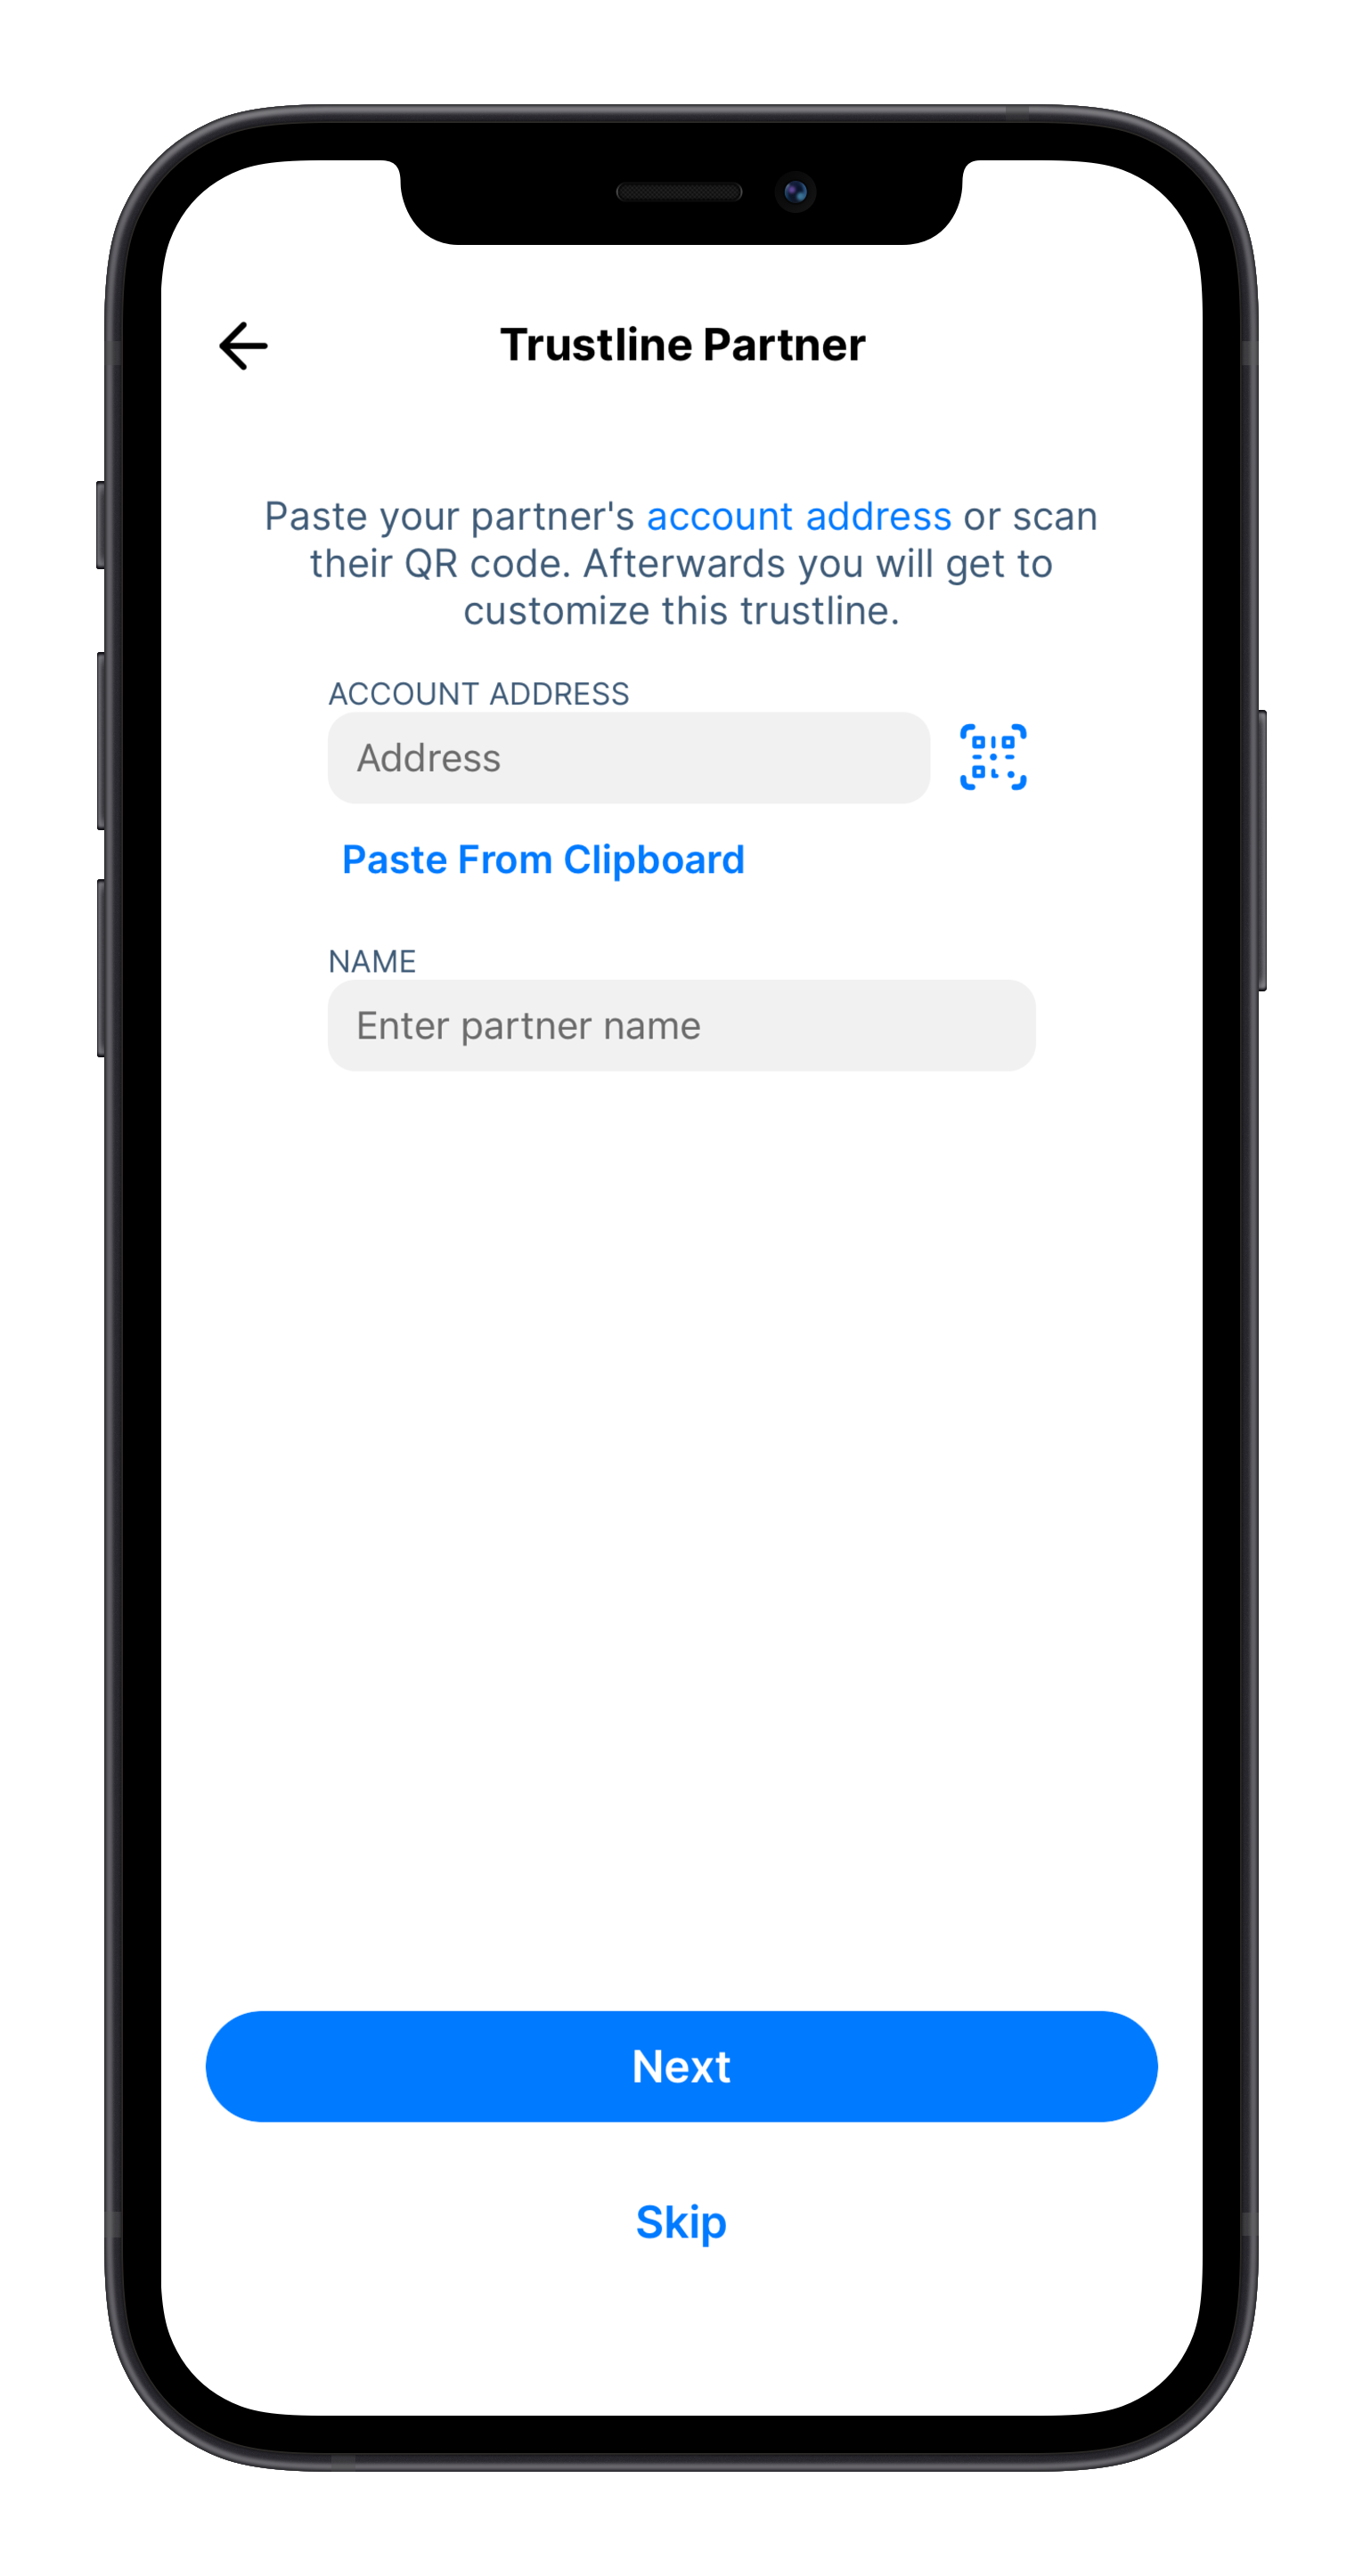
After choosing a name that you want to use in the app, you're ready to create your first trustline! You can enter your partner's address either by scanning their QR code or by entering the address to the input field. Make sure to enter a name for them as well so you will be able to easily see who you're interacting with!
You can also skip this step and create a new trustline later, but the app is not useful without at least one trustline!
Next, you will choose a currency network you would like to use for this trustline. On the next screen, you will need to choose and suggest a credit limit for this trustline.

Review the details of the trustline you wish to request before sending, and that's it, you're ready to start using the Trustlines App!


Securing access to your account
Notice
This is a crucial step for all users of the Trustlines App!
Note
This is not the same as backing up your account data. This will secure access to the account, but you should also make sure that the account data is backed up.
Backing up your passphrase will guarantee that you will be able to access your account in the case that you lose access to your device. Without the passphrase, you won't be able to access your account again on another device.
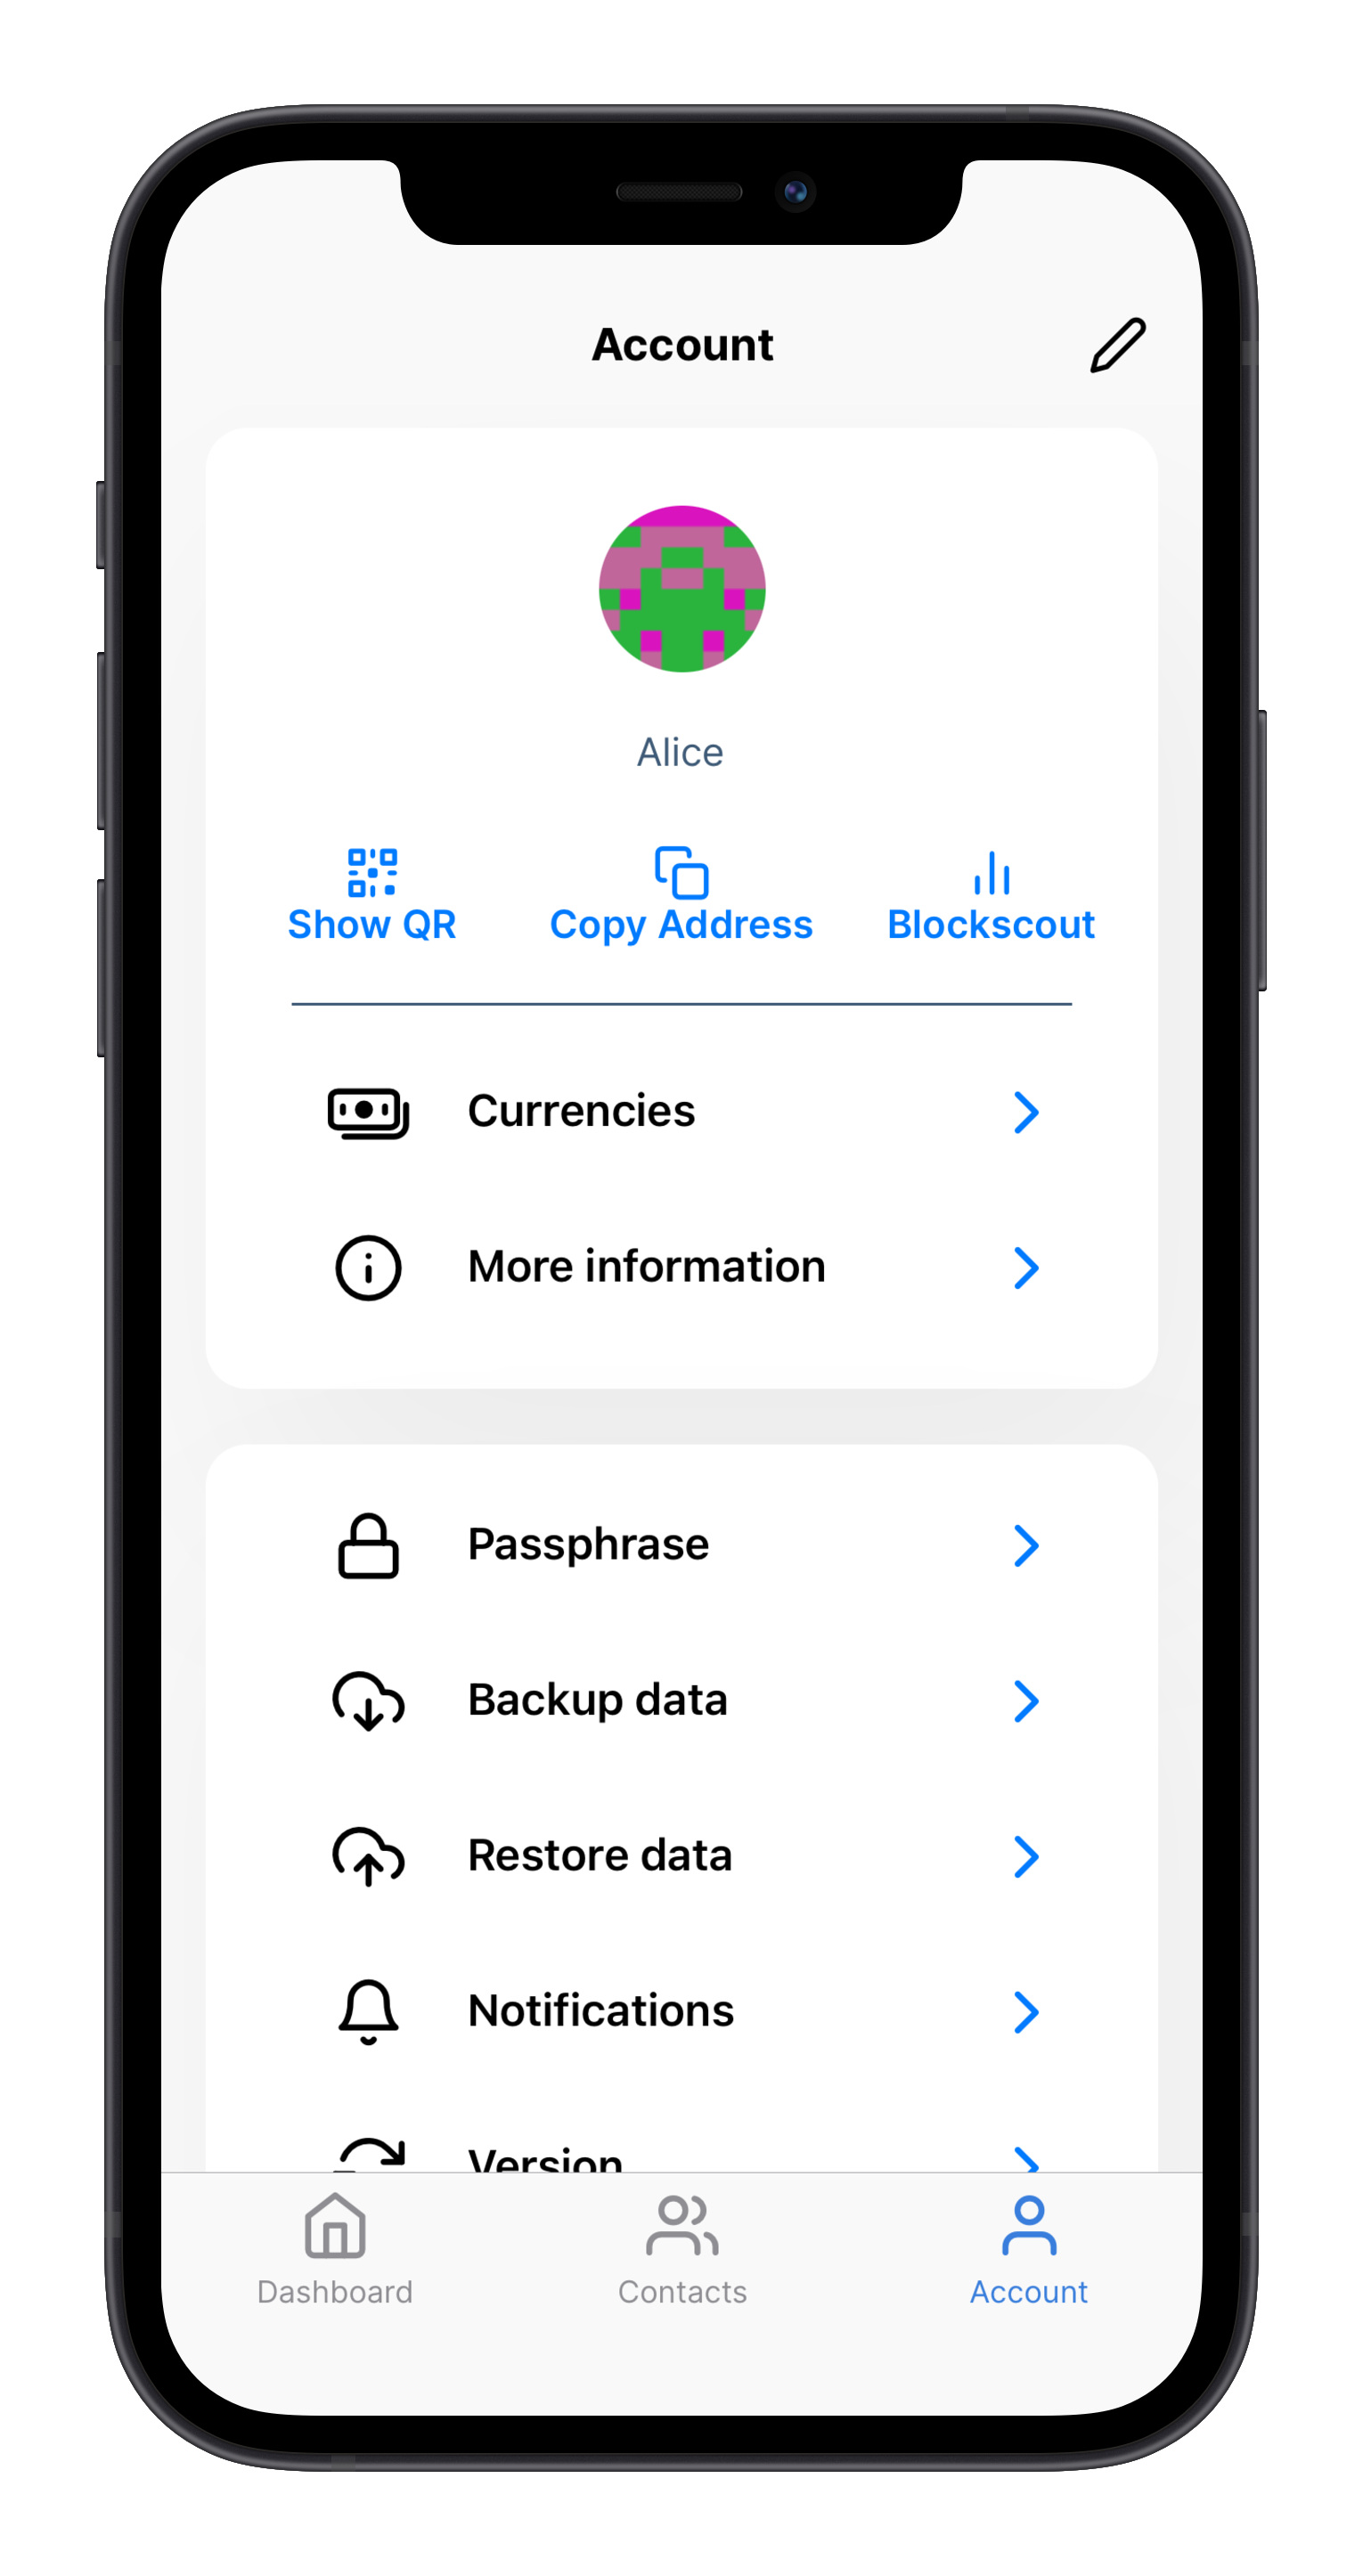
You start by going to the Account tab in the menu bar. There you need to select Passphrase to start the backing up process.
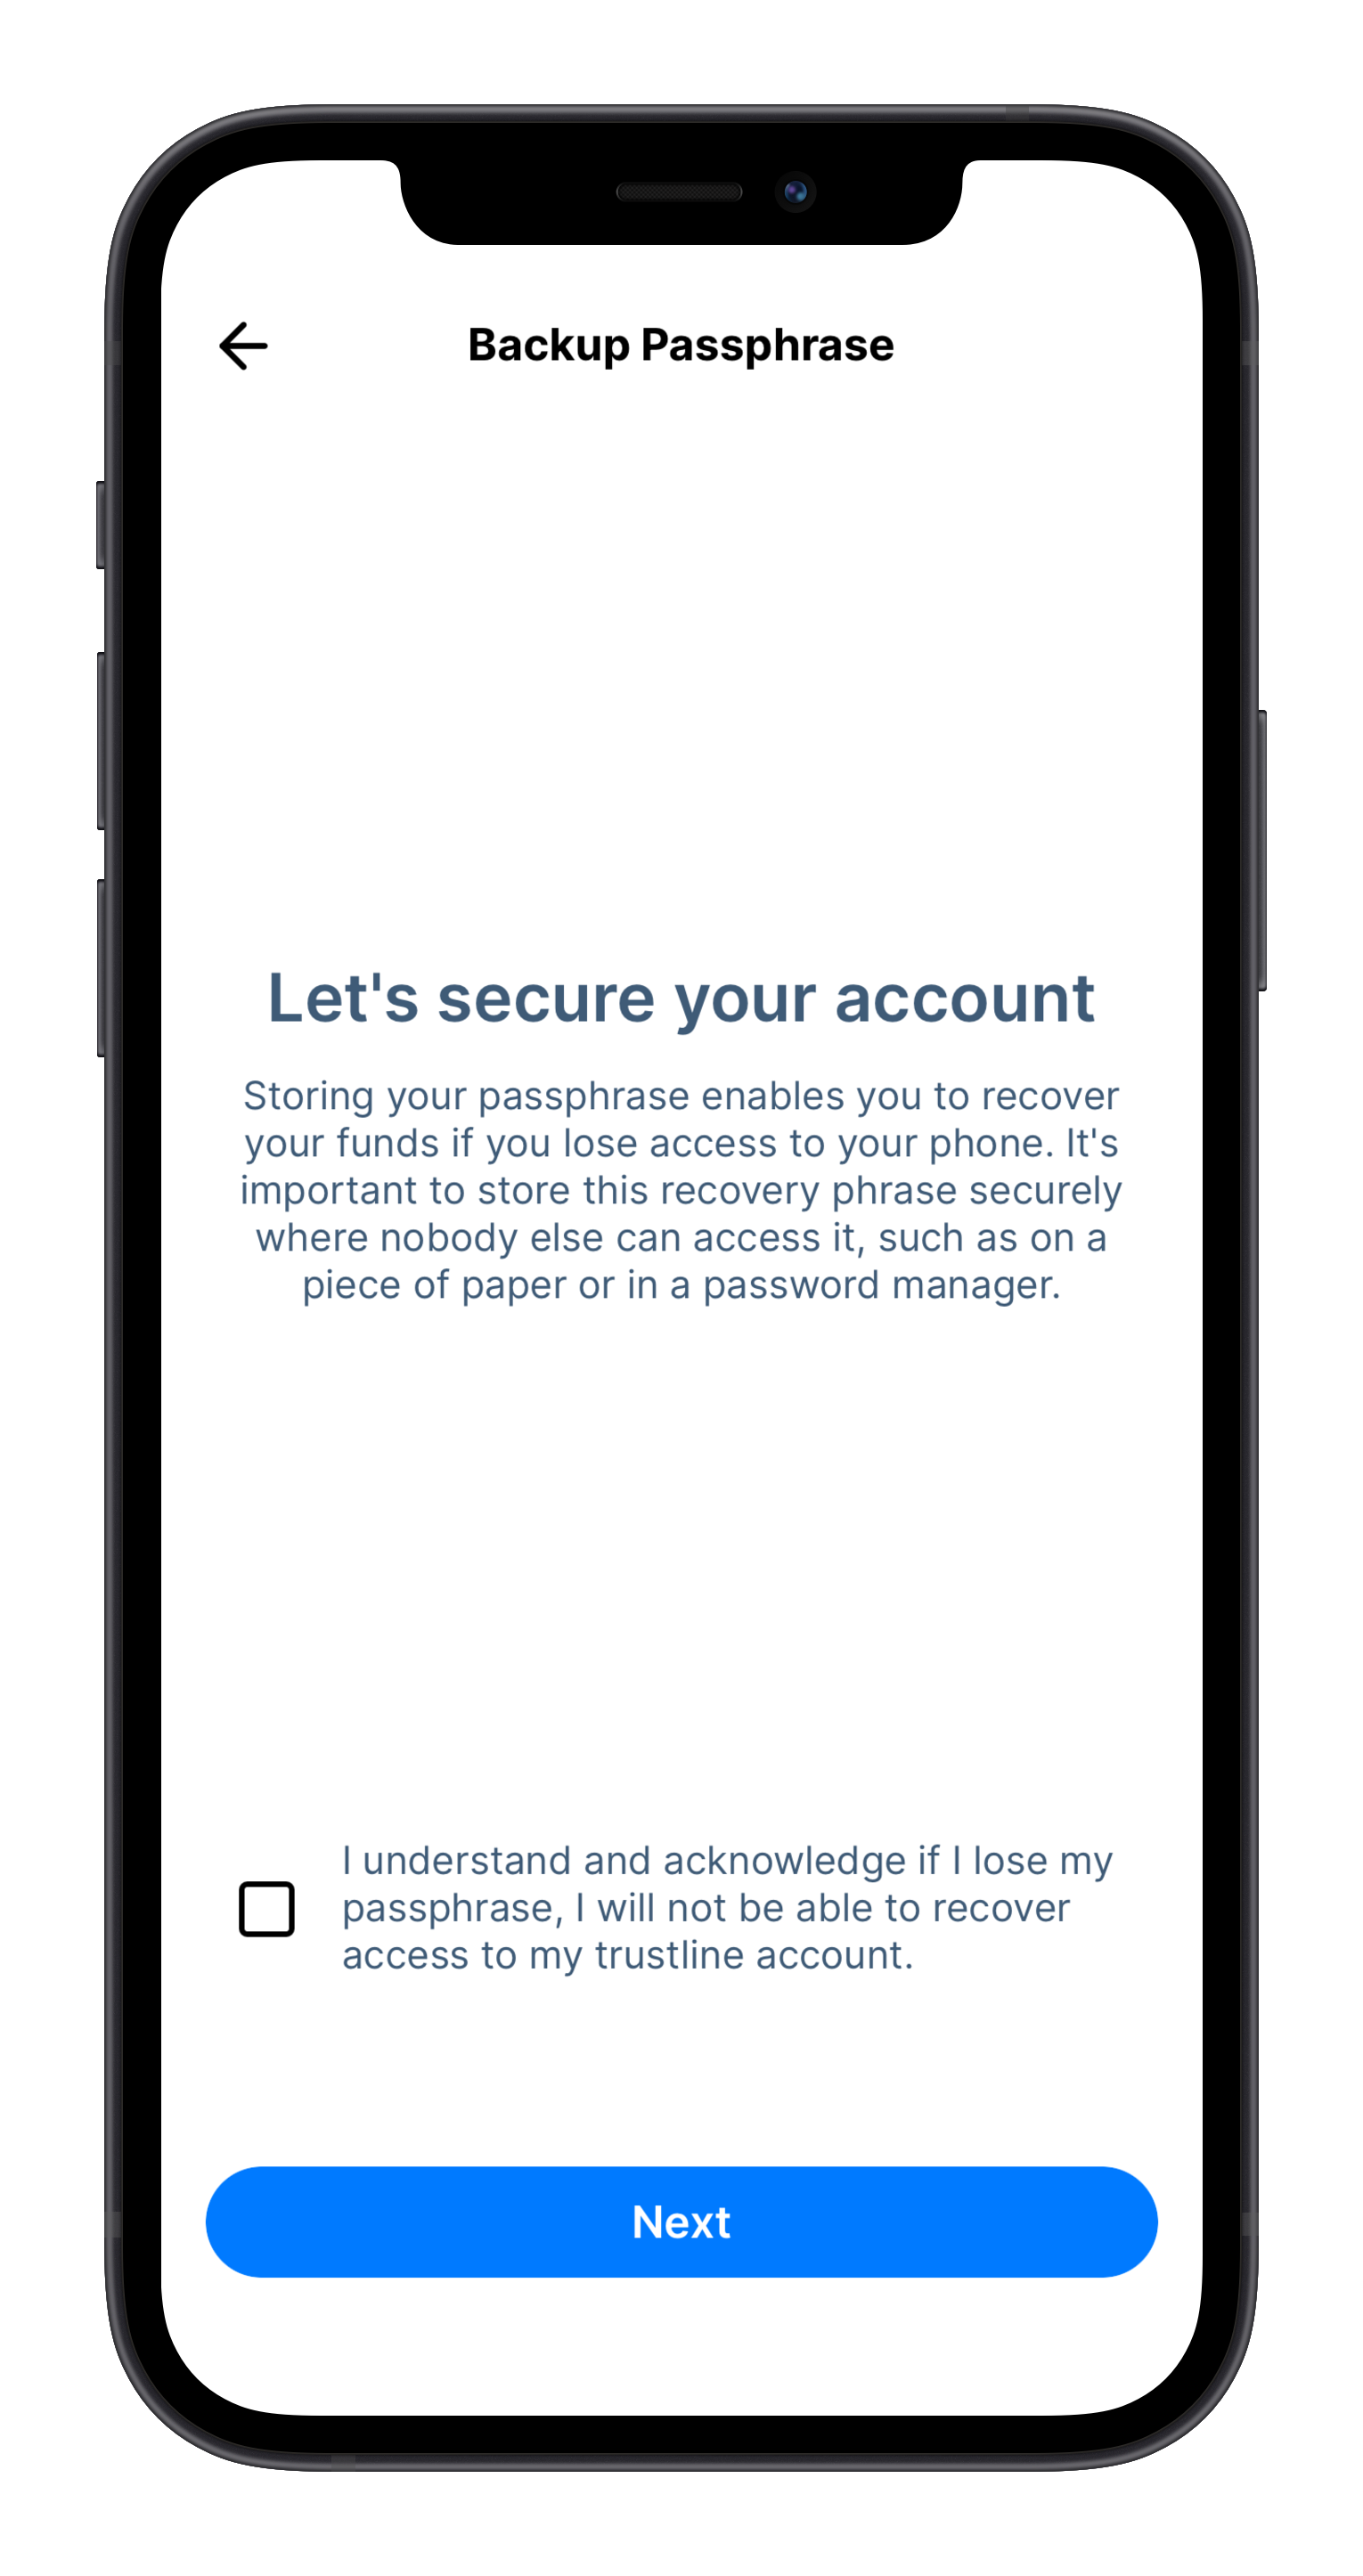
The next step will show you the personal passphrase associated with your account. This passphrase is 12 words long, and you will need to copy it to a secure location like a password manager. After copying your passphrase, you will need to verify that you have the correct passphrase stored. The app will ask you to enter the 12-word passphrase in the correct order, ensuring that you have the right one copied and allowing you to access your account in the future if needed.
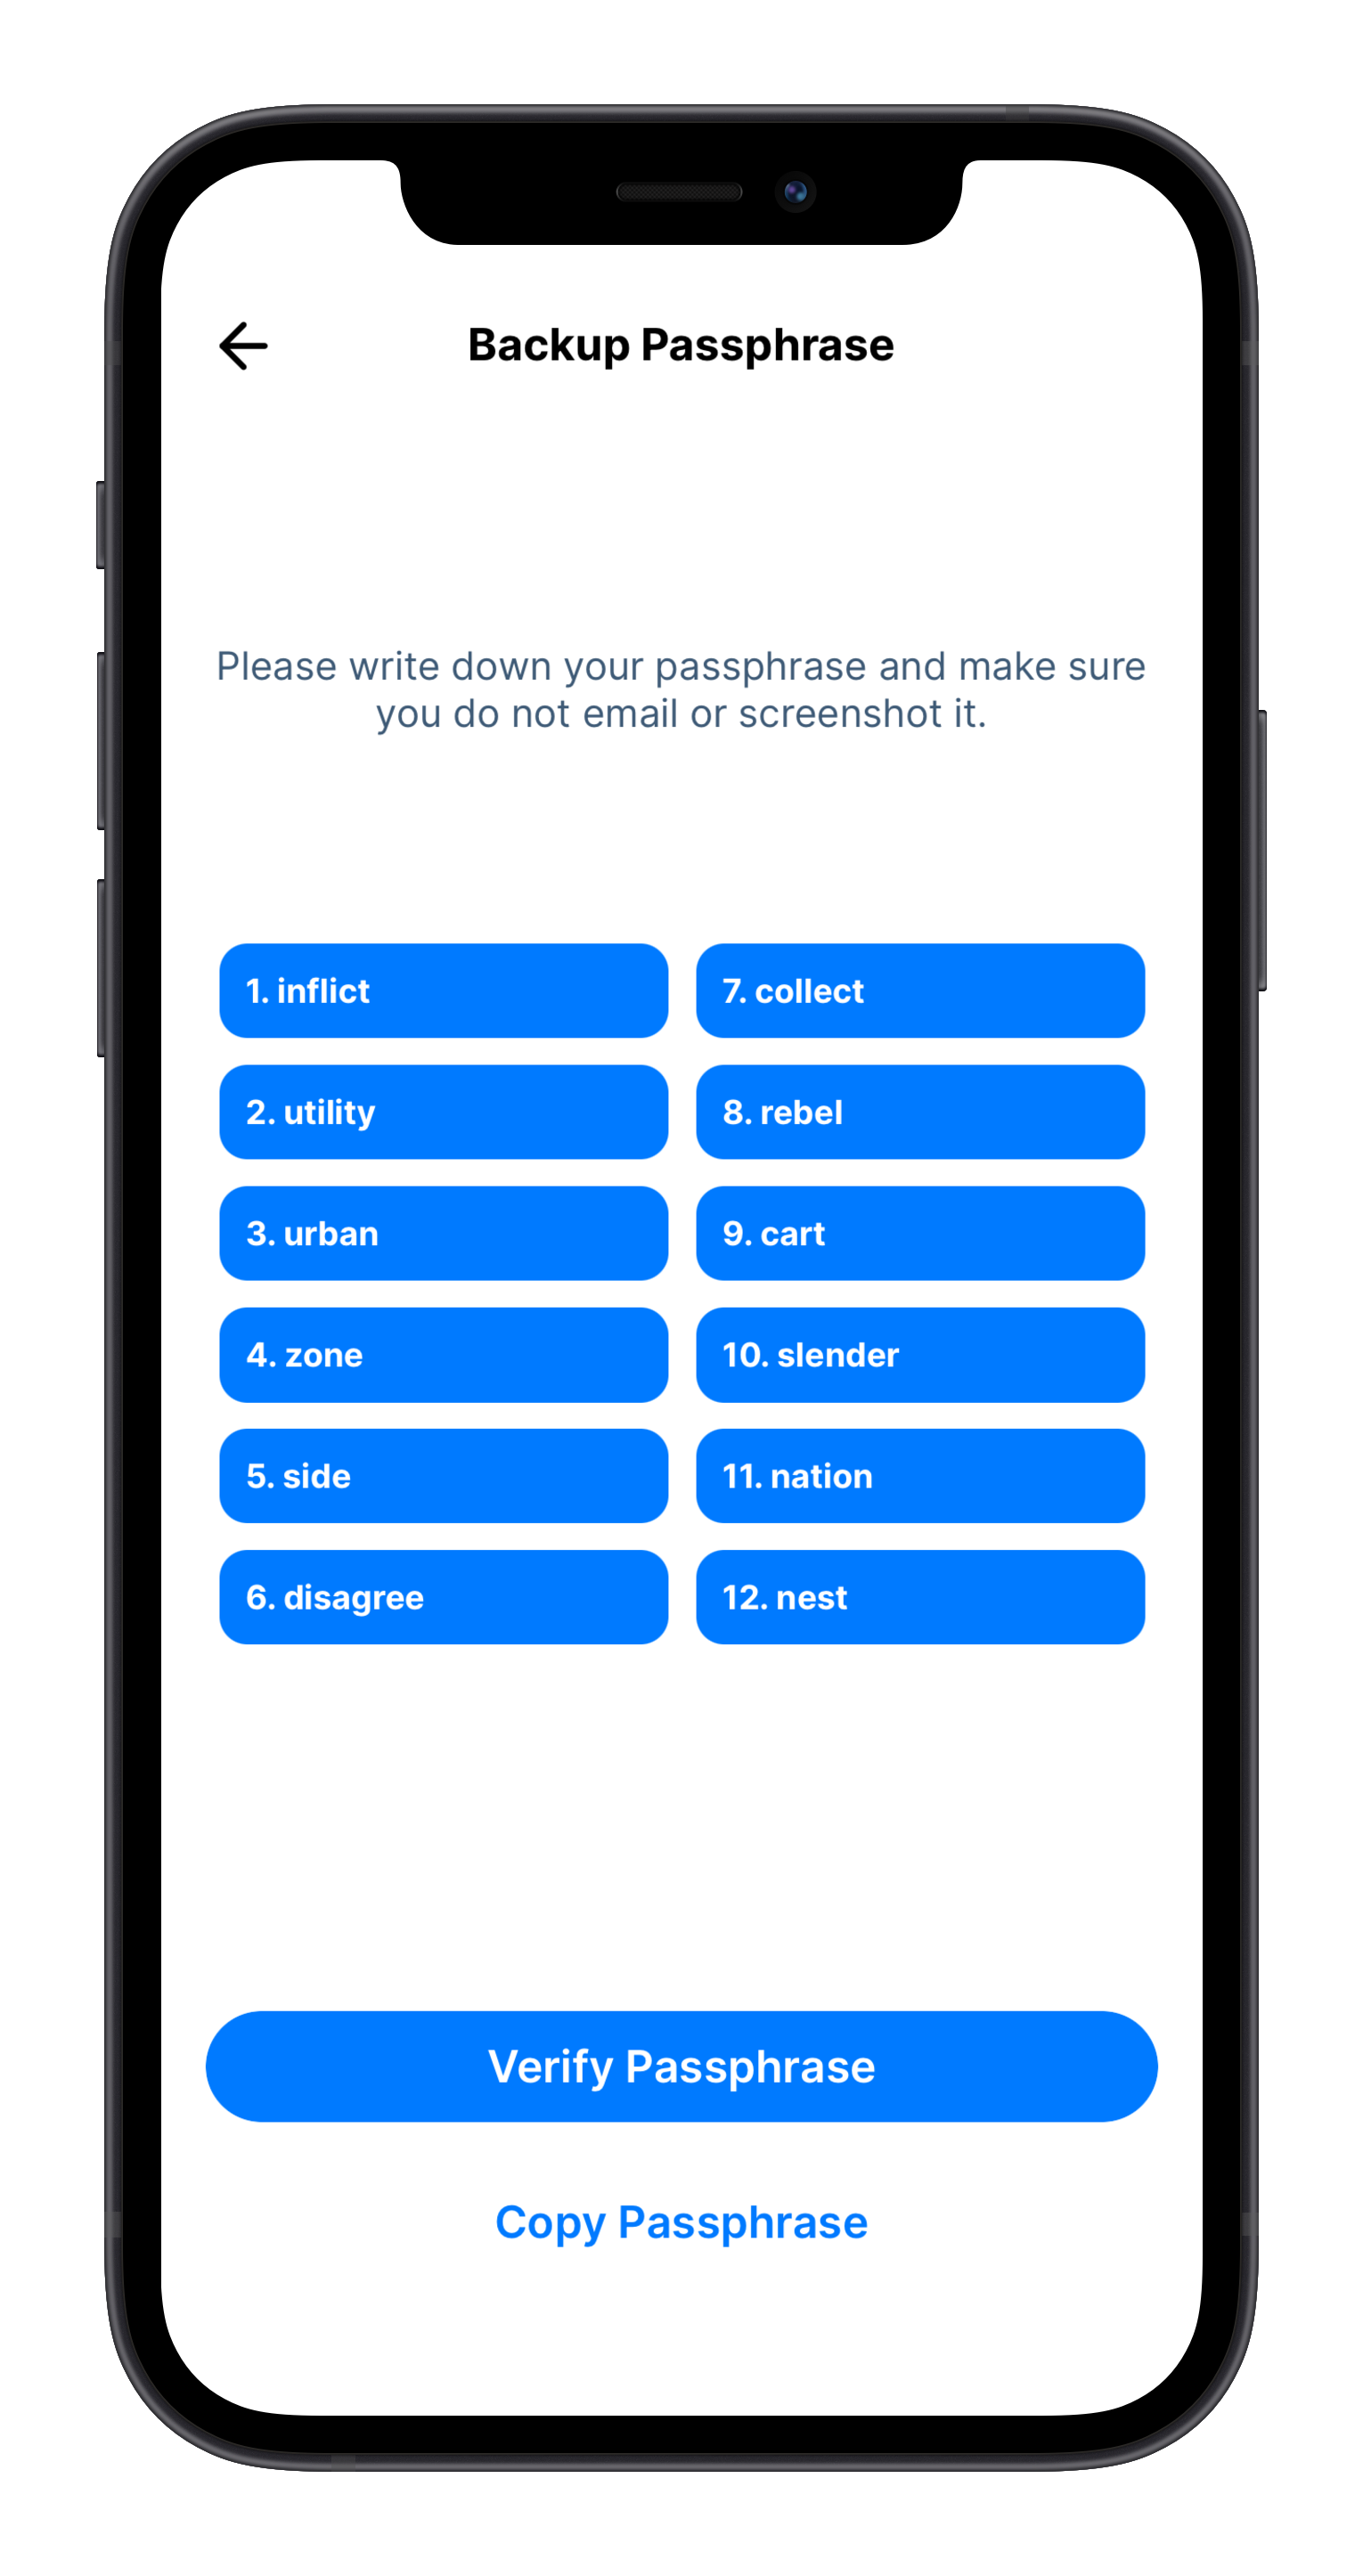

These are all the steps needed to secure access to your account. As a reminder, storing your passphrase, i.e., in a screenshot, email, or at cloud storage, is not a secure way of storing your passphrase.
Backing up and restoring your account data
All the personal data of your account is stored only on your device. While the Trustlines Blockchain stores information regarding your balances and transfers, personal information like the names of your contacts and payment requests are only stored on your device. This is why it’s important to back up your account data. We recommend doing a regular backup of this data in case your phone gets stolen, broken, or is otherwise lost.
The information is stored in a JSON format that you can be easily store in text form any way you would prefer. For a regular user without knowledge about the formatting, this is done easy, and can be done by just copying and pasting the information to save it.
Here's an example of how the data of your account data might look like.
{
  "contacts": [{
    "address": "0xdbF44585FD4C8fc748fB5b6f99d24f8540E0ebEc",
    "username": "Alice"
  }, {
    "address": "0x062E470d519d5feCC78a501644B402d00BBbF393",
    "username": "Dan"
  }],
  "activeCurrencies": [{
    "address": "0x57c4a2cCF2CC99f3dF7855465d1528C110Ff4F14"
  }, {
    "address": "0x7Ac3fC1C428df99D81d9b644106FF67c44A155aA"
  }],
  "messages": [{
    "id": "0x88DD2B76c8eAa369f38764EF71cEcF74F168a6f85262b8Aa66Ba22",
    "direction": "sent",
    "networkAddress": "0x7aF939CC78E5805d232752571cab0723613bD327",
    "timestamp": 1606128428,
    "type": "PaymentRequest",
    "counterpartyAddress": "0x21fa801a76196cEb92417c436eEf0a15EB57C649",
    "accountAddress": "0xB25bAb13E693CE19405A73F3c4A868aB32E46979",
    "paymentRequestID": "0xC7edf264F6218c9A",
    "amount": "10",
    "subject": "Lunch"
  }],
  "bills": []
}
Backing up your account data
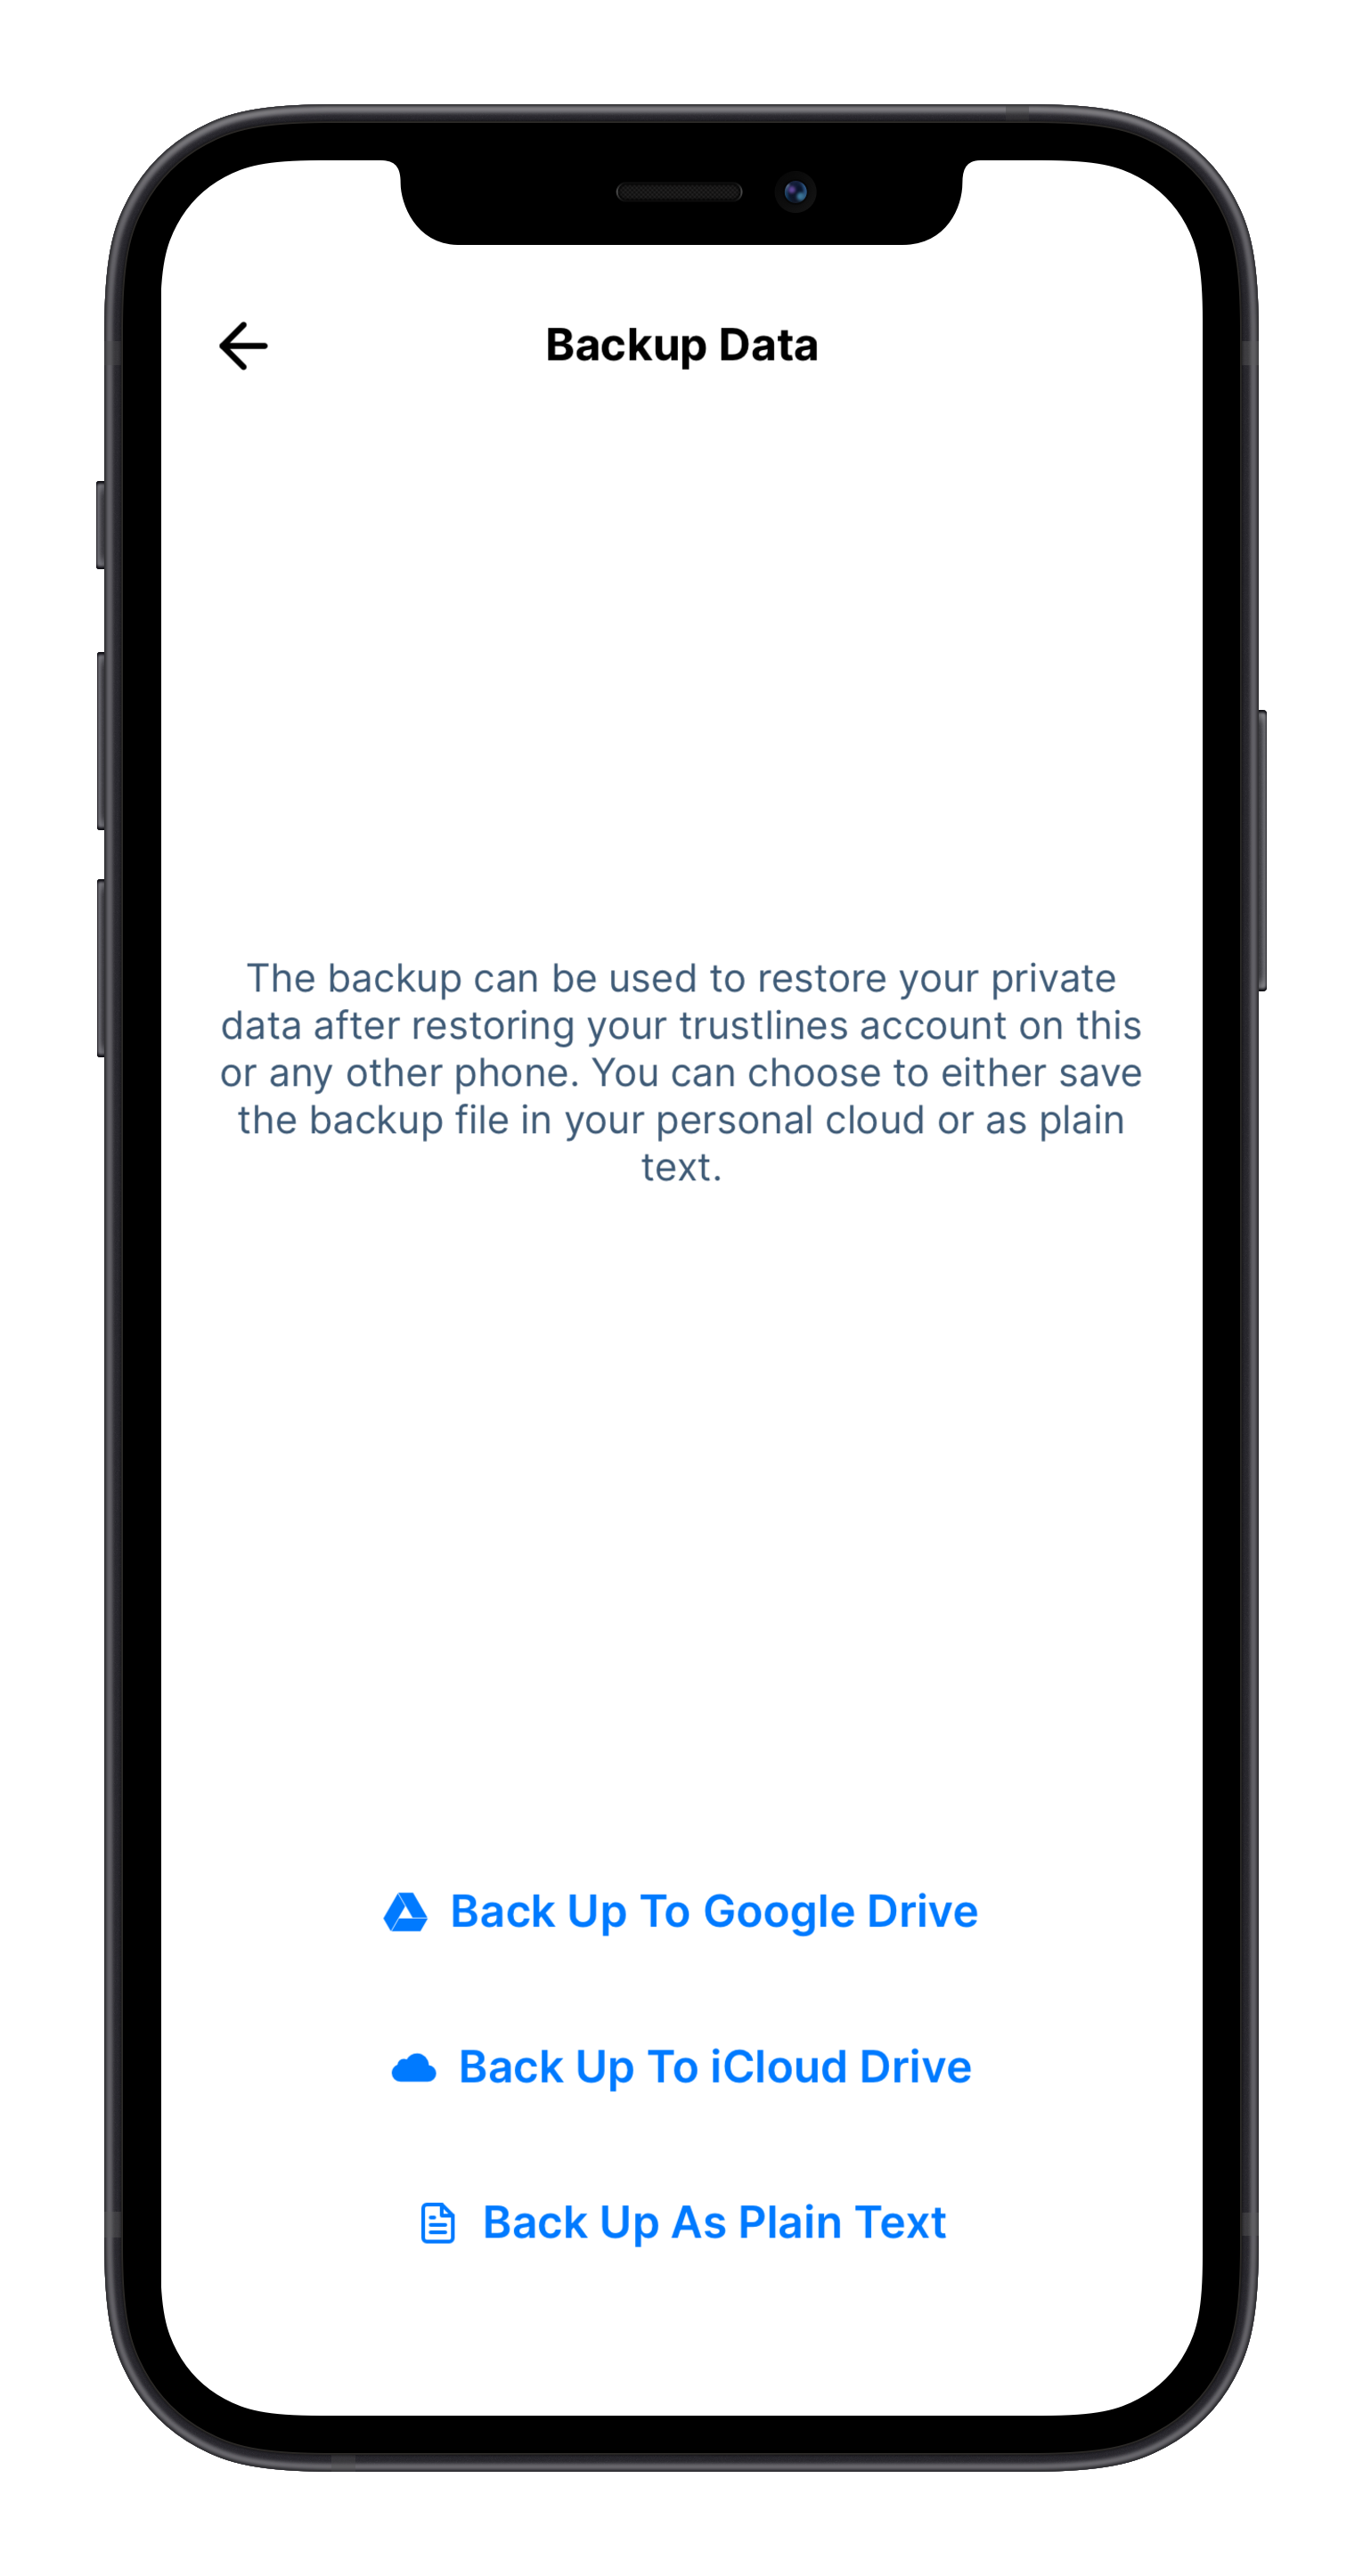
Head on over to the Accounts tab in the menu bar. There you will find the Backup data option. Hitting the Back It Up button will prompt a selection of how you want to save the data. As mentioned above, the data will be in text form, formatted as JSON data, which you can copy and save somewhere, or directly select an option to save it to your device.
Restoring up your account data
Head on over to the Accounts tab in the menu bar. There you will find the Restore data option. This will allow you to paste the data into the input field to restore your data. As mentioned above, the data will be in text form, formatted as JSON data, which you can copy and paste from where you have saved it while backing up your data.

Creating a trustline
The app is not useful without at least one trustline! So if you don't have one, the first thing you should do upon downloading the Trustlines App is to create a trustline with a trusted partner.
To create a trustline, first, one party must create a proposal, and the other must accept it.
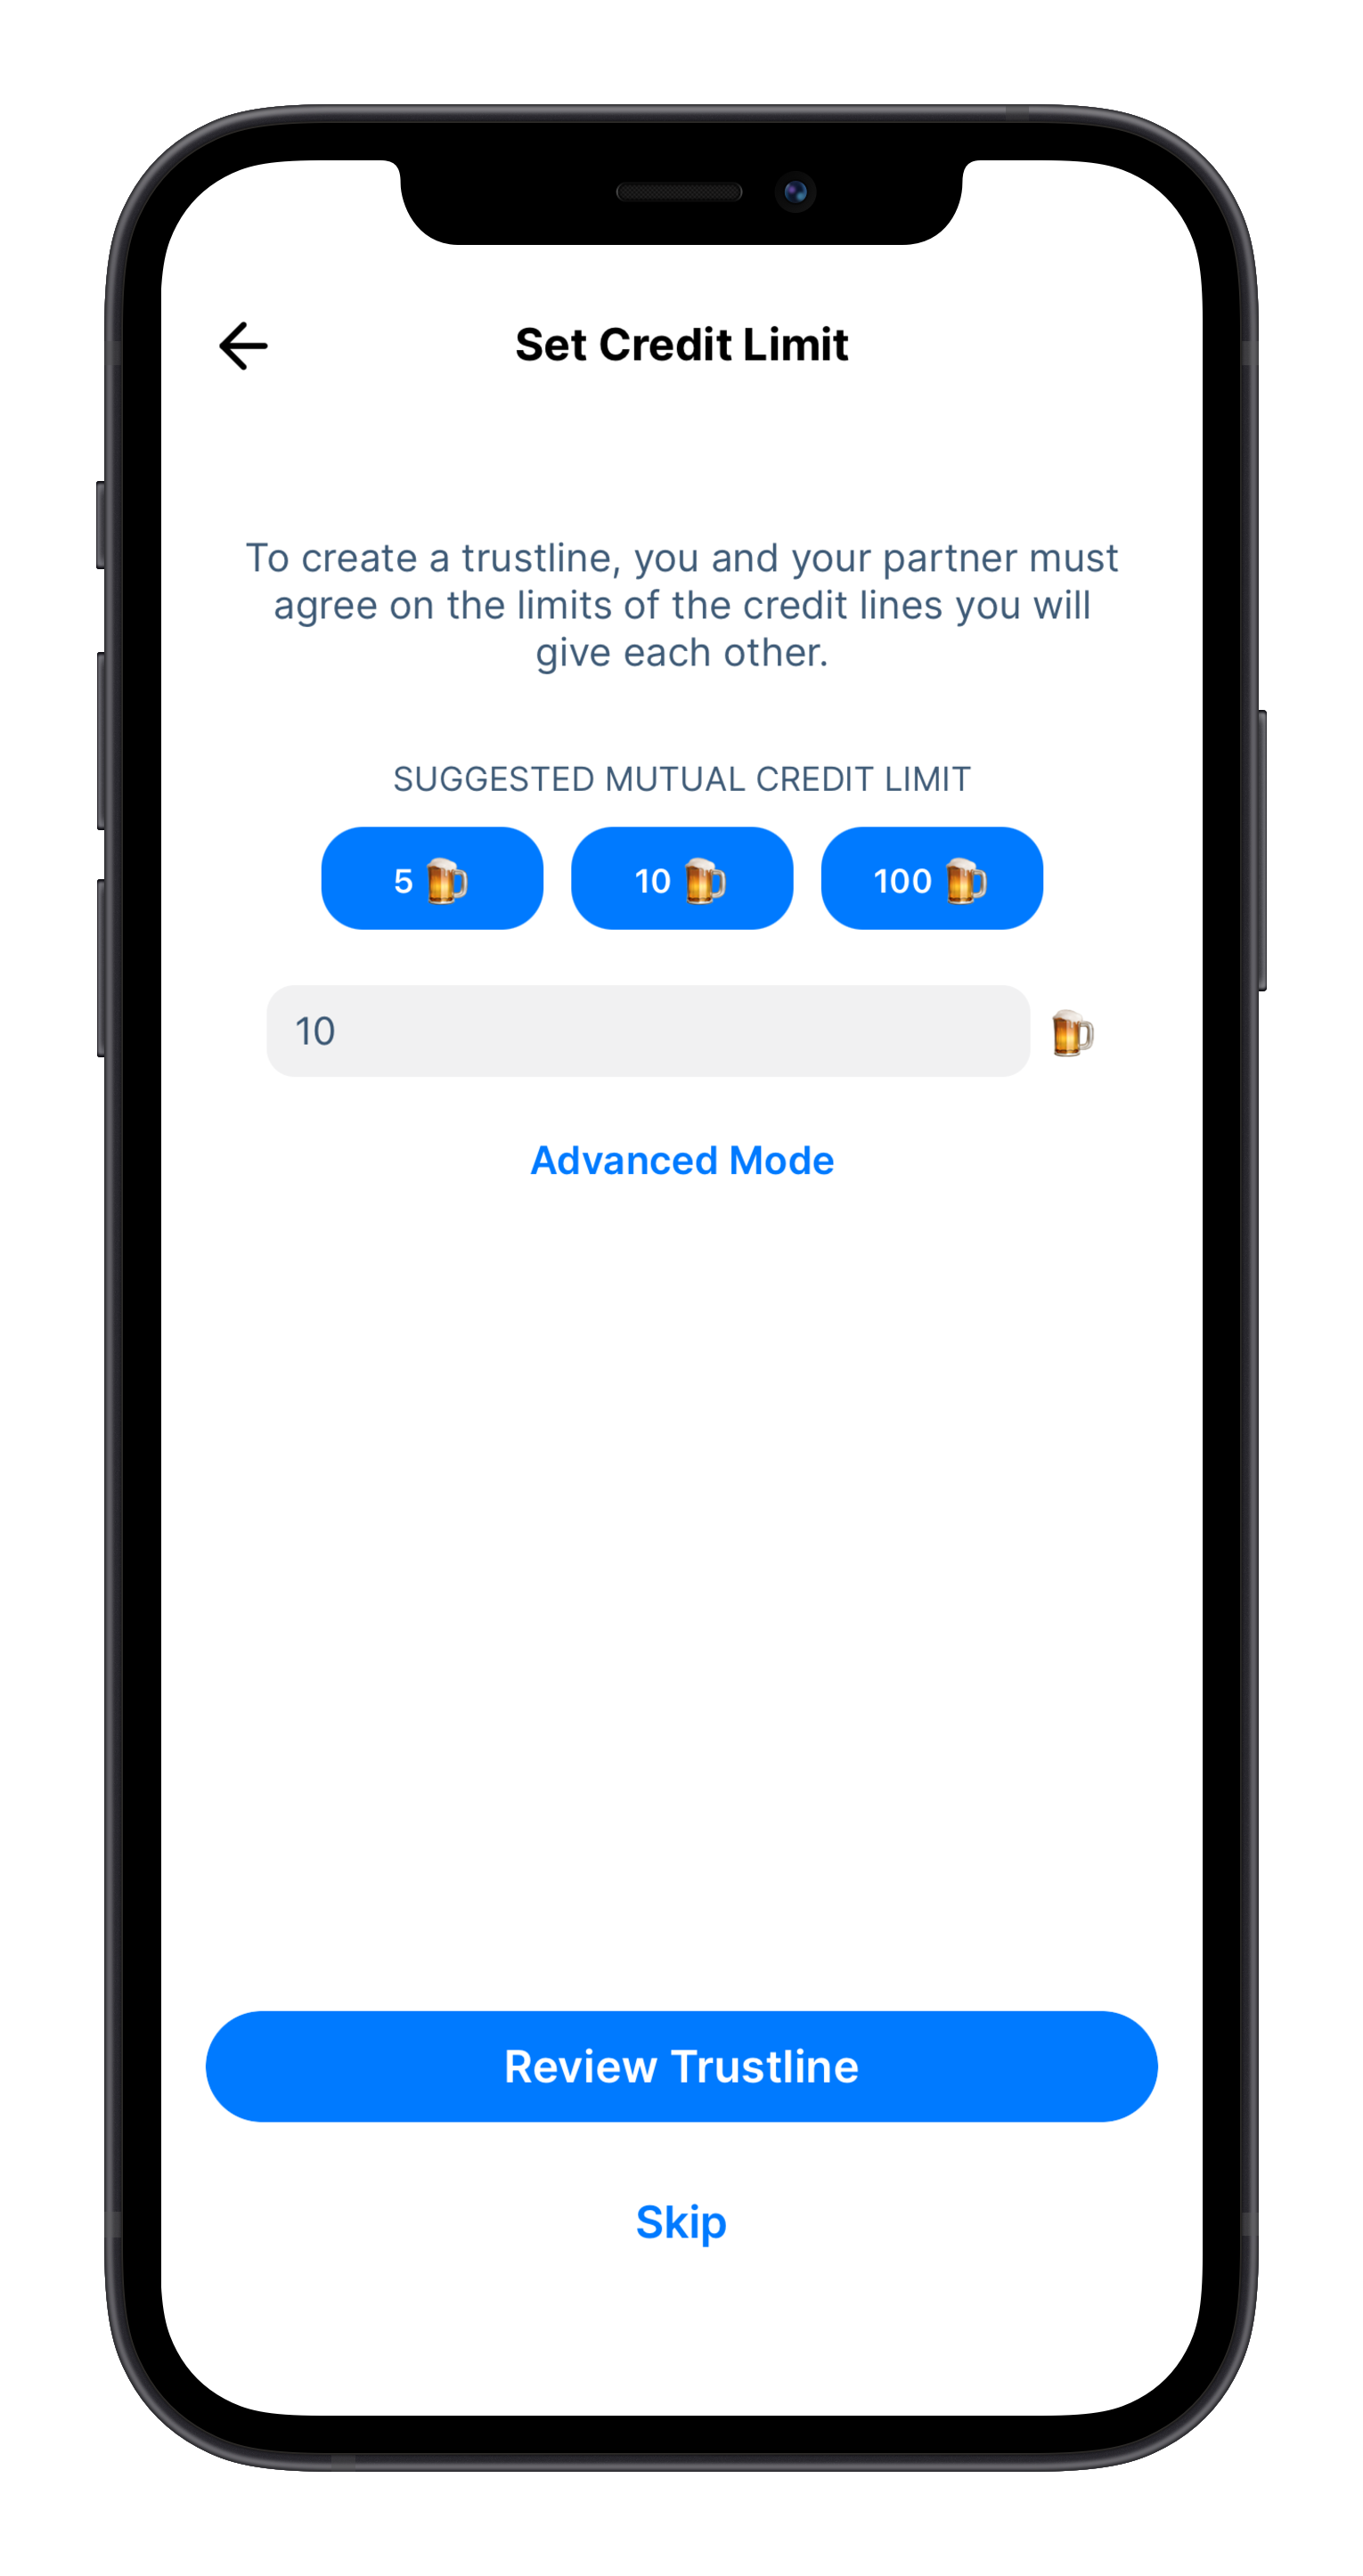
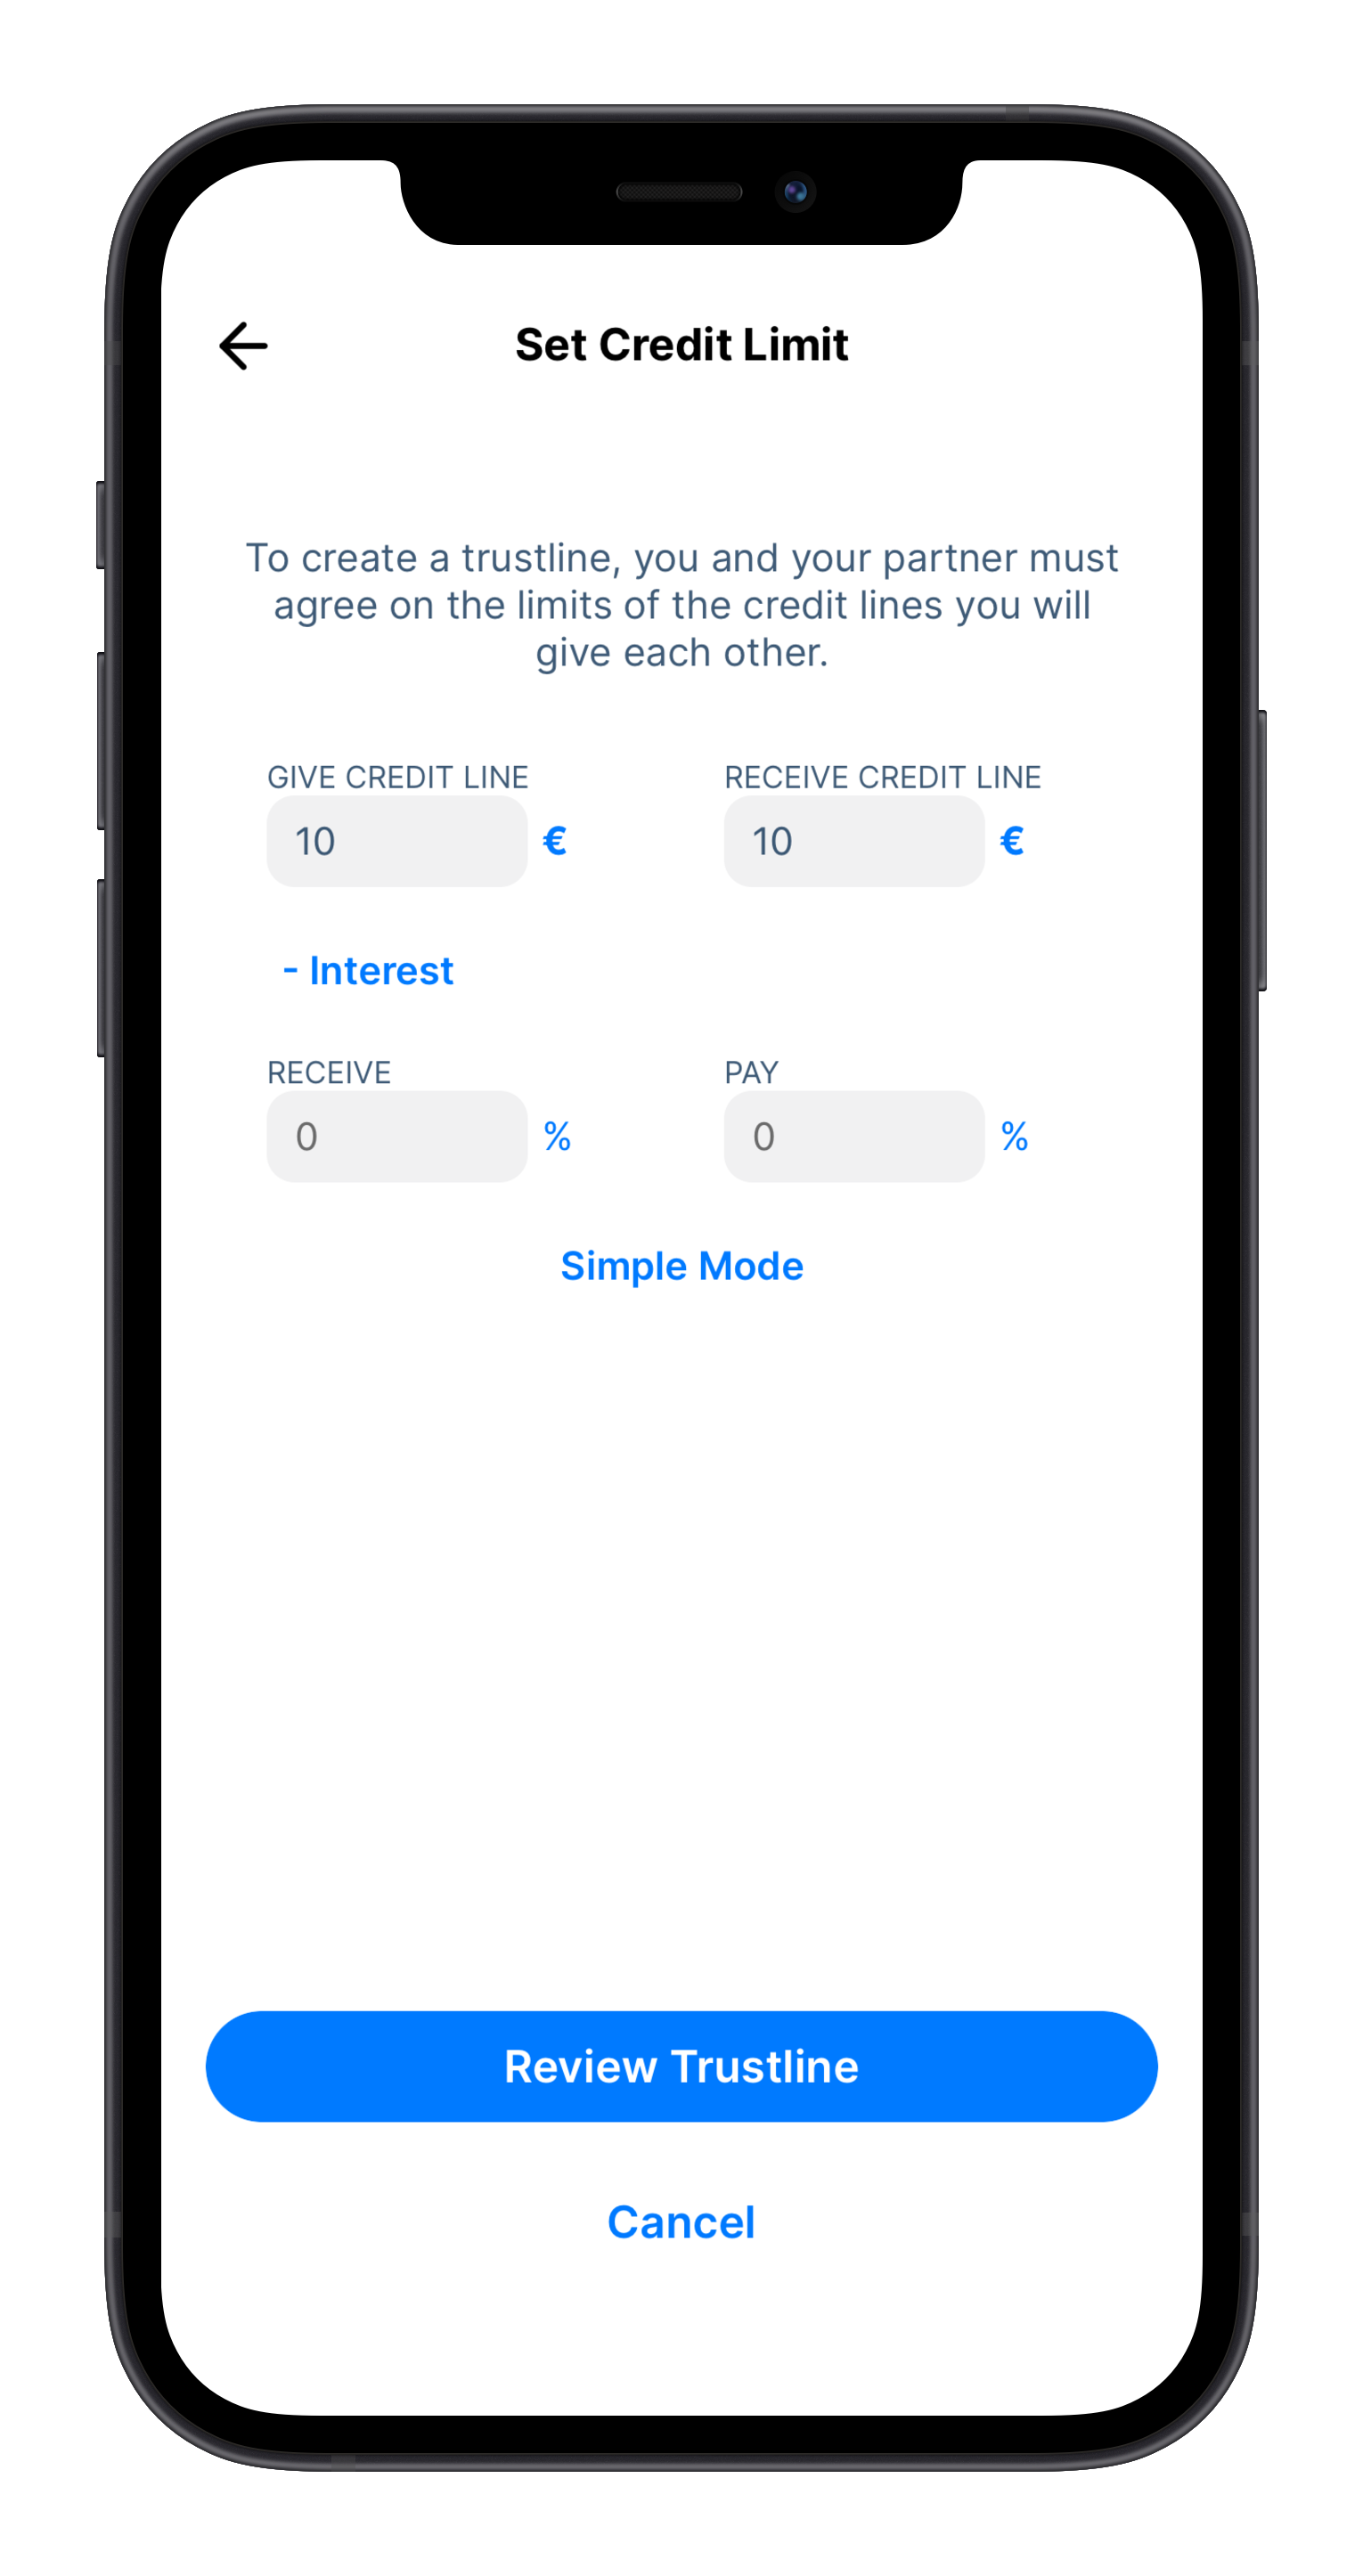
Each trustline consists of two credit lines. As a default, we suggest you set both limits to the same value. It's best to discuss this together as you fill in the numbers. Selecting the Advanced Mode will allow you to set two values; the left is the amount you would lend, and the right is the amount you can borrow. “Borrow” can be thought of as your “spend limit” with this partner. These two amounts can be set to whatever values you and your partner agree on. Some currency networks also have an option to add interest to either of these credit lines.
Start by heading to the Dashboard. Here you can either start the process by tapping on New Trustline.
The first step is to select which currency network, and thus, denomination you wish to use for this specific trustline.
Next, you need to set a credit limit for the trustline. It's best to discuss this together as you fill in the numbers. The Advanced Mode will provide you with more options if you wish to set different credit limits for you and your partner or add a custom interest for the trustline.
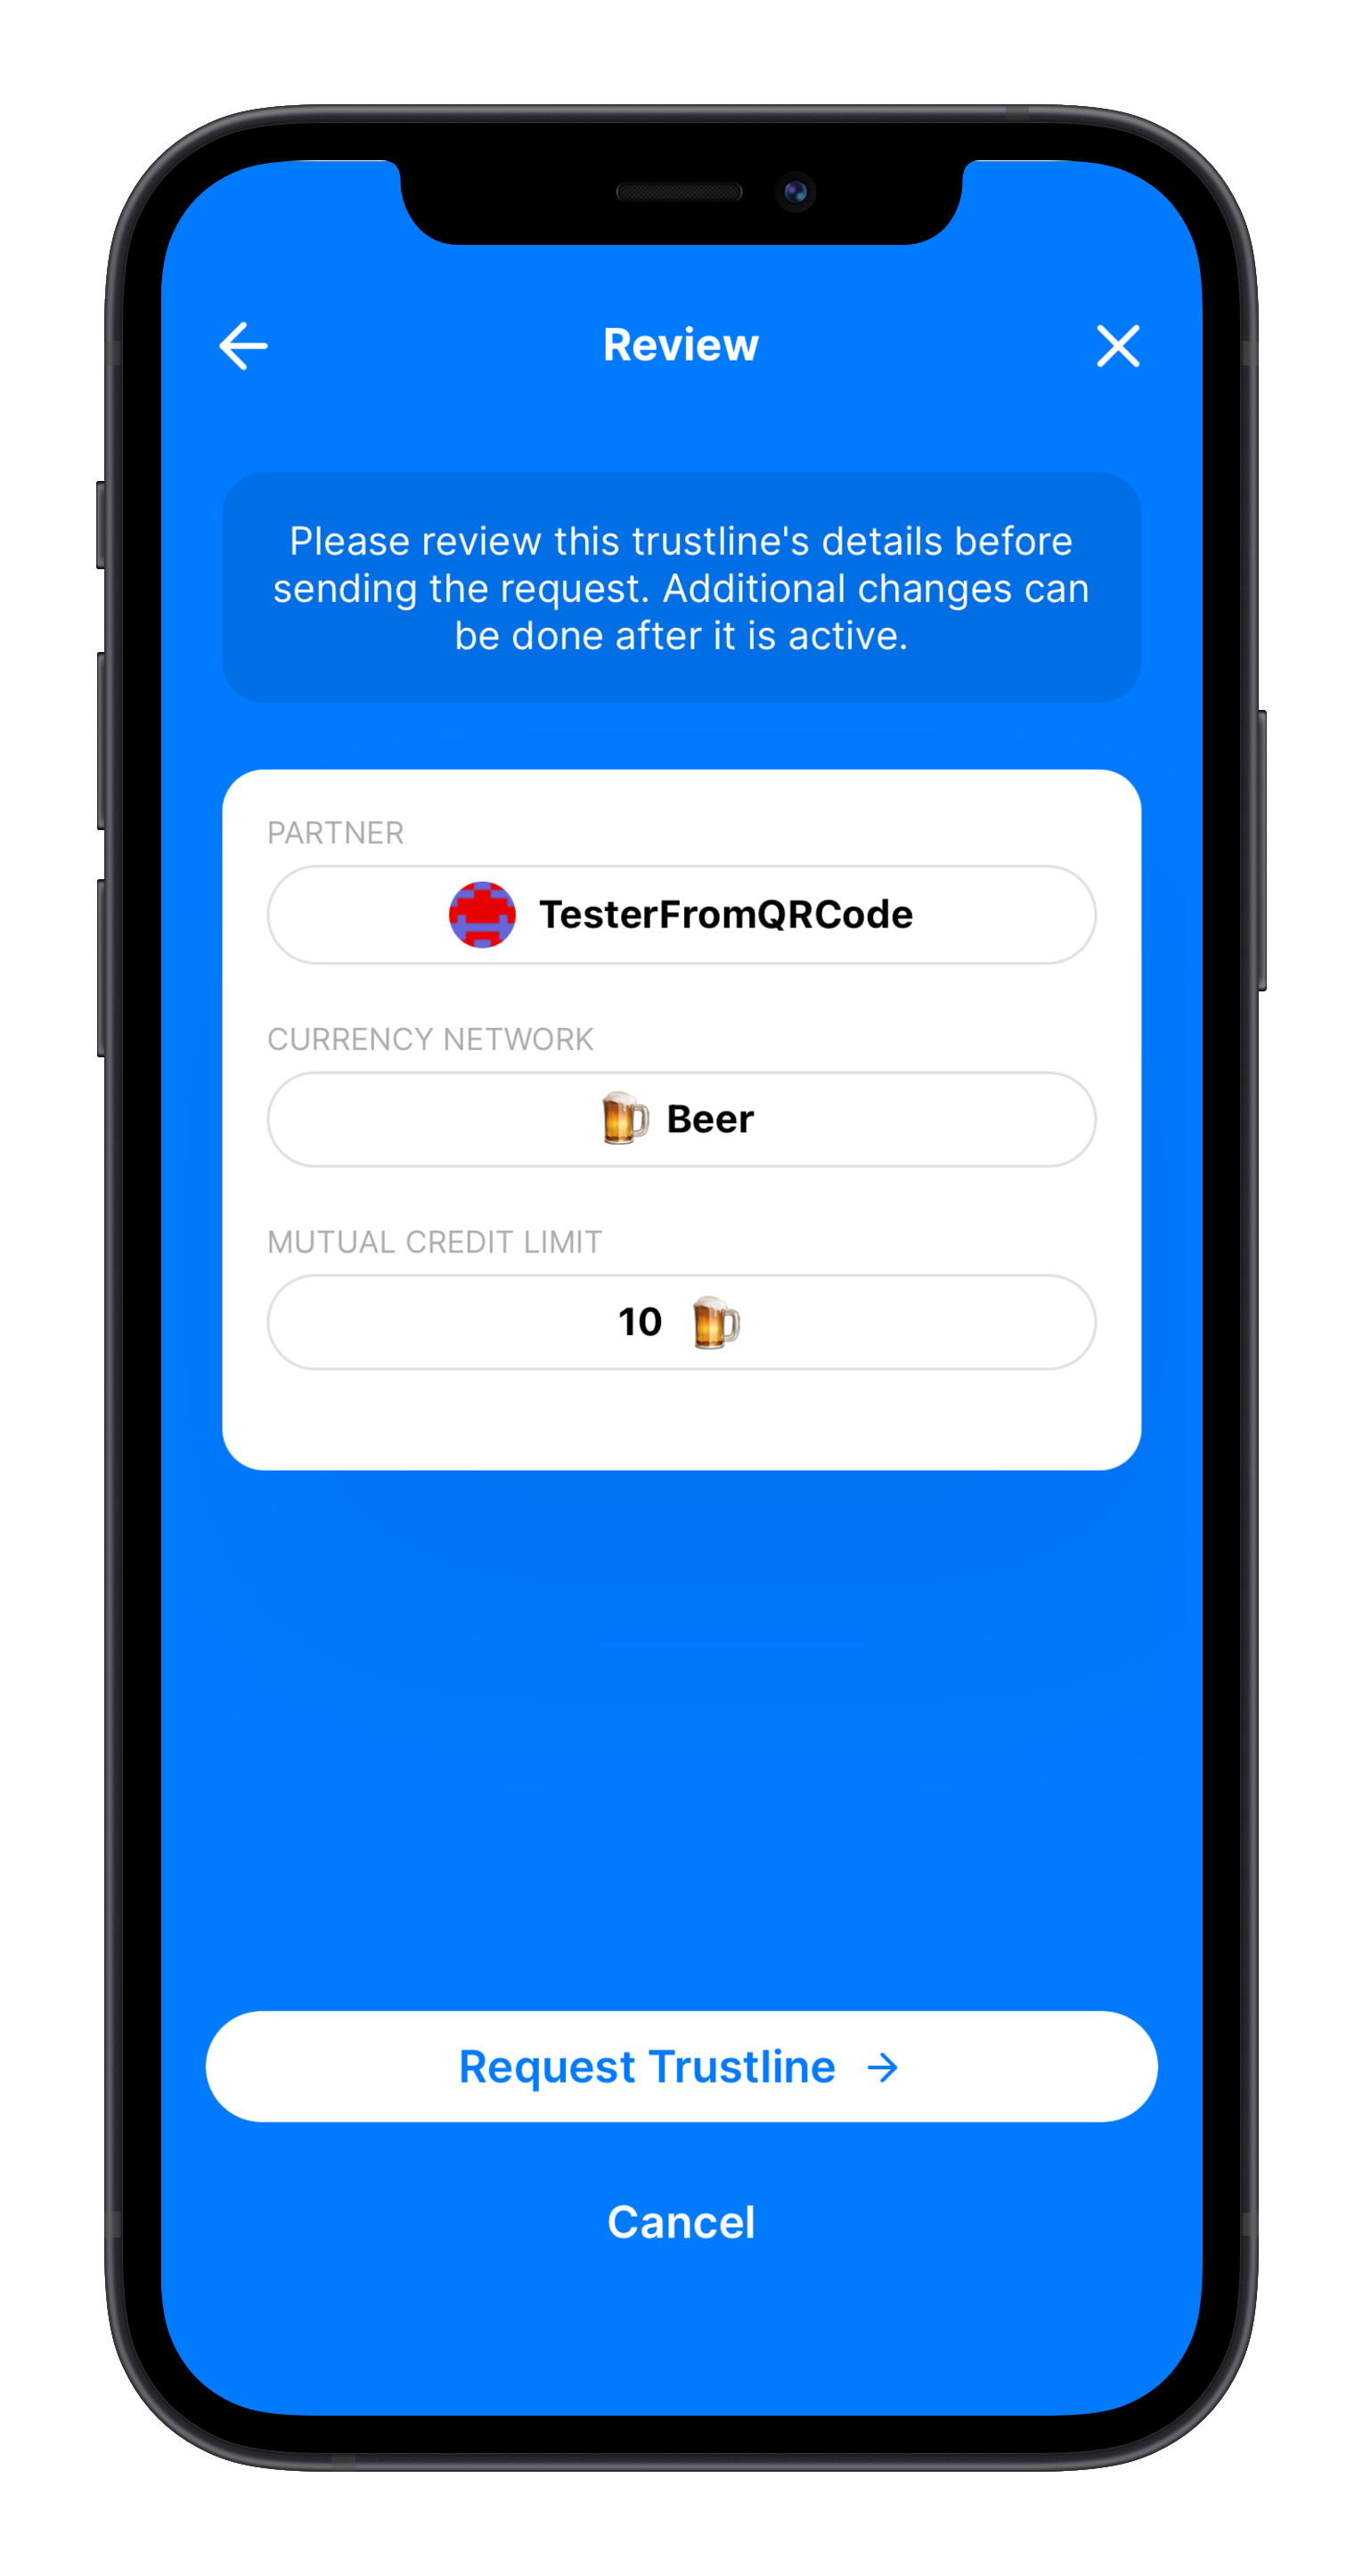
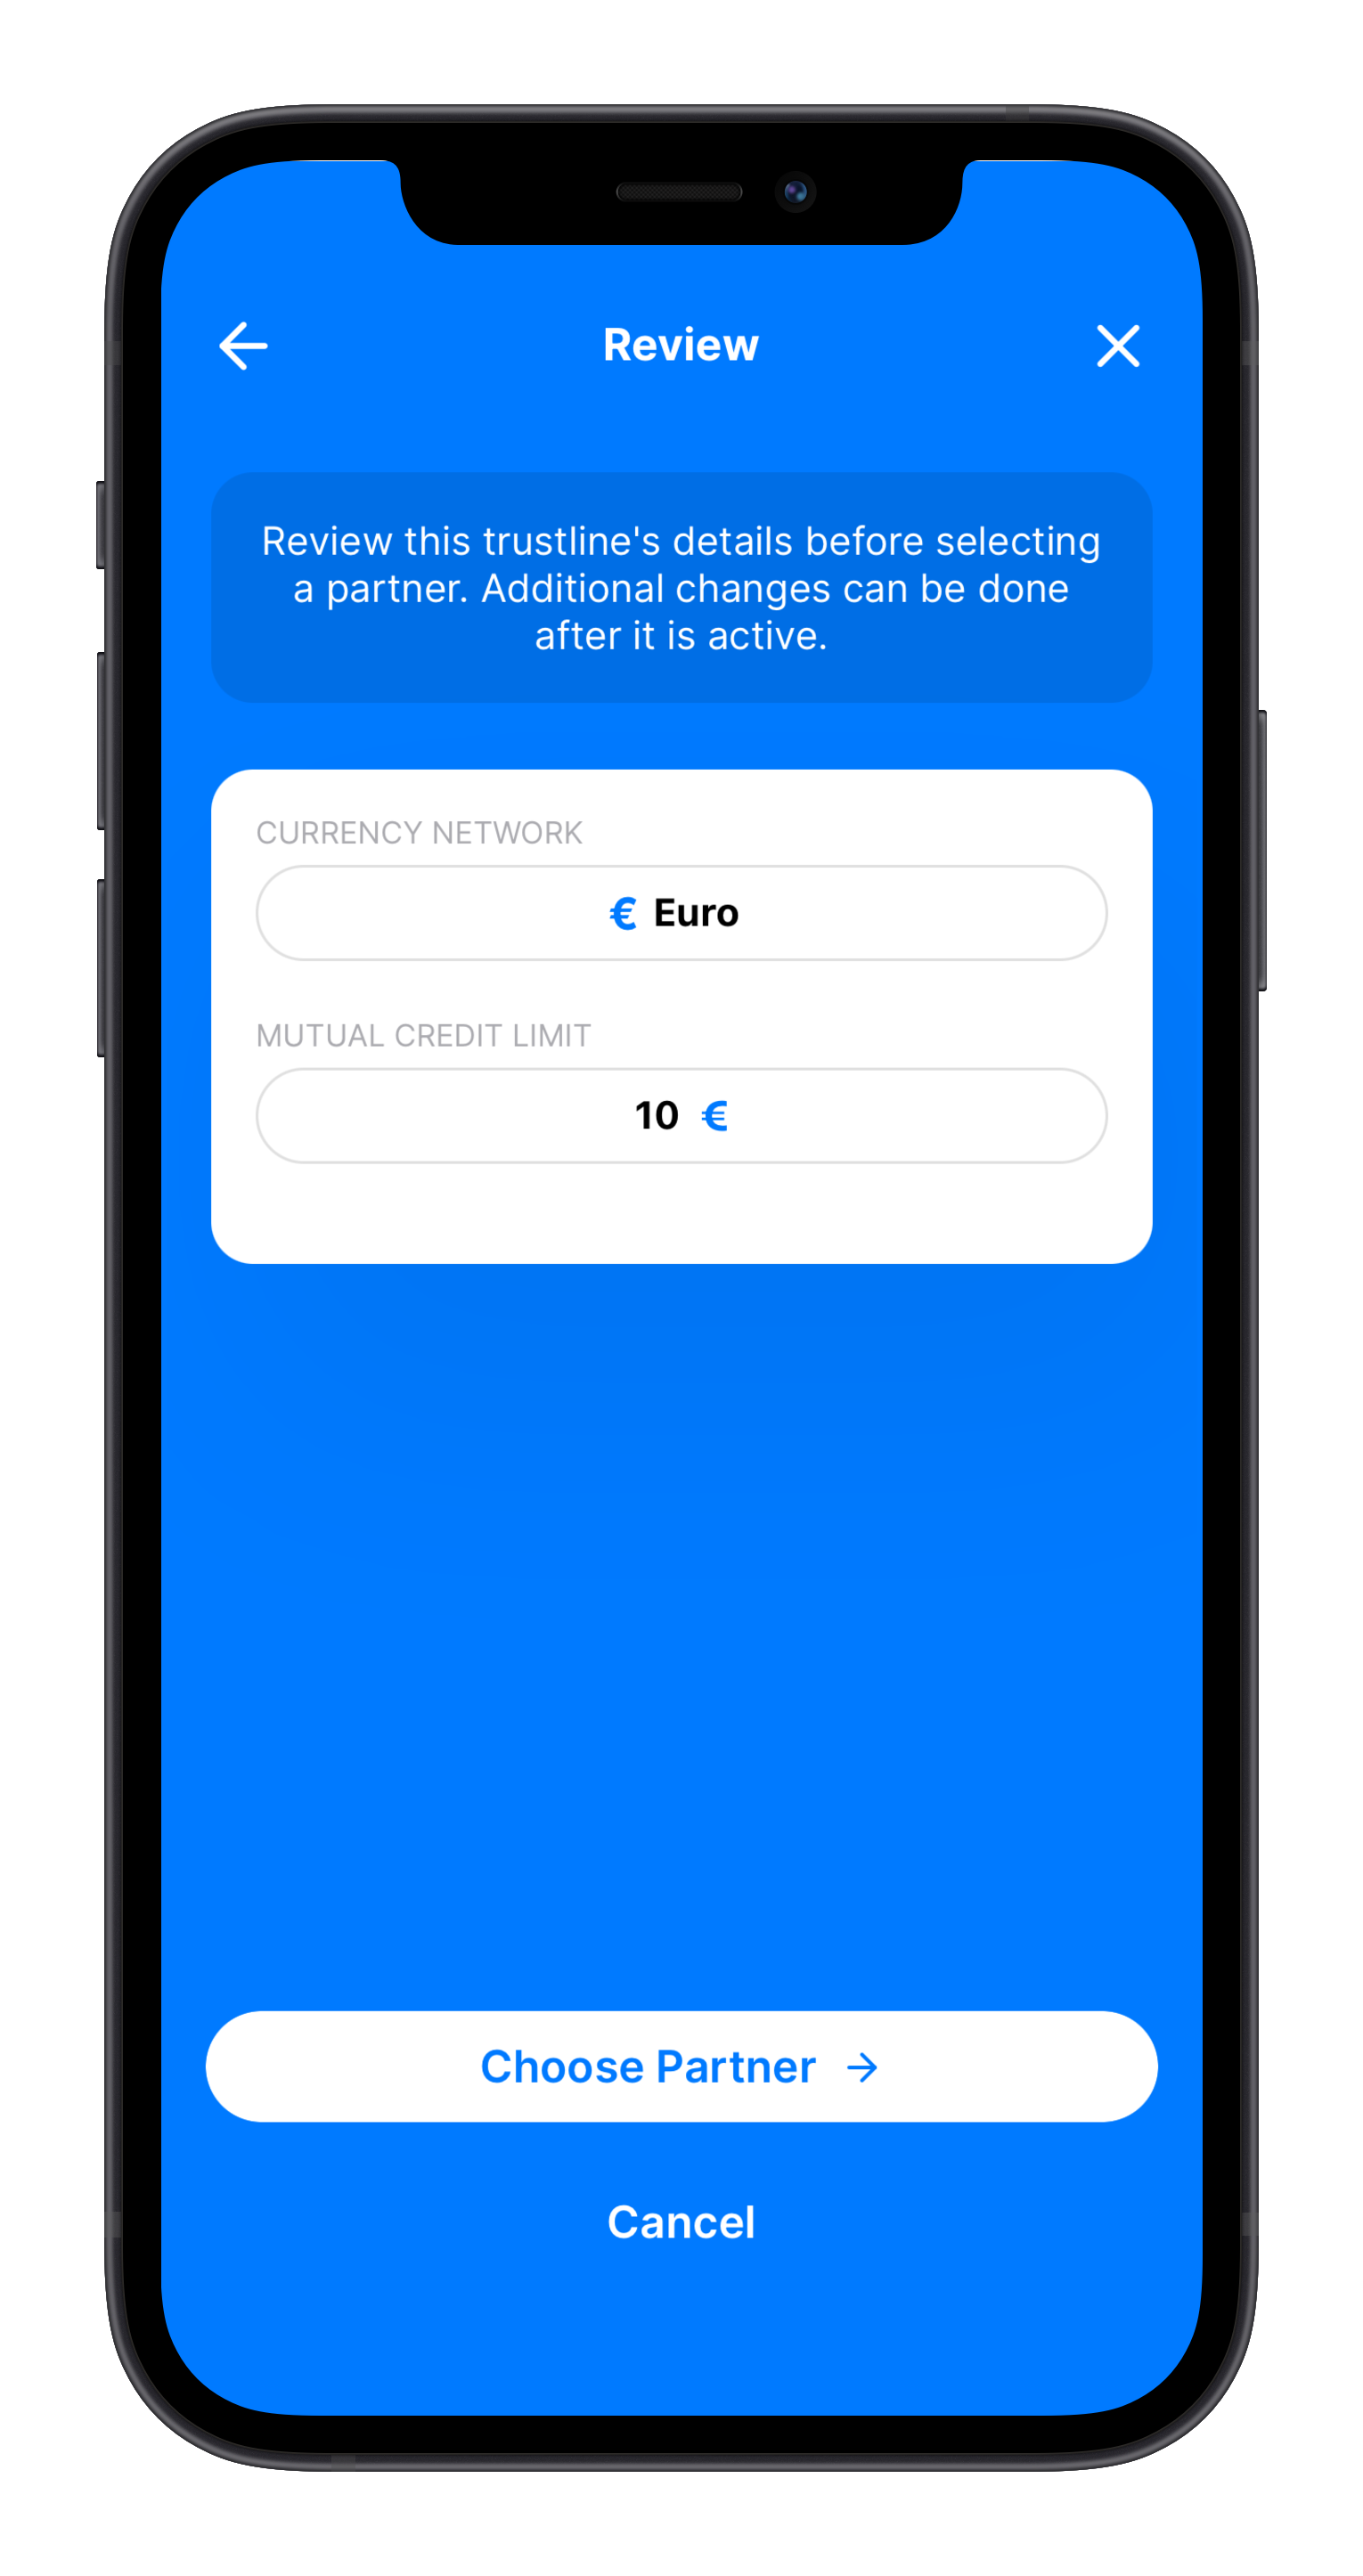
After selecting the credit limit for the trustline, review the request before choosing a partner.
Here you can select to share a link to be sent to a recipient, i.e., using a messaging app, email, etc., share your QR code to be scanned, or to select a partner from the list of existing contacts, paste in the partners account address, or scan their QR code.
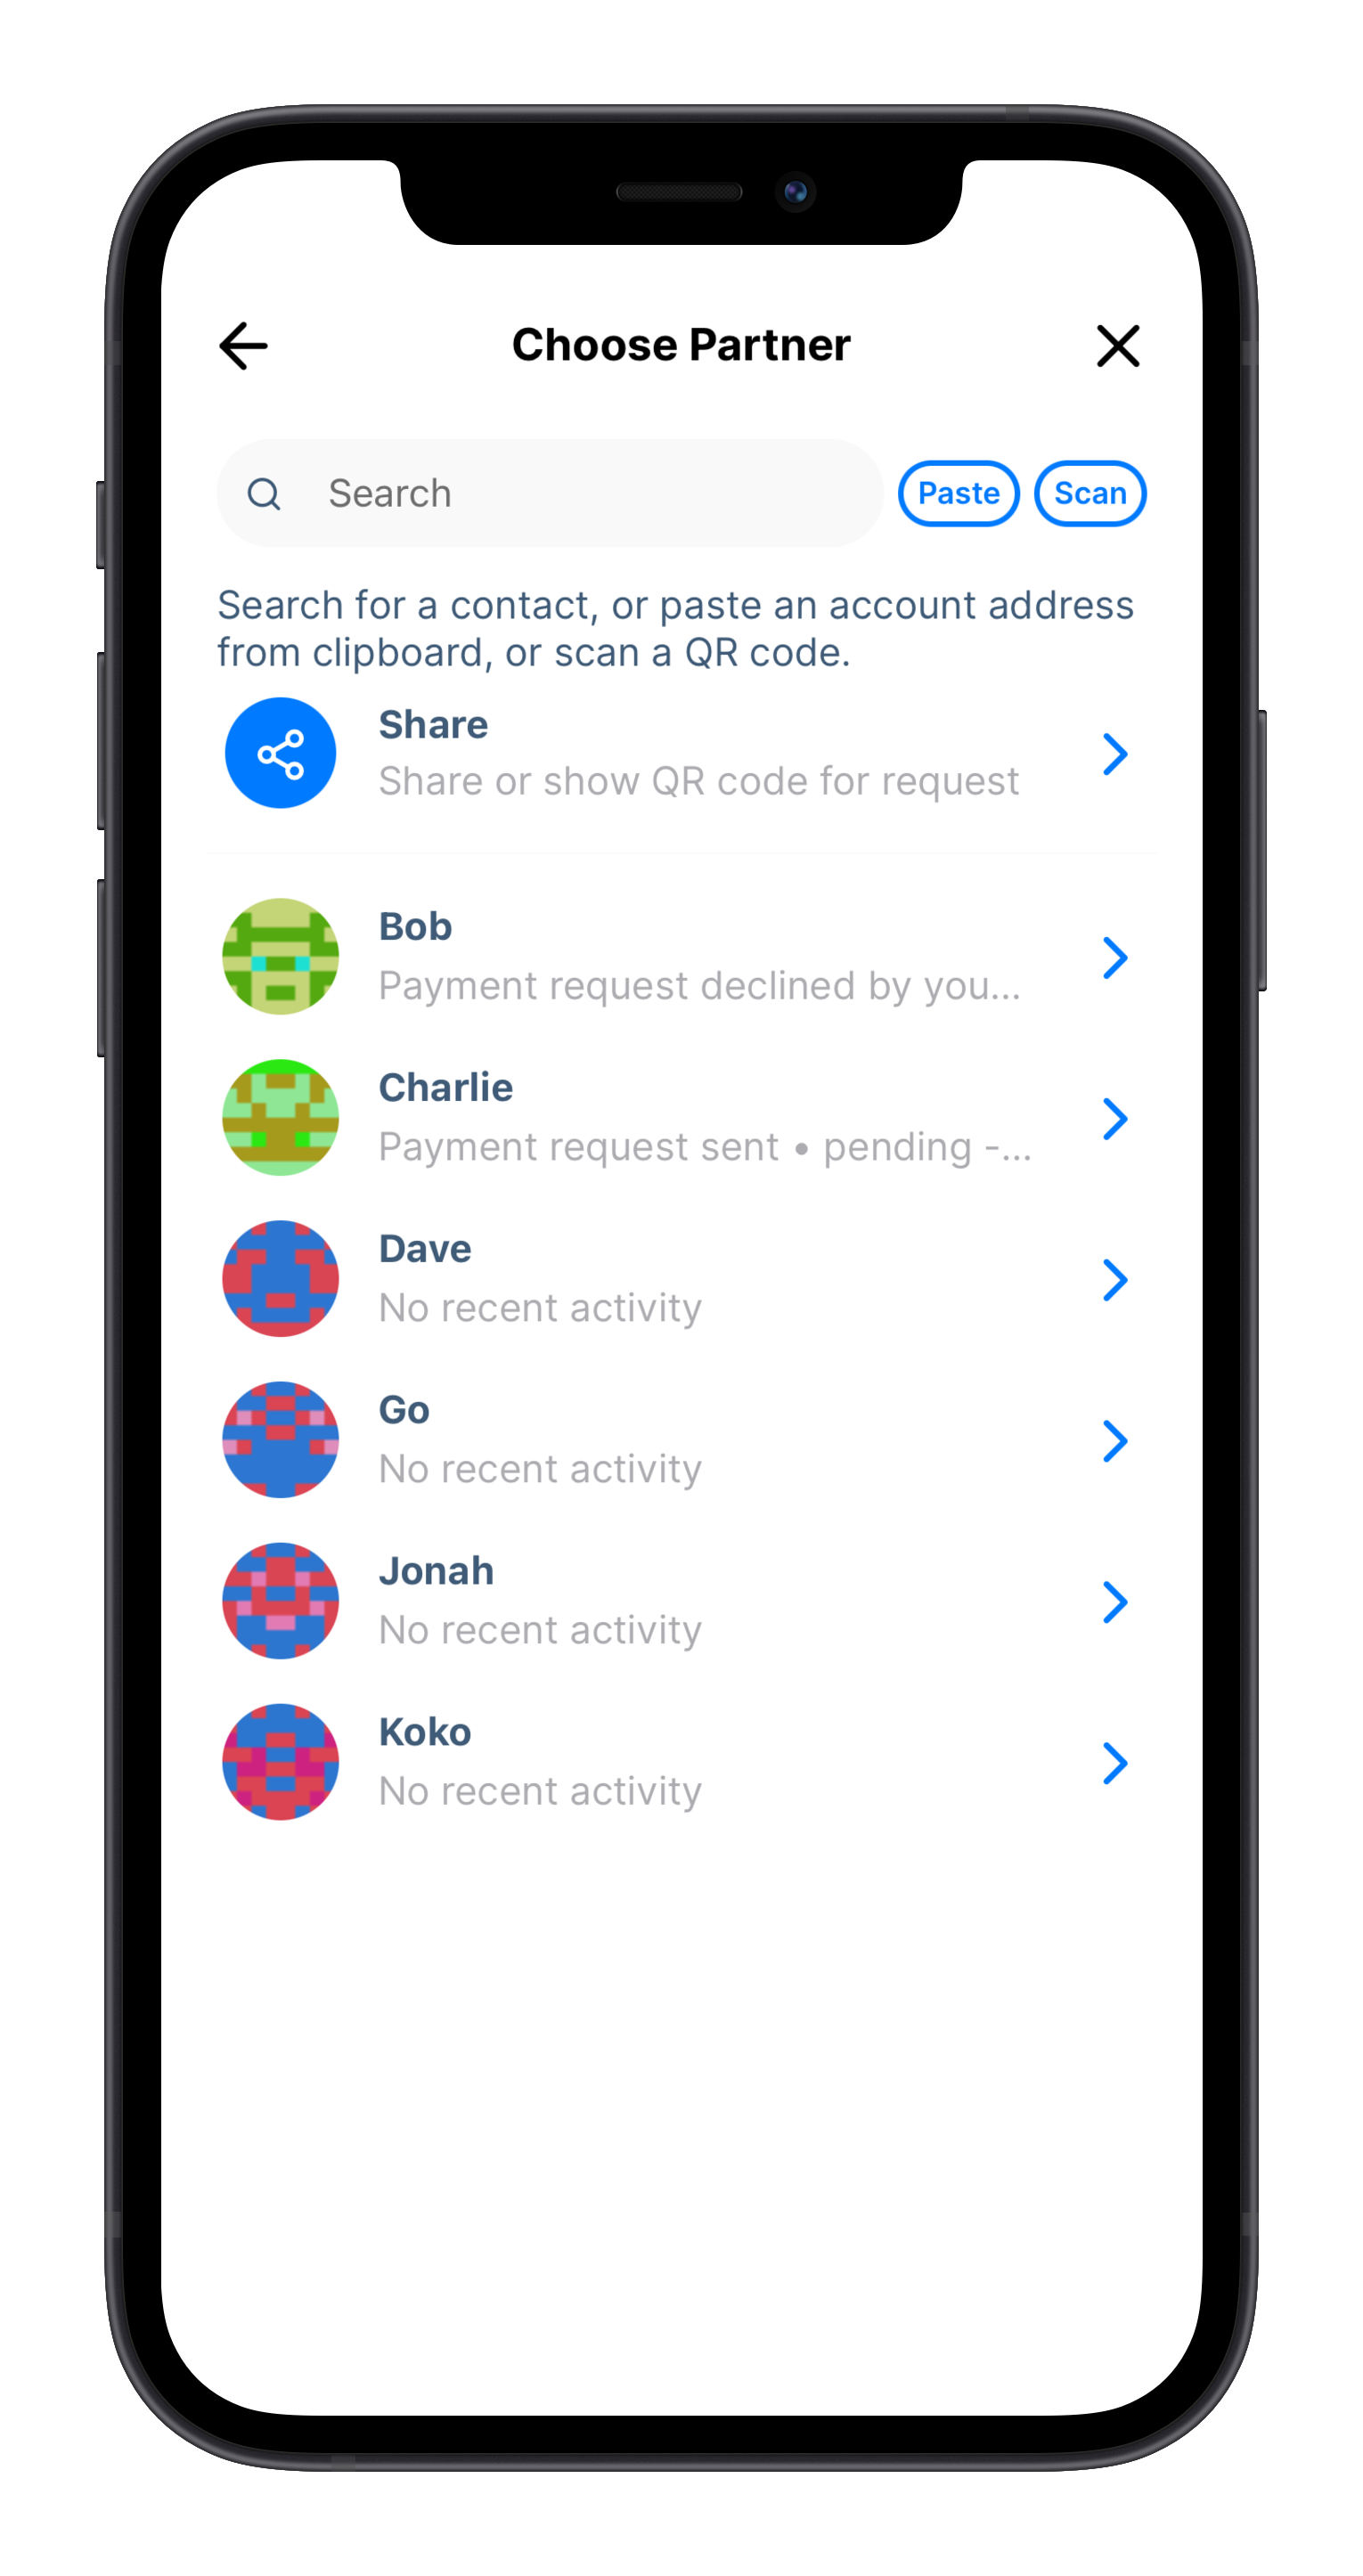
By selecting Share when choosing a partner, you will be shown the option to share your own QR code or to select Share again at the bottom of the screen to send a trustline request link to someone. Both of these options will contain the information that you previously selected for the trustline request.

Then, if selecting another option like an existing contact, review the details, making sure everything is correct, and send the request!

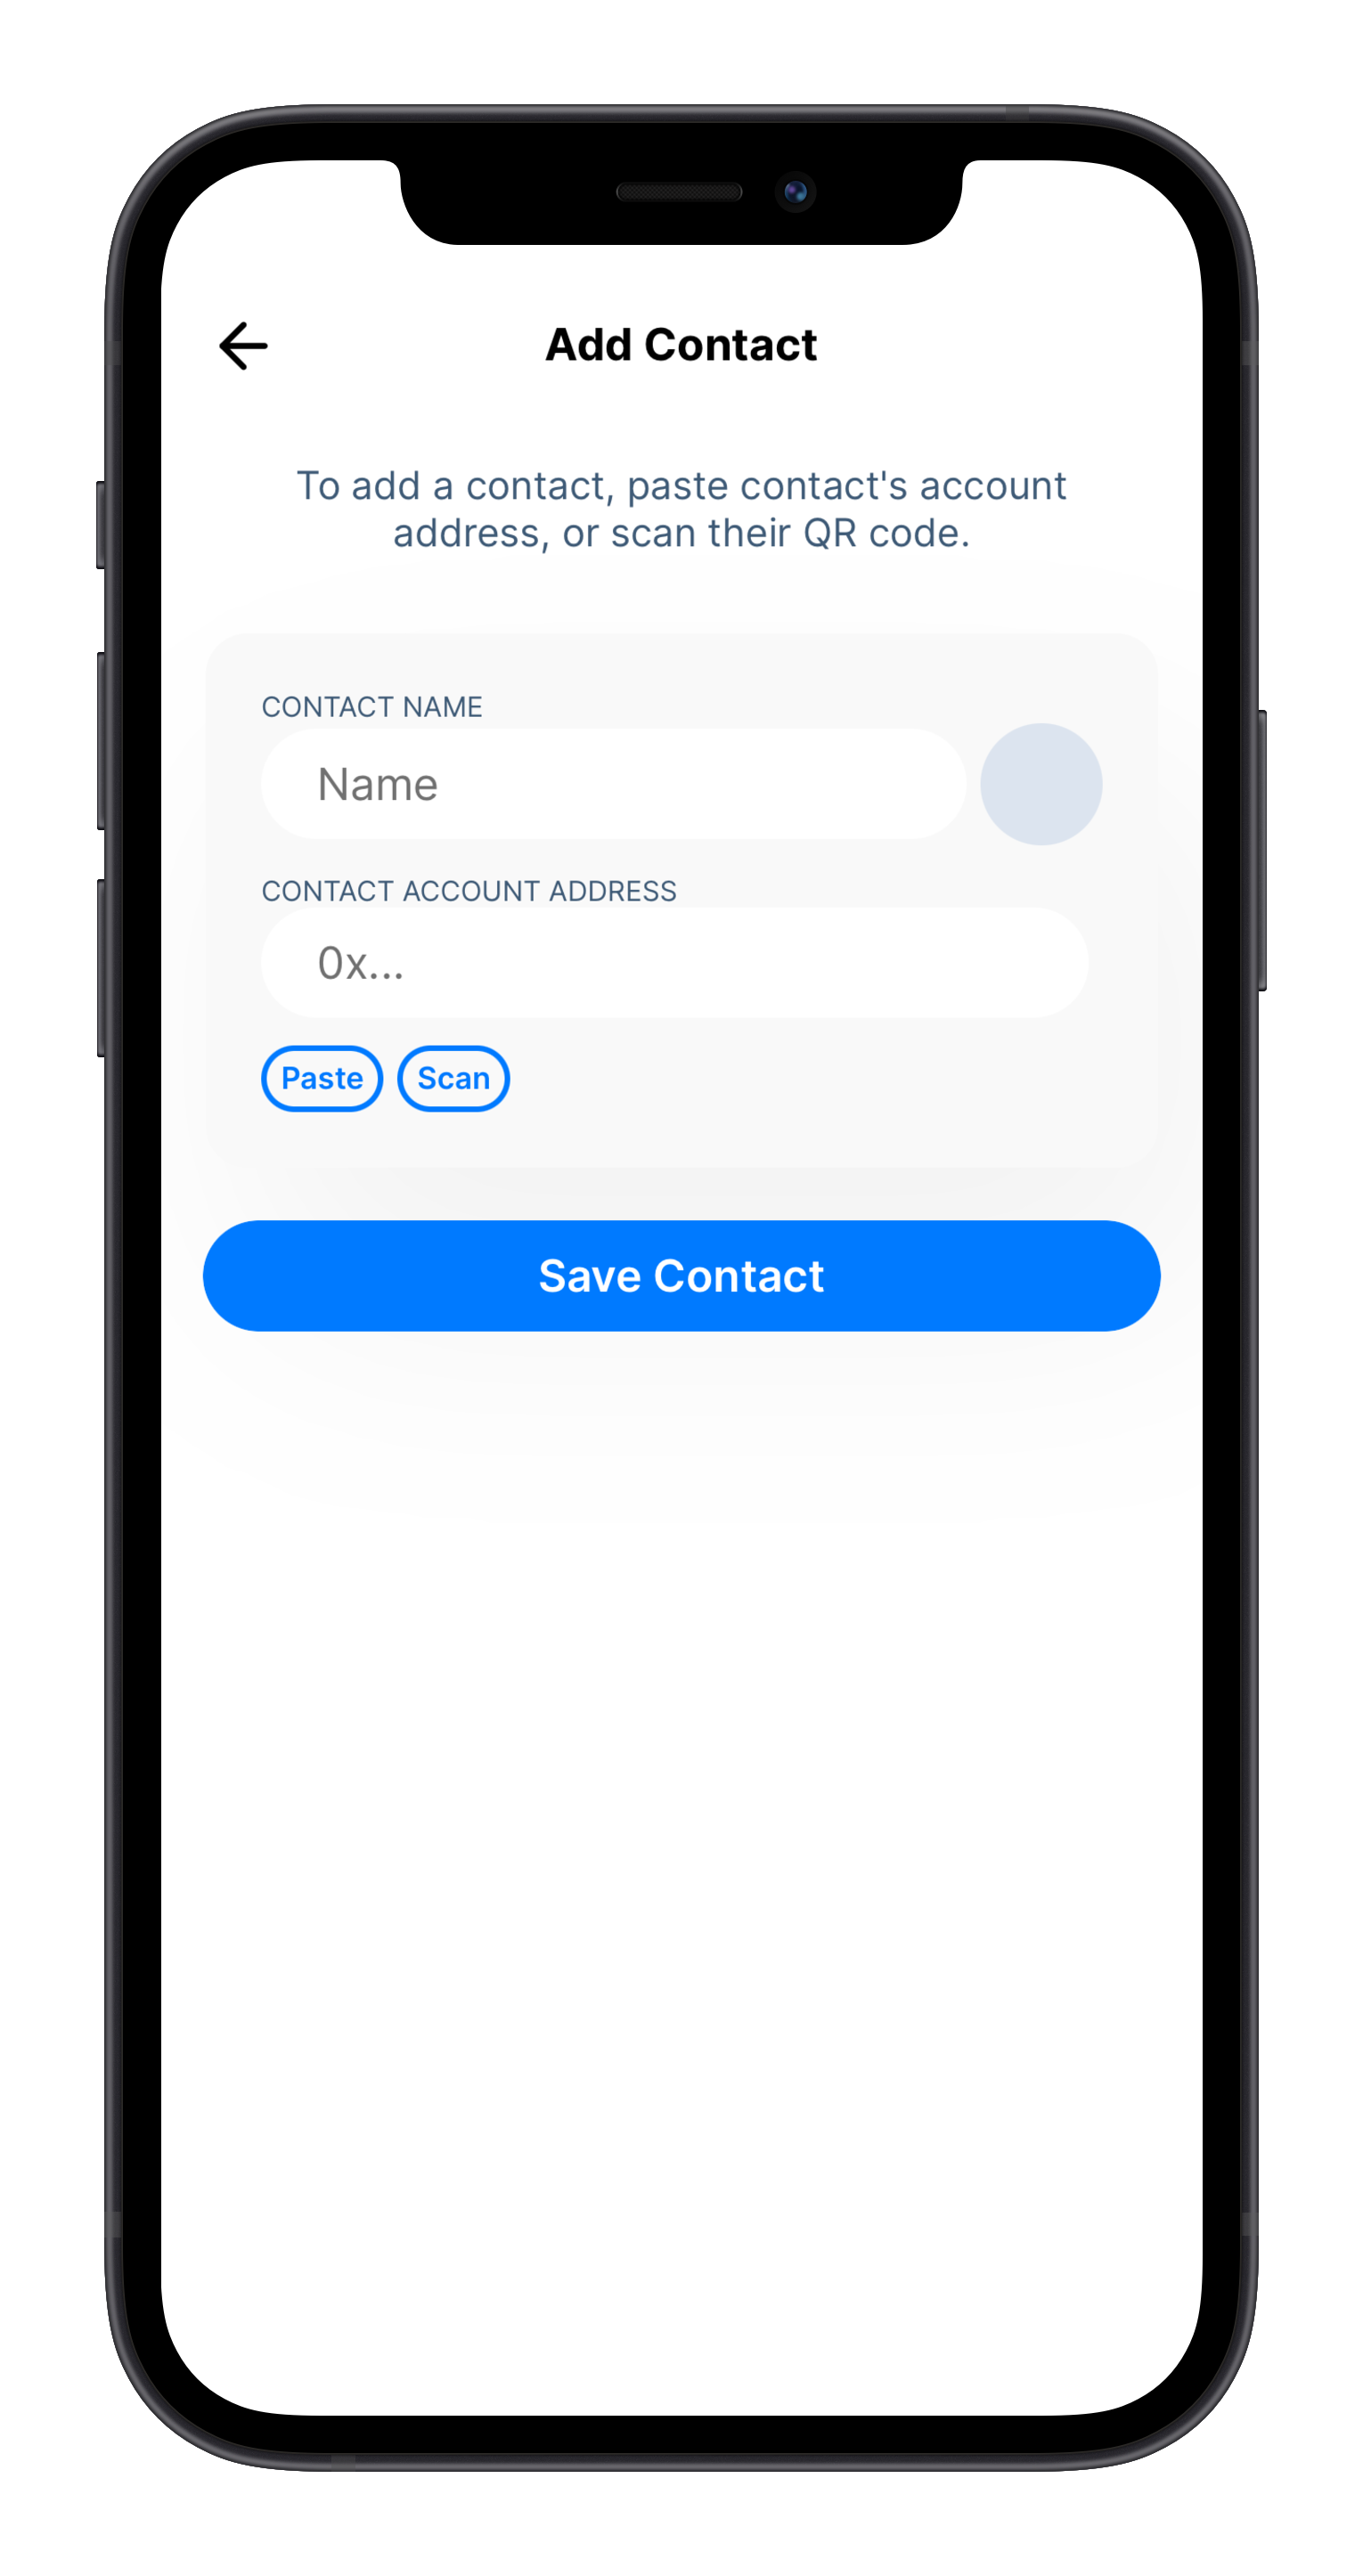
Adding a contact
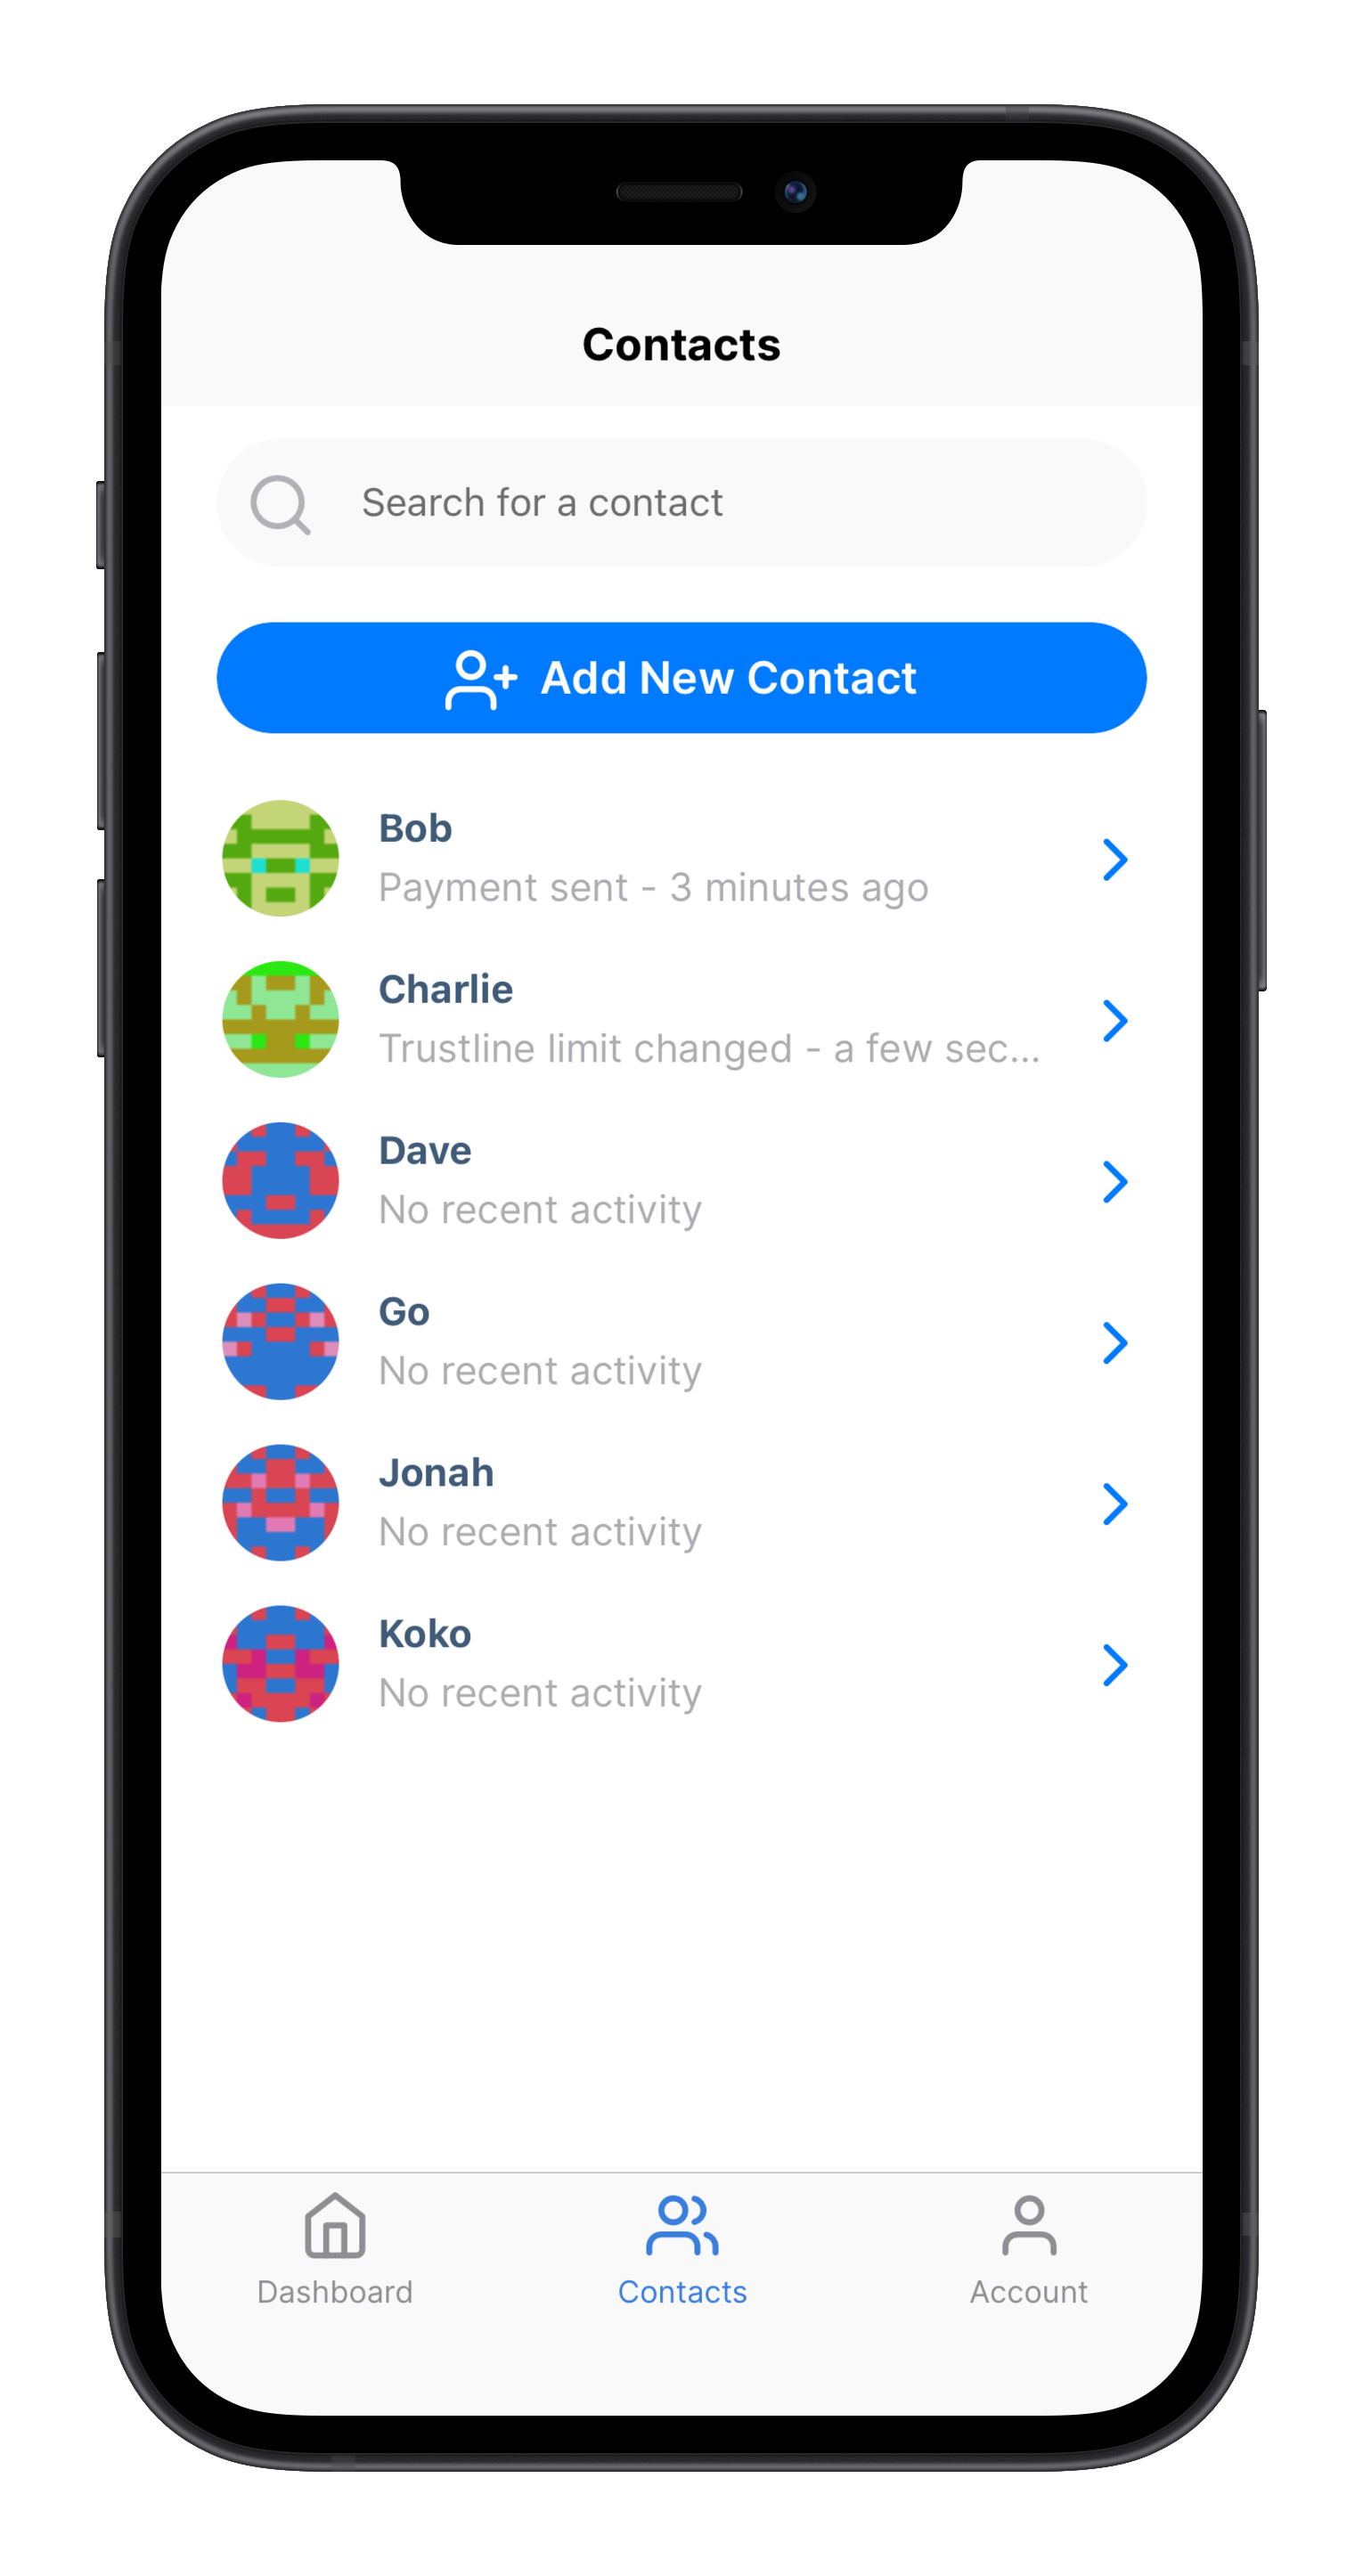
To add a contact, your partner must share their account address. You, adding the contact, should click on the Contacts item in the menu bar. At the top of the screen, there's a button for adding new contacts. Click this.
Your partner sharing their contact information should go to the Account tab in the menu bar and select Show QR at the top of the screen.
You can now scan this with your QR scanner by clicking on the Scan button.
If you are not physically together, your partner can also become a contact by clicking Copy Address under Account and sending their wallet address to you via a messaging service.
Make sure to enter a name for them as well! Make sure to label them with a name that you'll be able to recognize.
Choosing currency networks to use
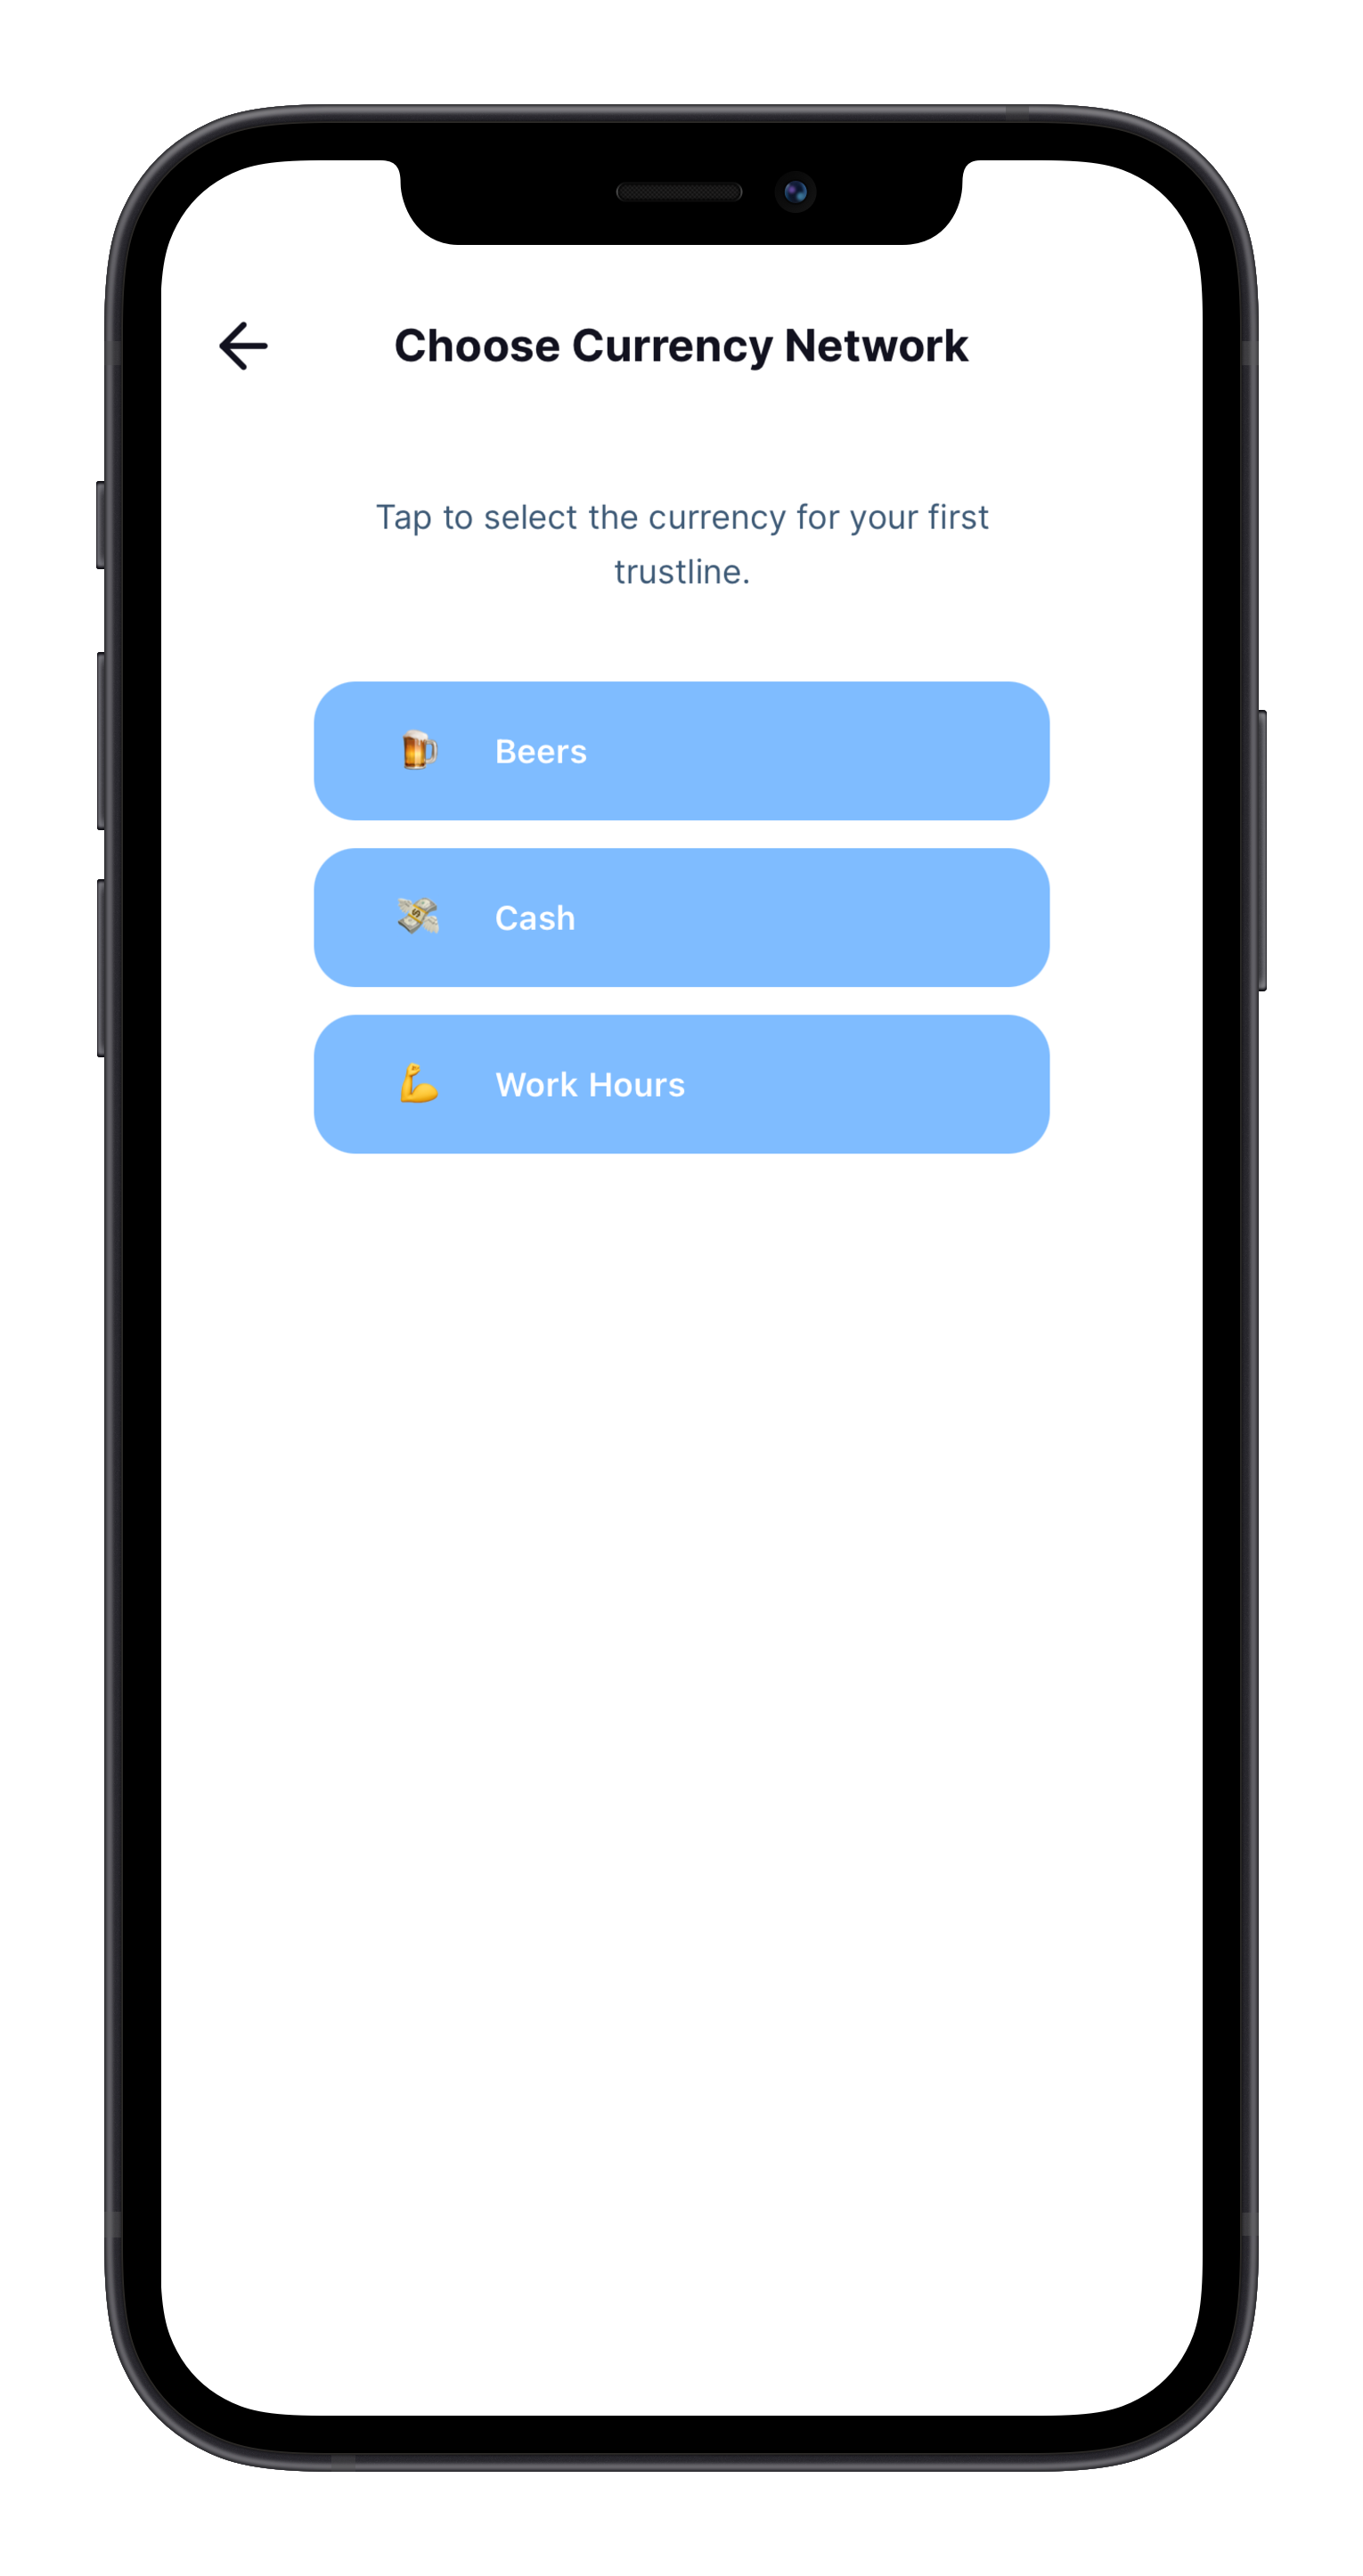
You'll be able to enable currency networks to create trustlines using different denominations. Pick something you are interested in using purely as a "unit of account." Popular currency networks are USD, EUR, Hours, and Beer. You may also want to use your local currency.
To enable different currency networks, simply select the Account tab at the bottom menu bar and then select Currencies. Here you can enable, or disable, different currency networks that you can easily then use from your Dashboard.
Currency networks can also be enabled during the trustline creation process on the go without the need to enable them in advance.
Choosing a currency network for a trustline
When presented with the Choose Currency Network screen, tap on More options to see the whole list of currency networks that you can choose from. The currency network denominations are used purely as a "unit of account."
Setting a credit limit
Each trustline consists of two credit lines. As a default, you set both limits to the same value. It's best to discuss this together as you fill in the numbers. Selecting the Advanced Mode will allow you to set two values; the left is the amount you would lend, and the right is the amount you can borrow. “Borrow” can be thought of as your “spend limit” with this partner. These two amounts can be set to whatever values you and your partner agree on. There is also an option to add interest to either of these credit lines.
Checking your global credit limit
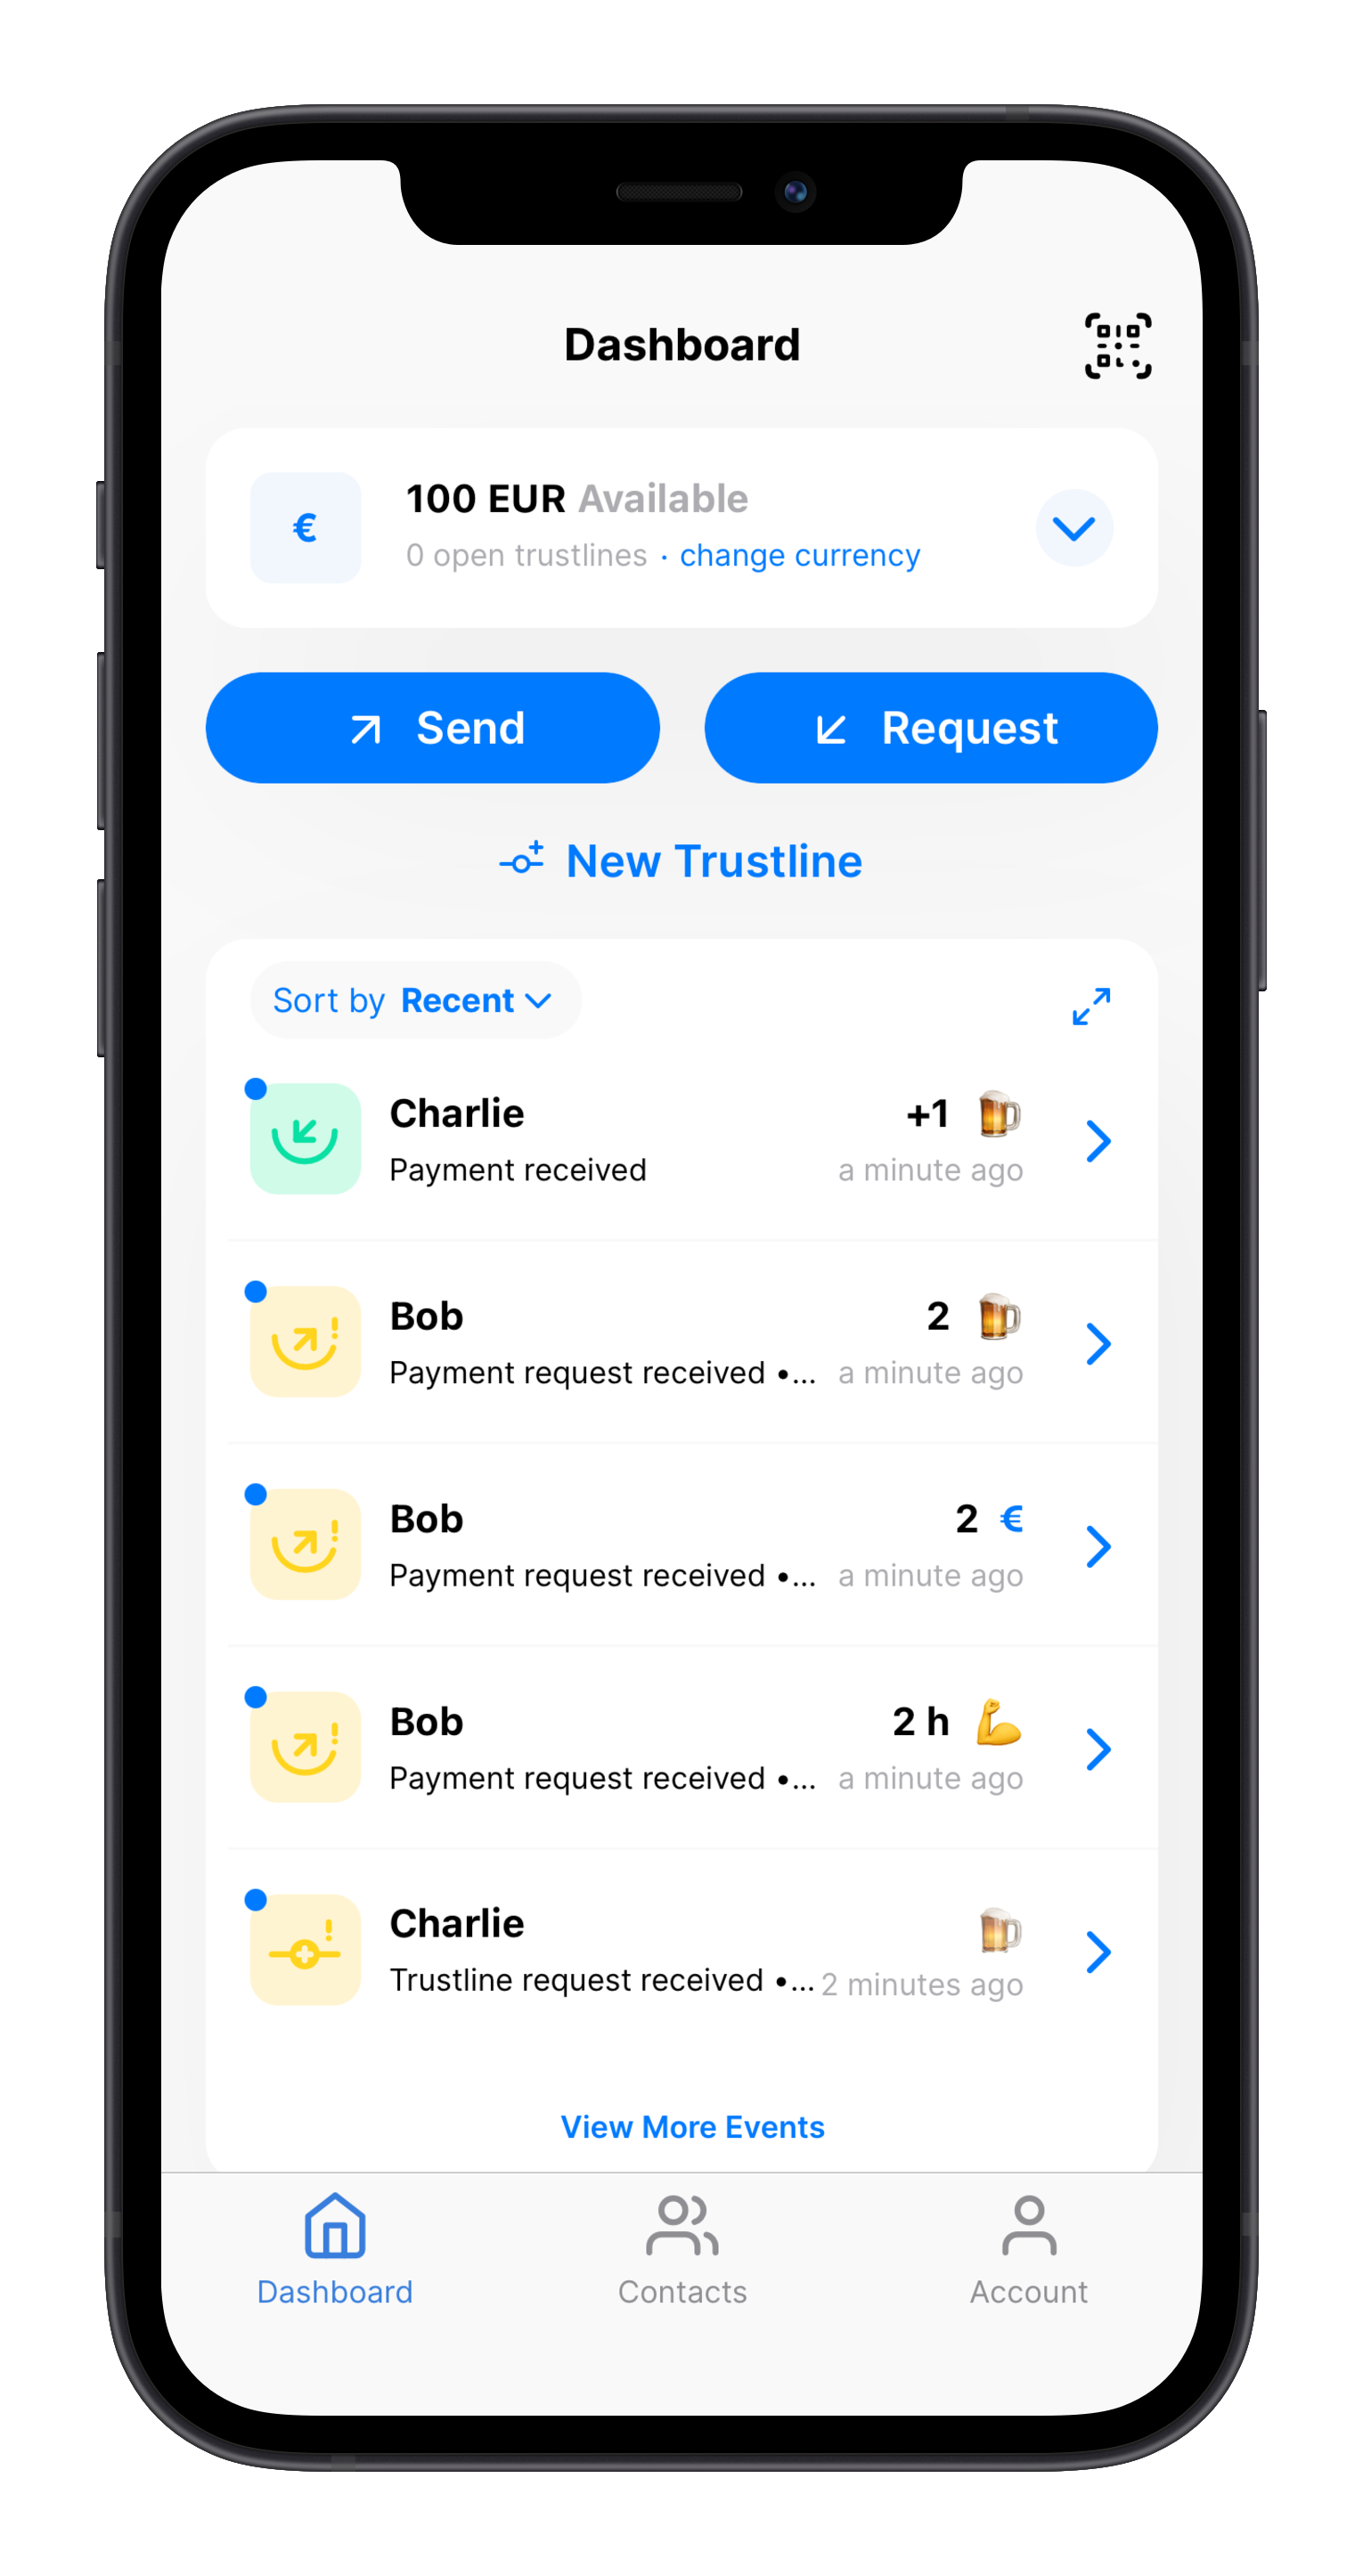
As you head on over to the Dashboard screen, you'll see a big number at the top, with the word "Available" underneath, and "Send" and "Receive" buttons. This number is not your balance. Instead, it is your available global credit, the sum of all the credit available on every trustline you have opened within a particular currency network. (It is similar to a credit limit on a credit card.)
This number will go down whenever you make a payment using the Trustlines App because paying uses up available credit.
But this number will go up when you receive payments, like if a friend pays you using a credit line that you have given to them. In other words, if a friend borrows some money from you (and thus owes you money), this amount is recorded as additional credit on top of your available credit.
The higher your global credit limit is, the higher your capacity to make payments in the network. If you want to raise your limit, open more trustlines with more people that you trust (or ask existing friends to raise their credit limits with you).
Sending and receiving payments
Sending a payment
Creating a trustline allows you to transact not just with this trusted friend, but also with all the people that your friend is connected to, and all the people their friends are connected to, etc. You can ripple payments across many chains of friends, as long as there is a high enough credit limit (enough "capacity") on each connected trustline.
To send a payment to someone you don't yet know, you can use your QR scanner to directly scan their payment request or share a payment request link via a messaging service.
If it's someone you plan to transact with again in the future, you can add them as a contact, too (see Adding a contact). If you already have them as a contact, you can hit Send directly from the Dashboard. Make sure you swipe to select the right currency network before hitting Send.

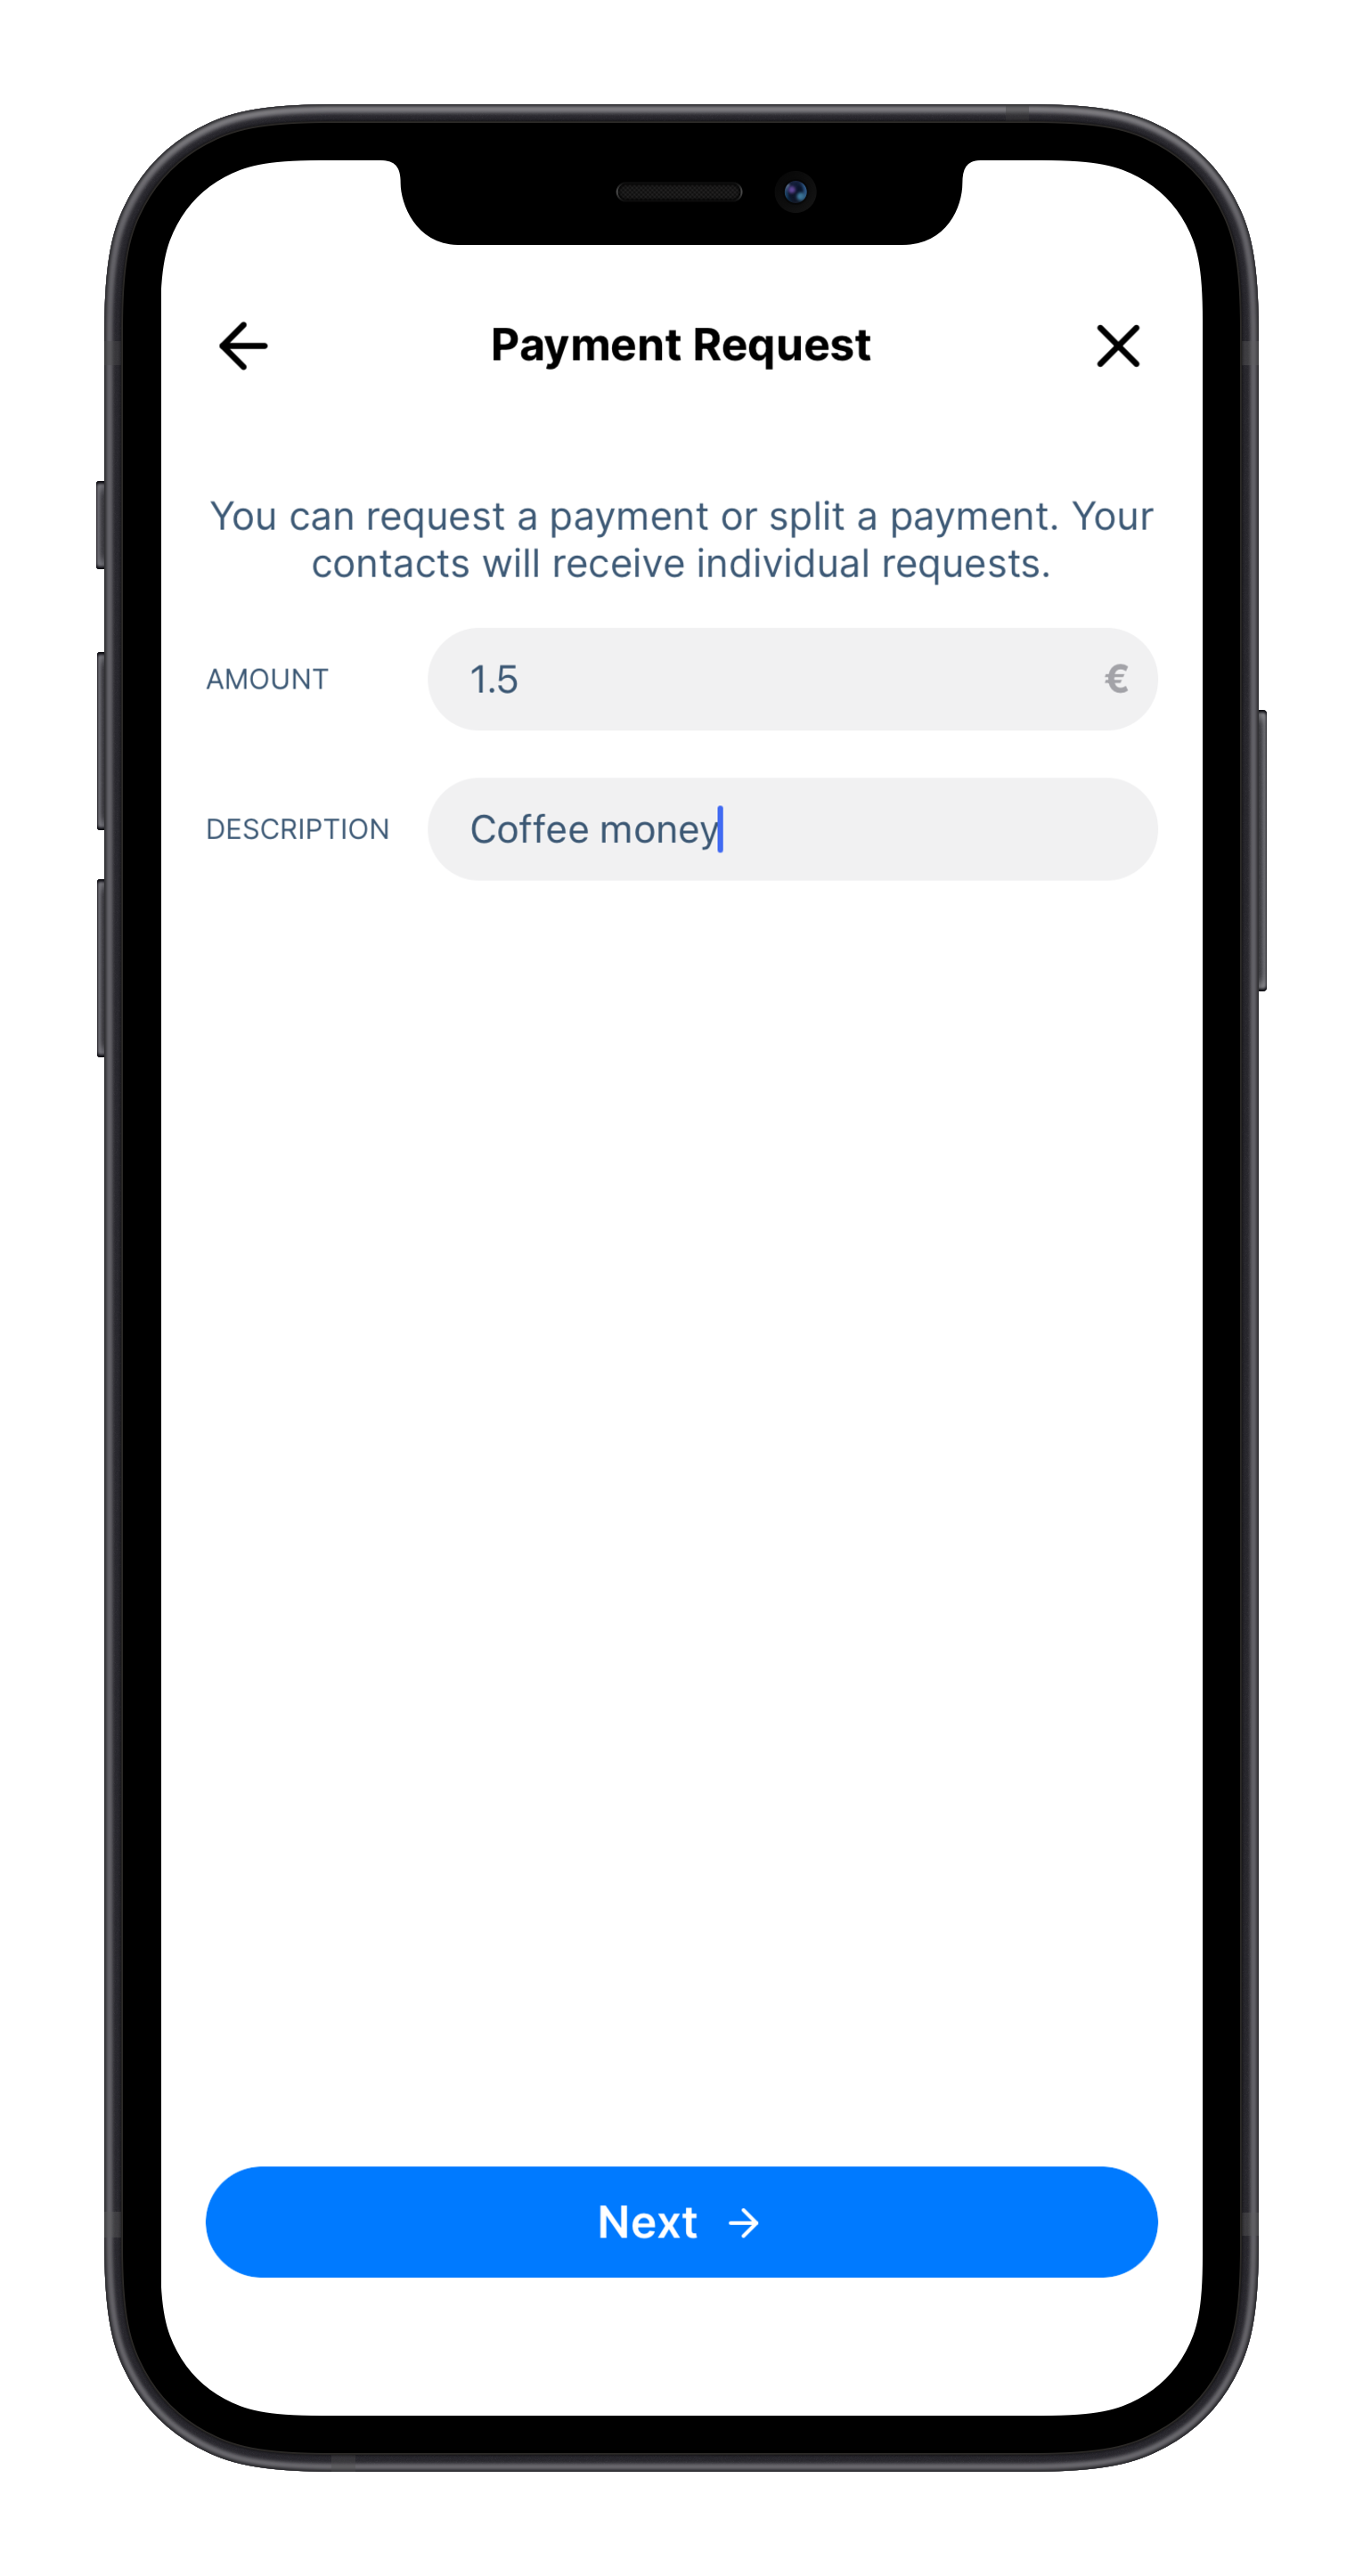
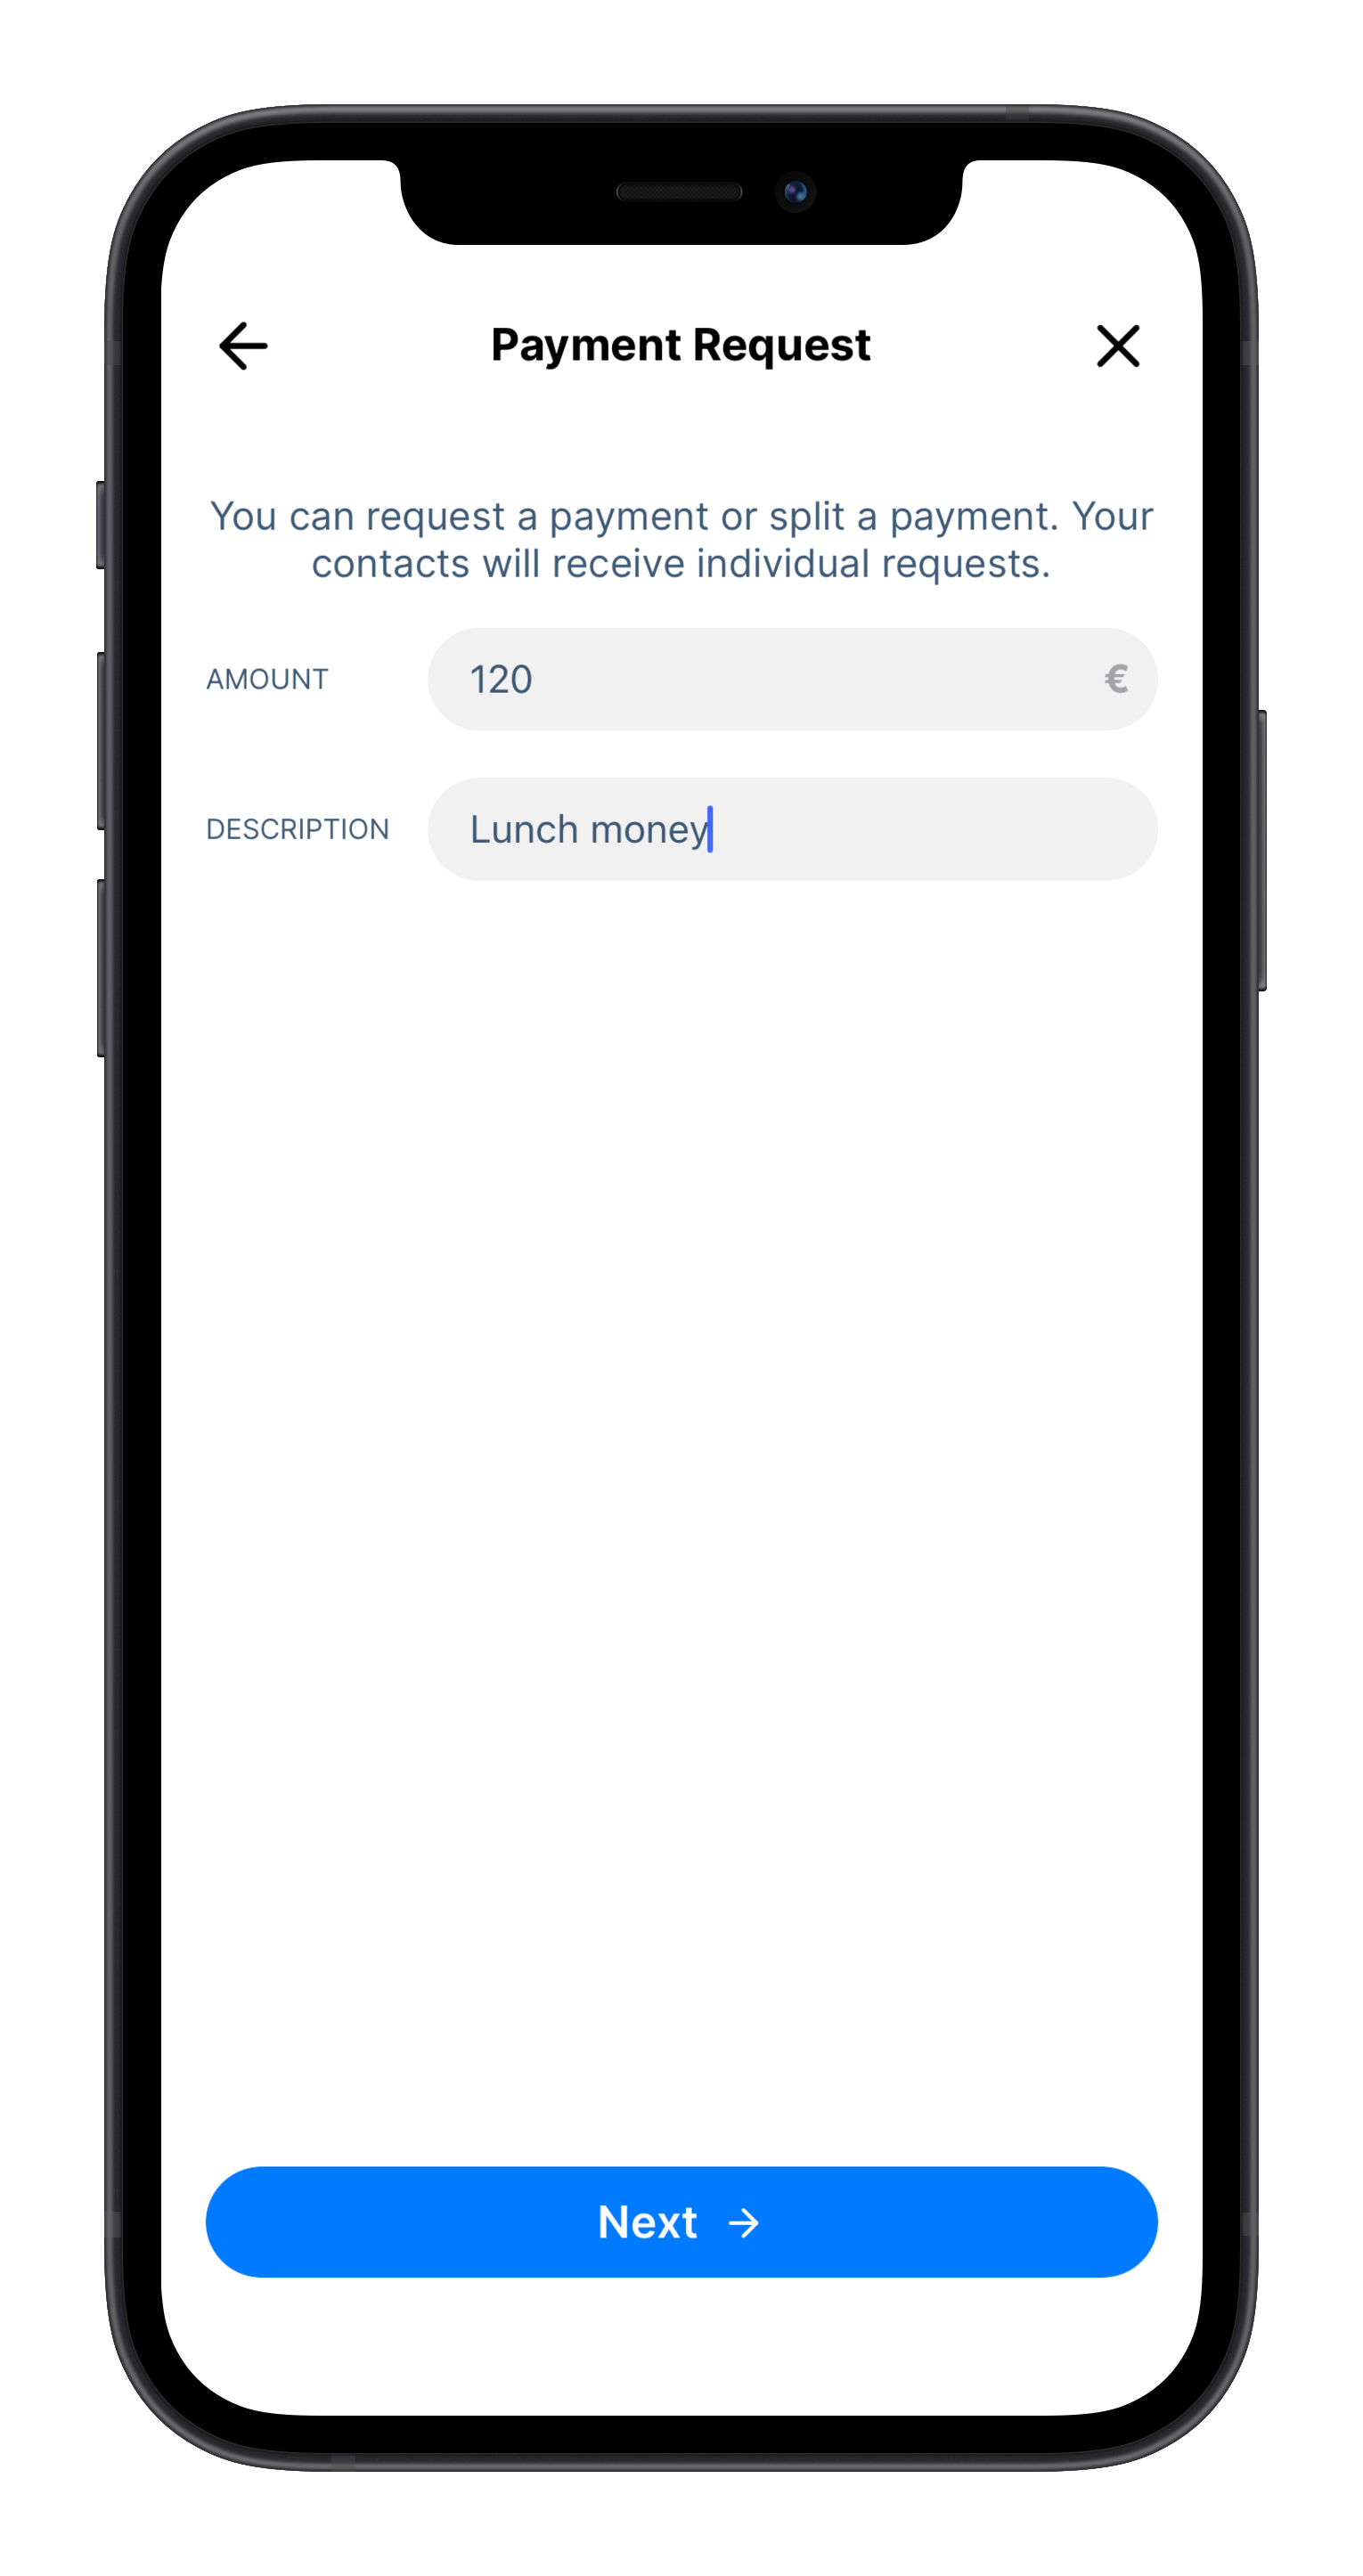
Requesting a payment
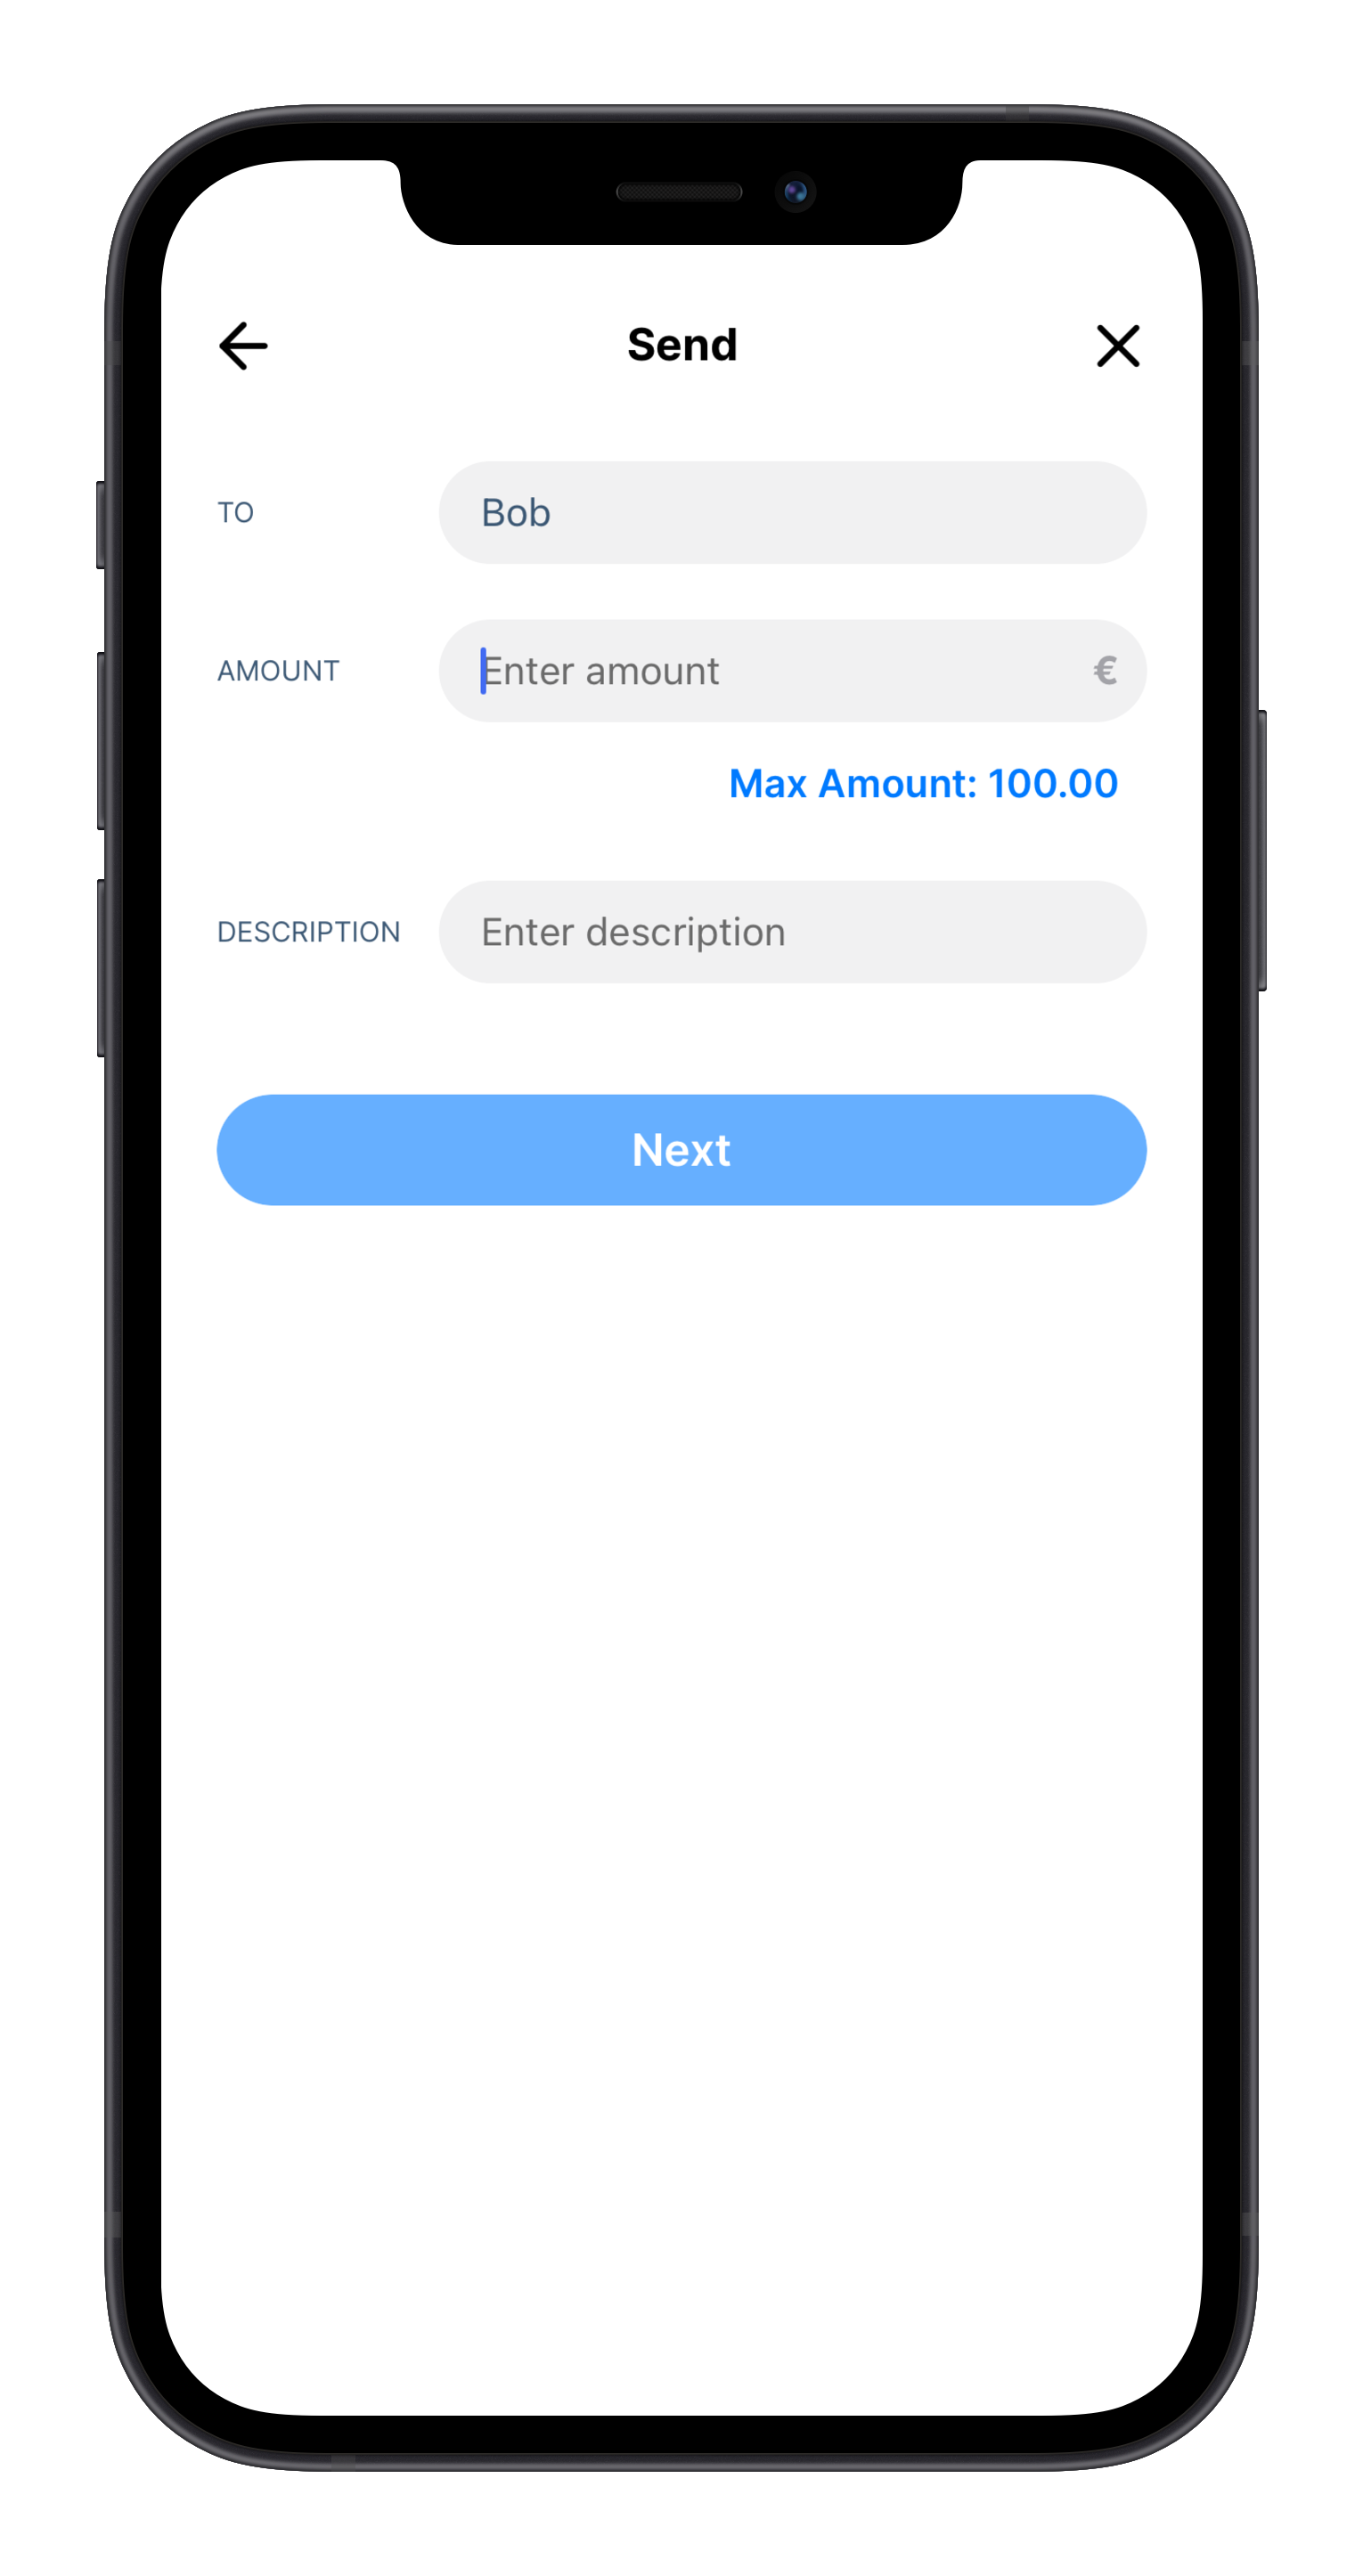
To request a payment from someone, you hit the Request button in the Dashboard. Make sure you swipe to select the right currency network before hitting Request.
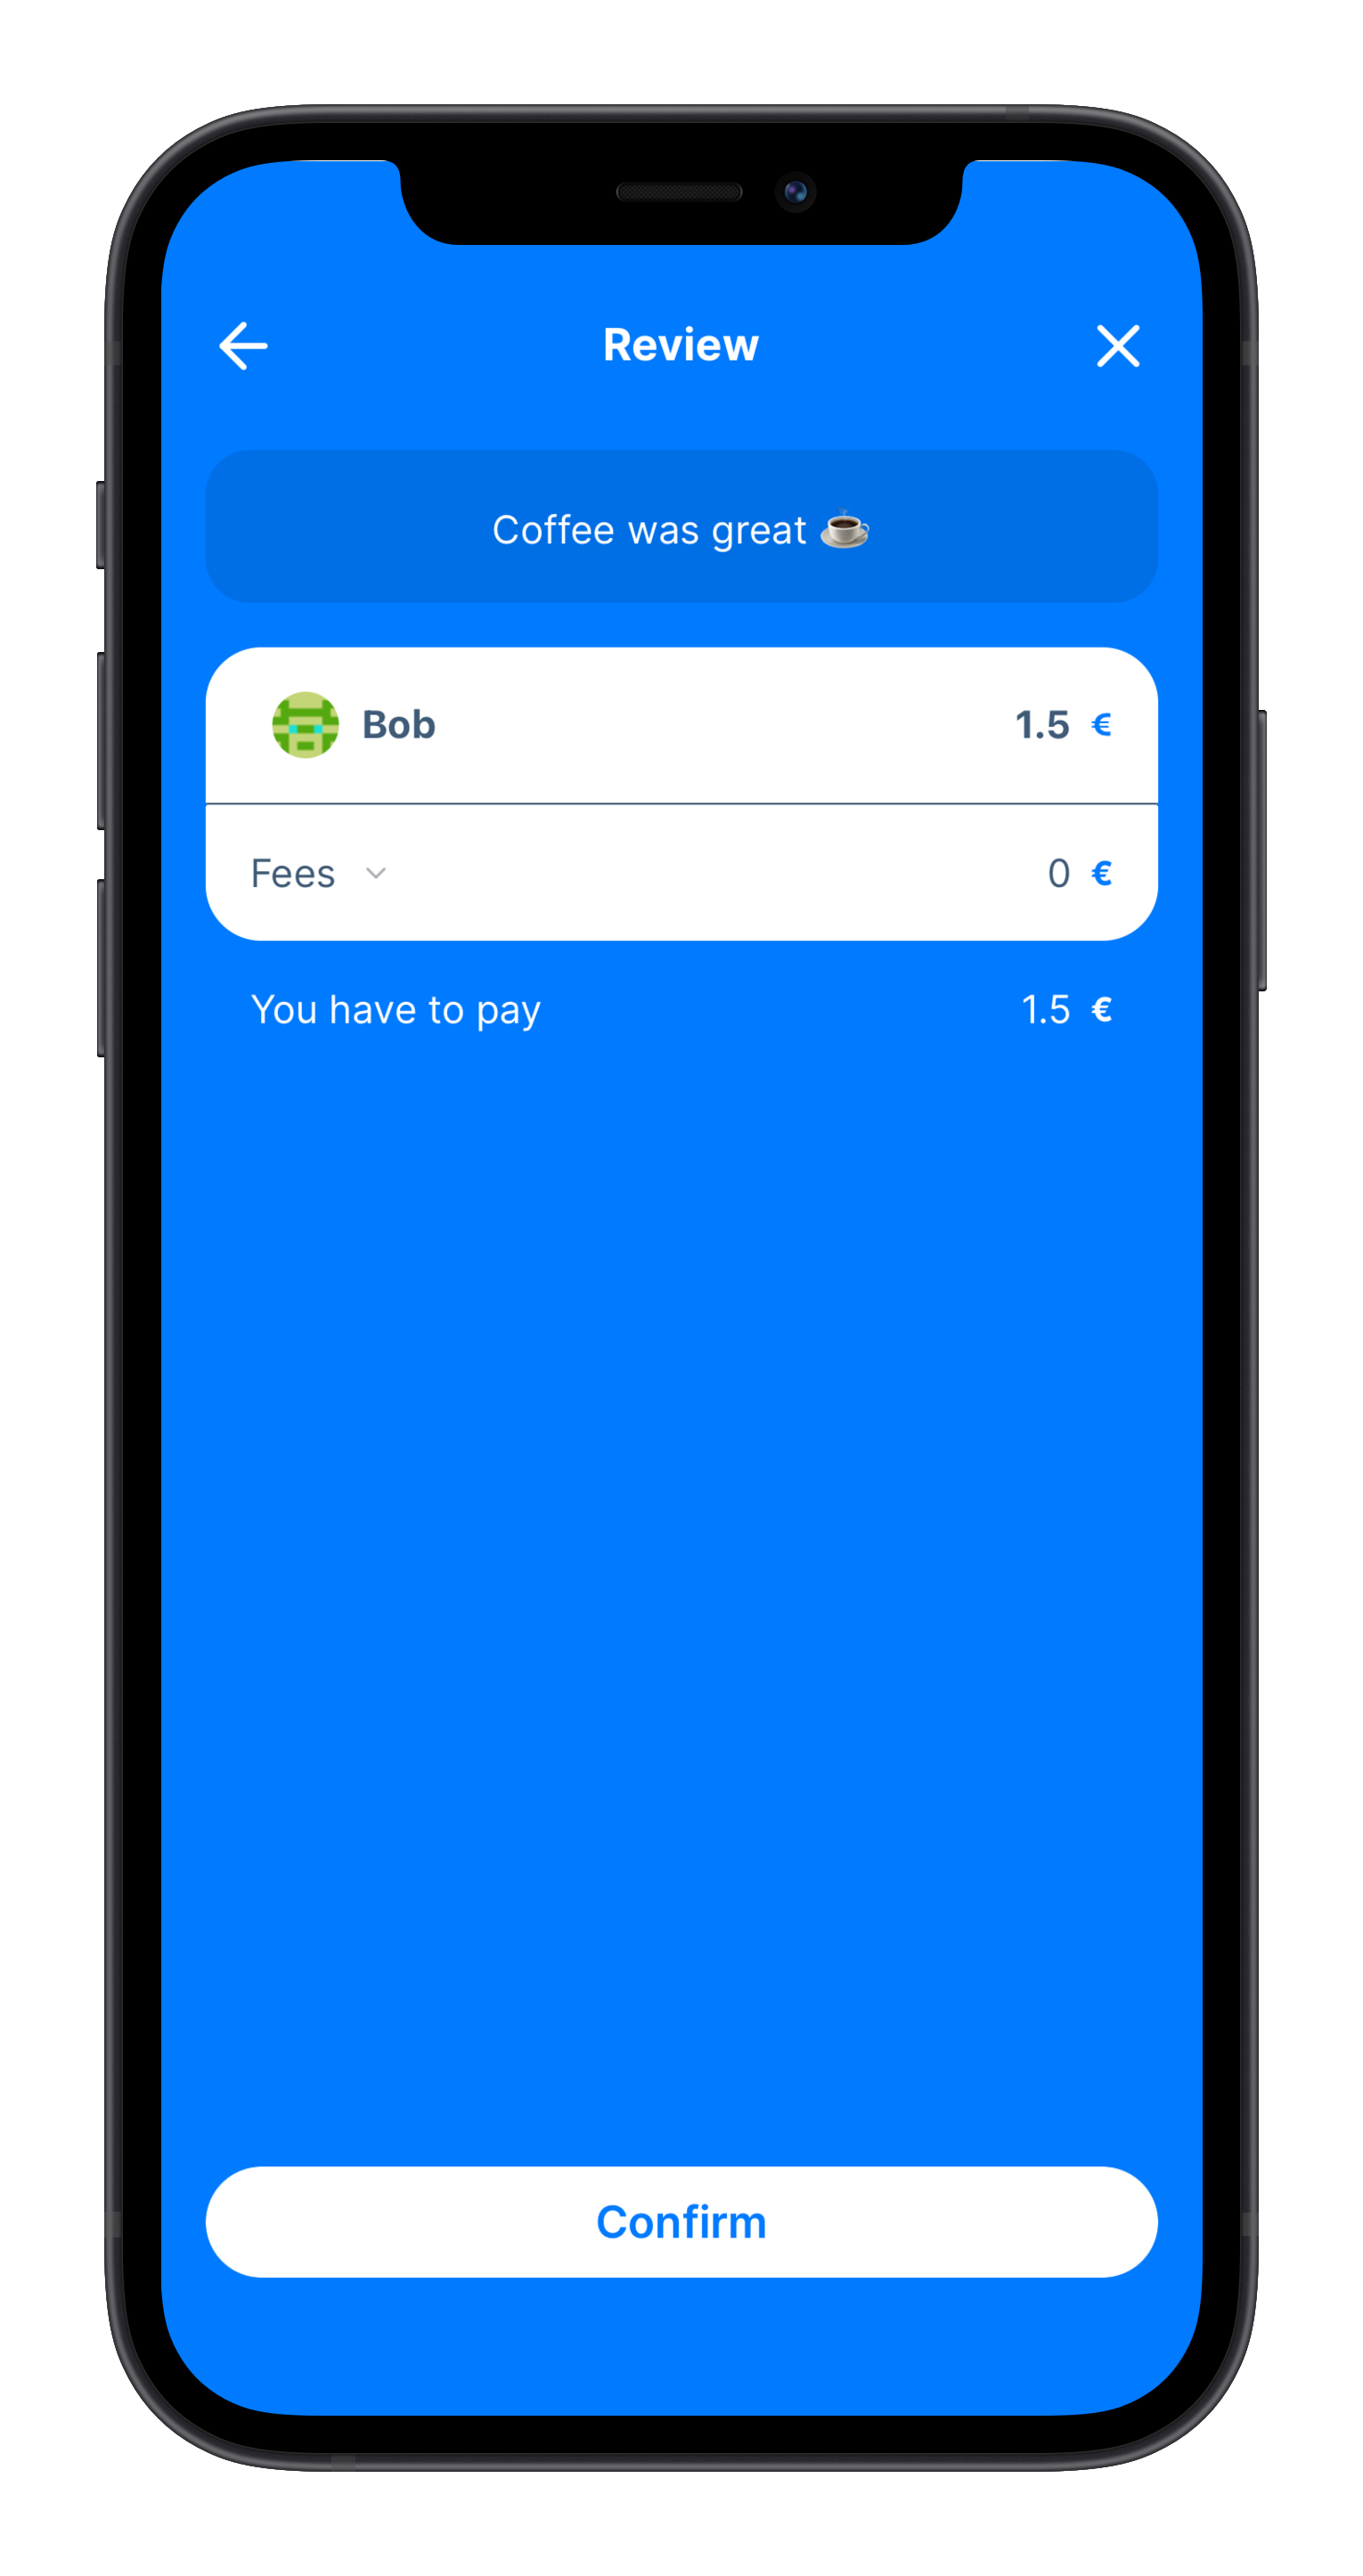
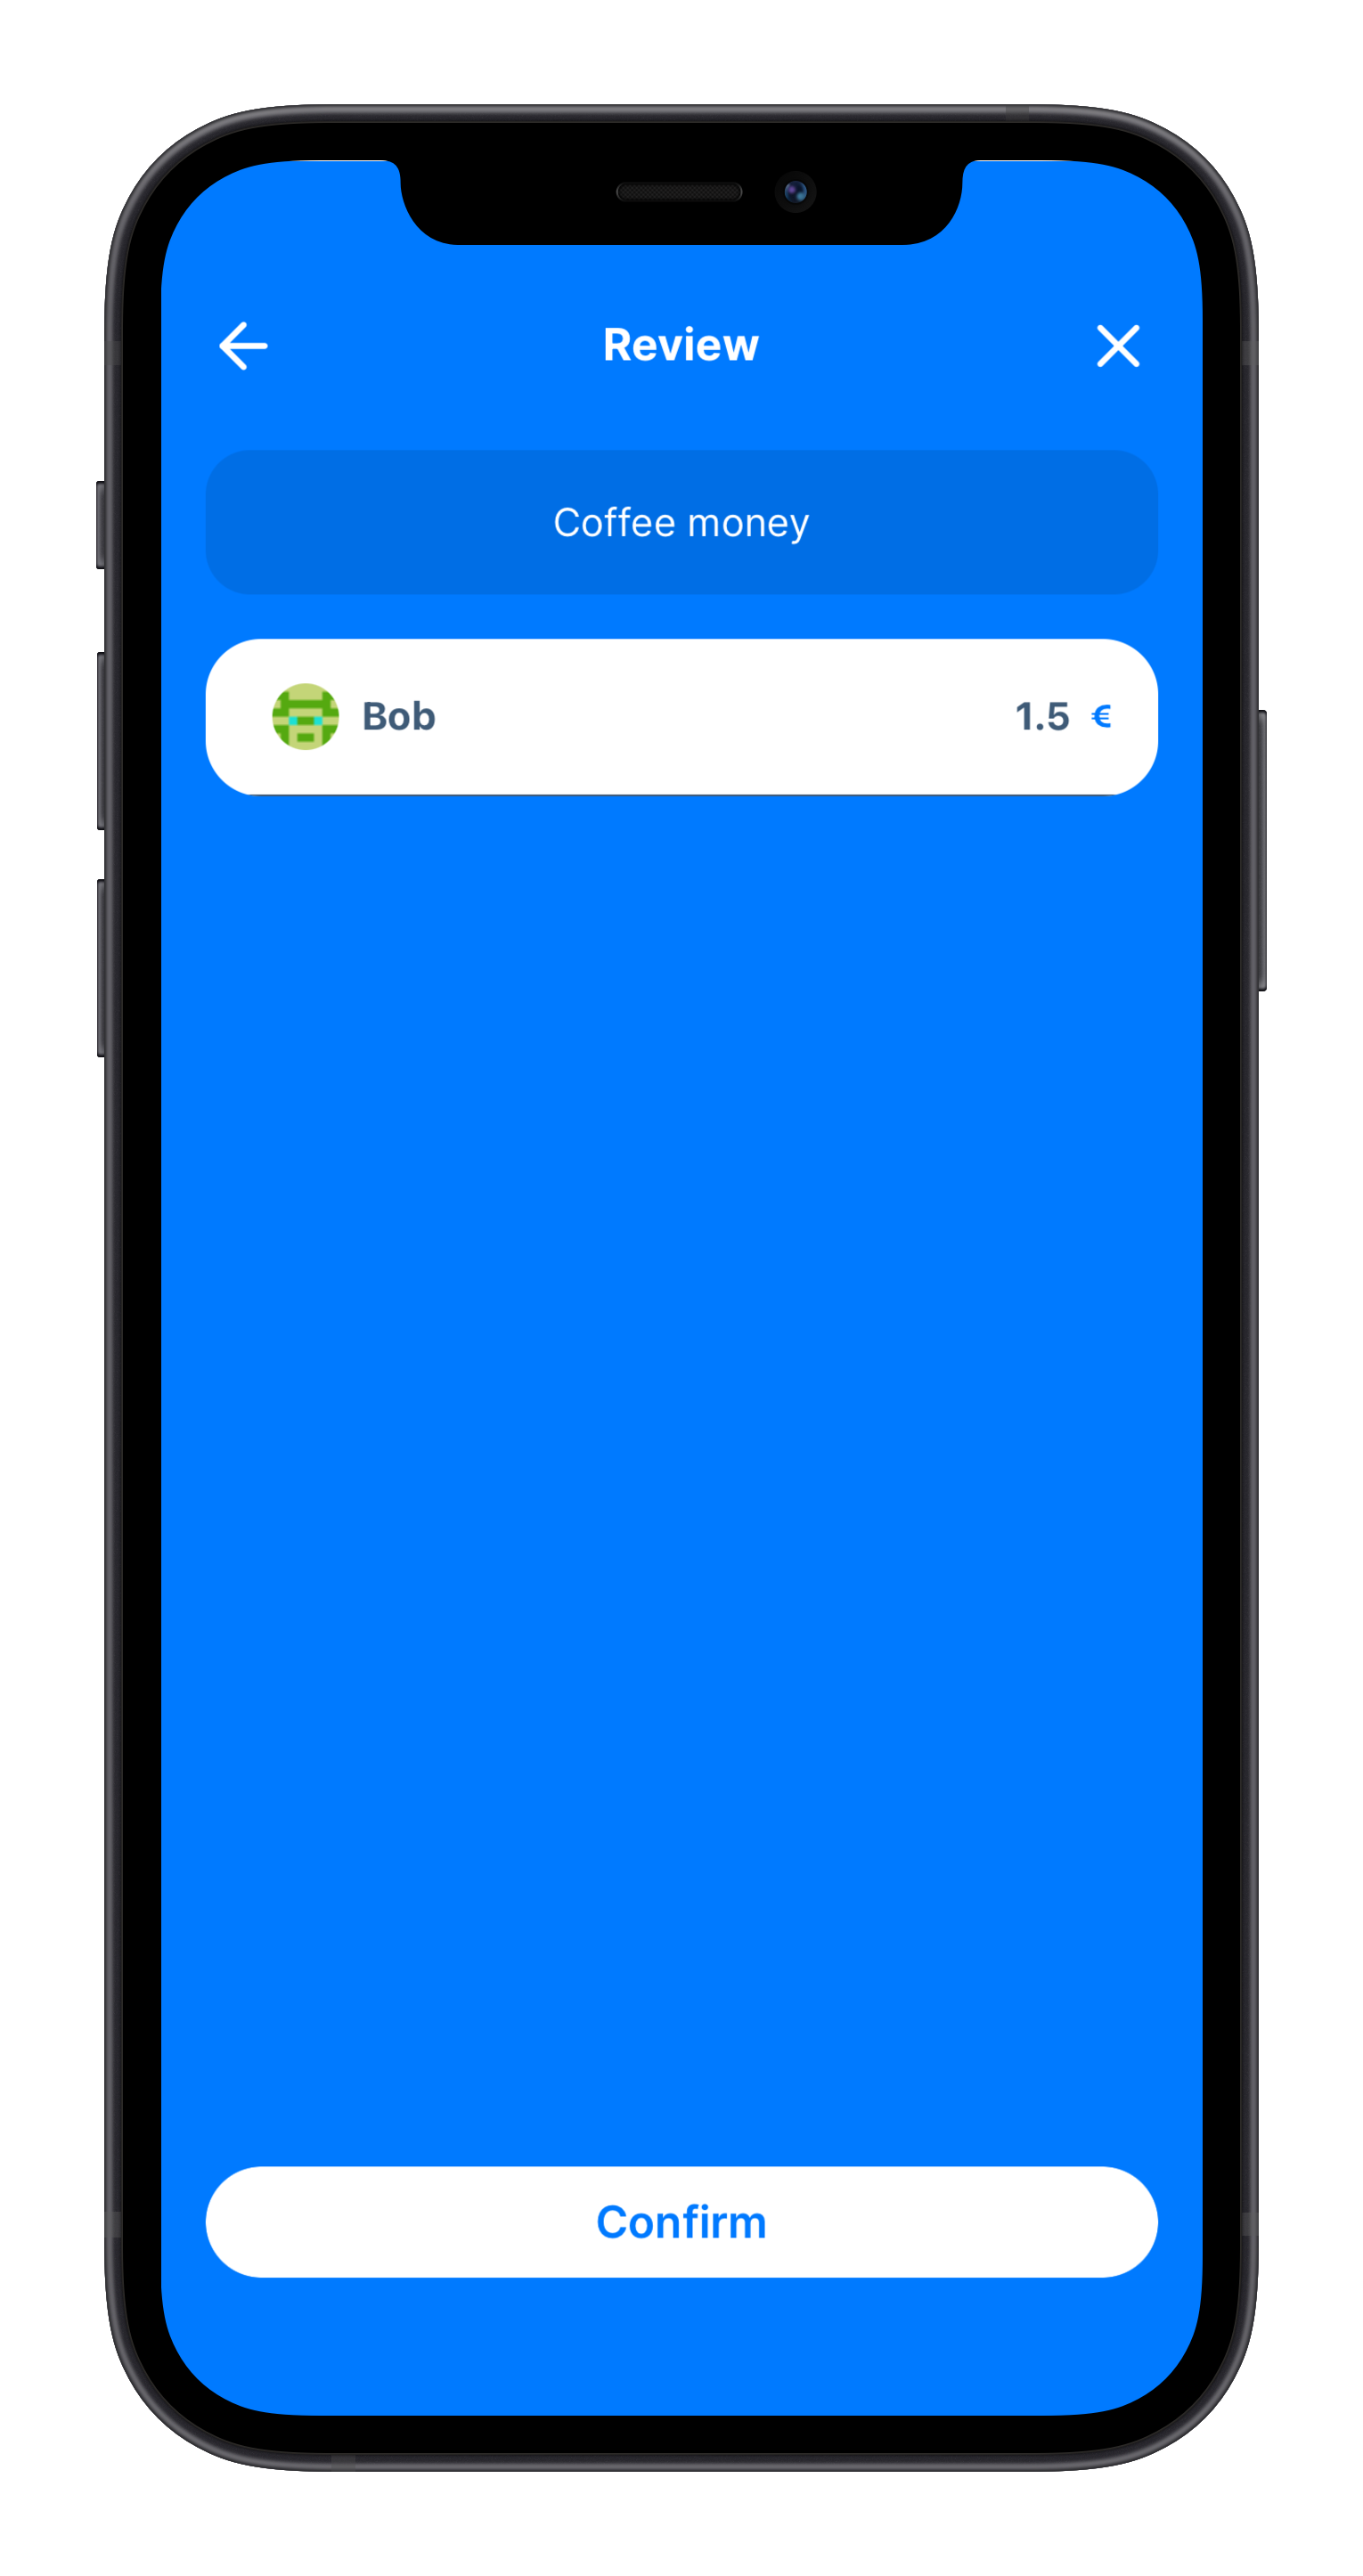
You will need to enter the amount that you are requesting, choose a partner to send the request to, and review the request before confirming it. You can also easily split the payment between multiple people by selecting the Split Bill option (see Split request for more details).
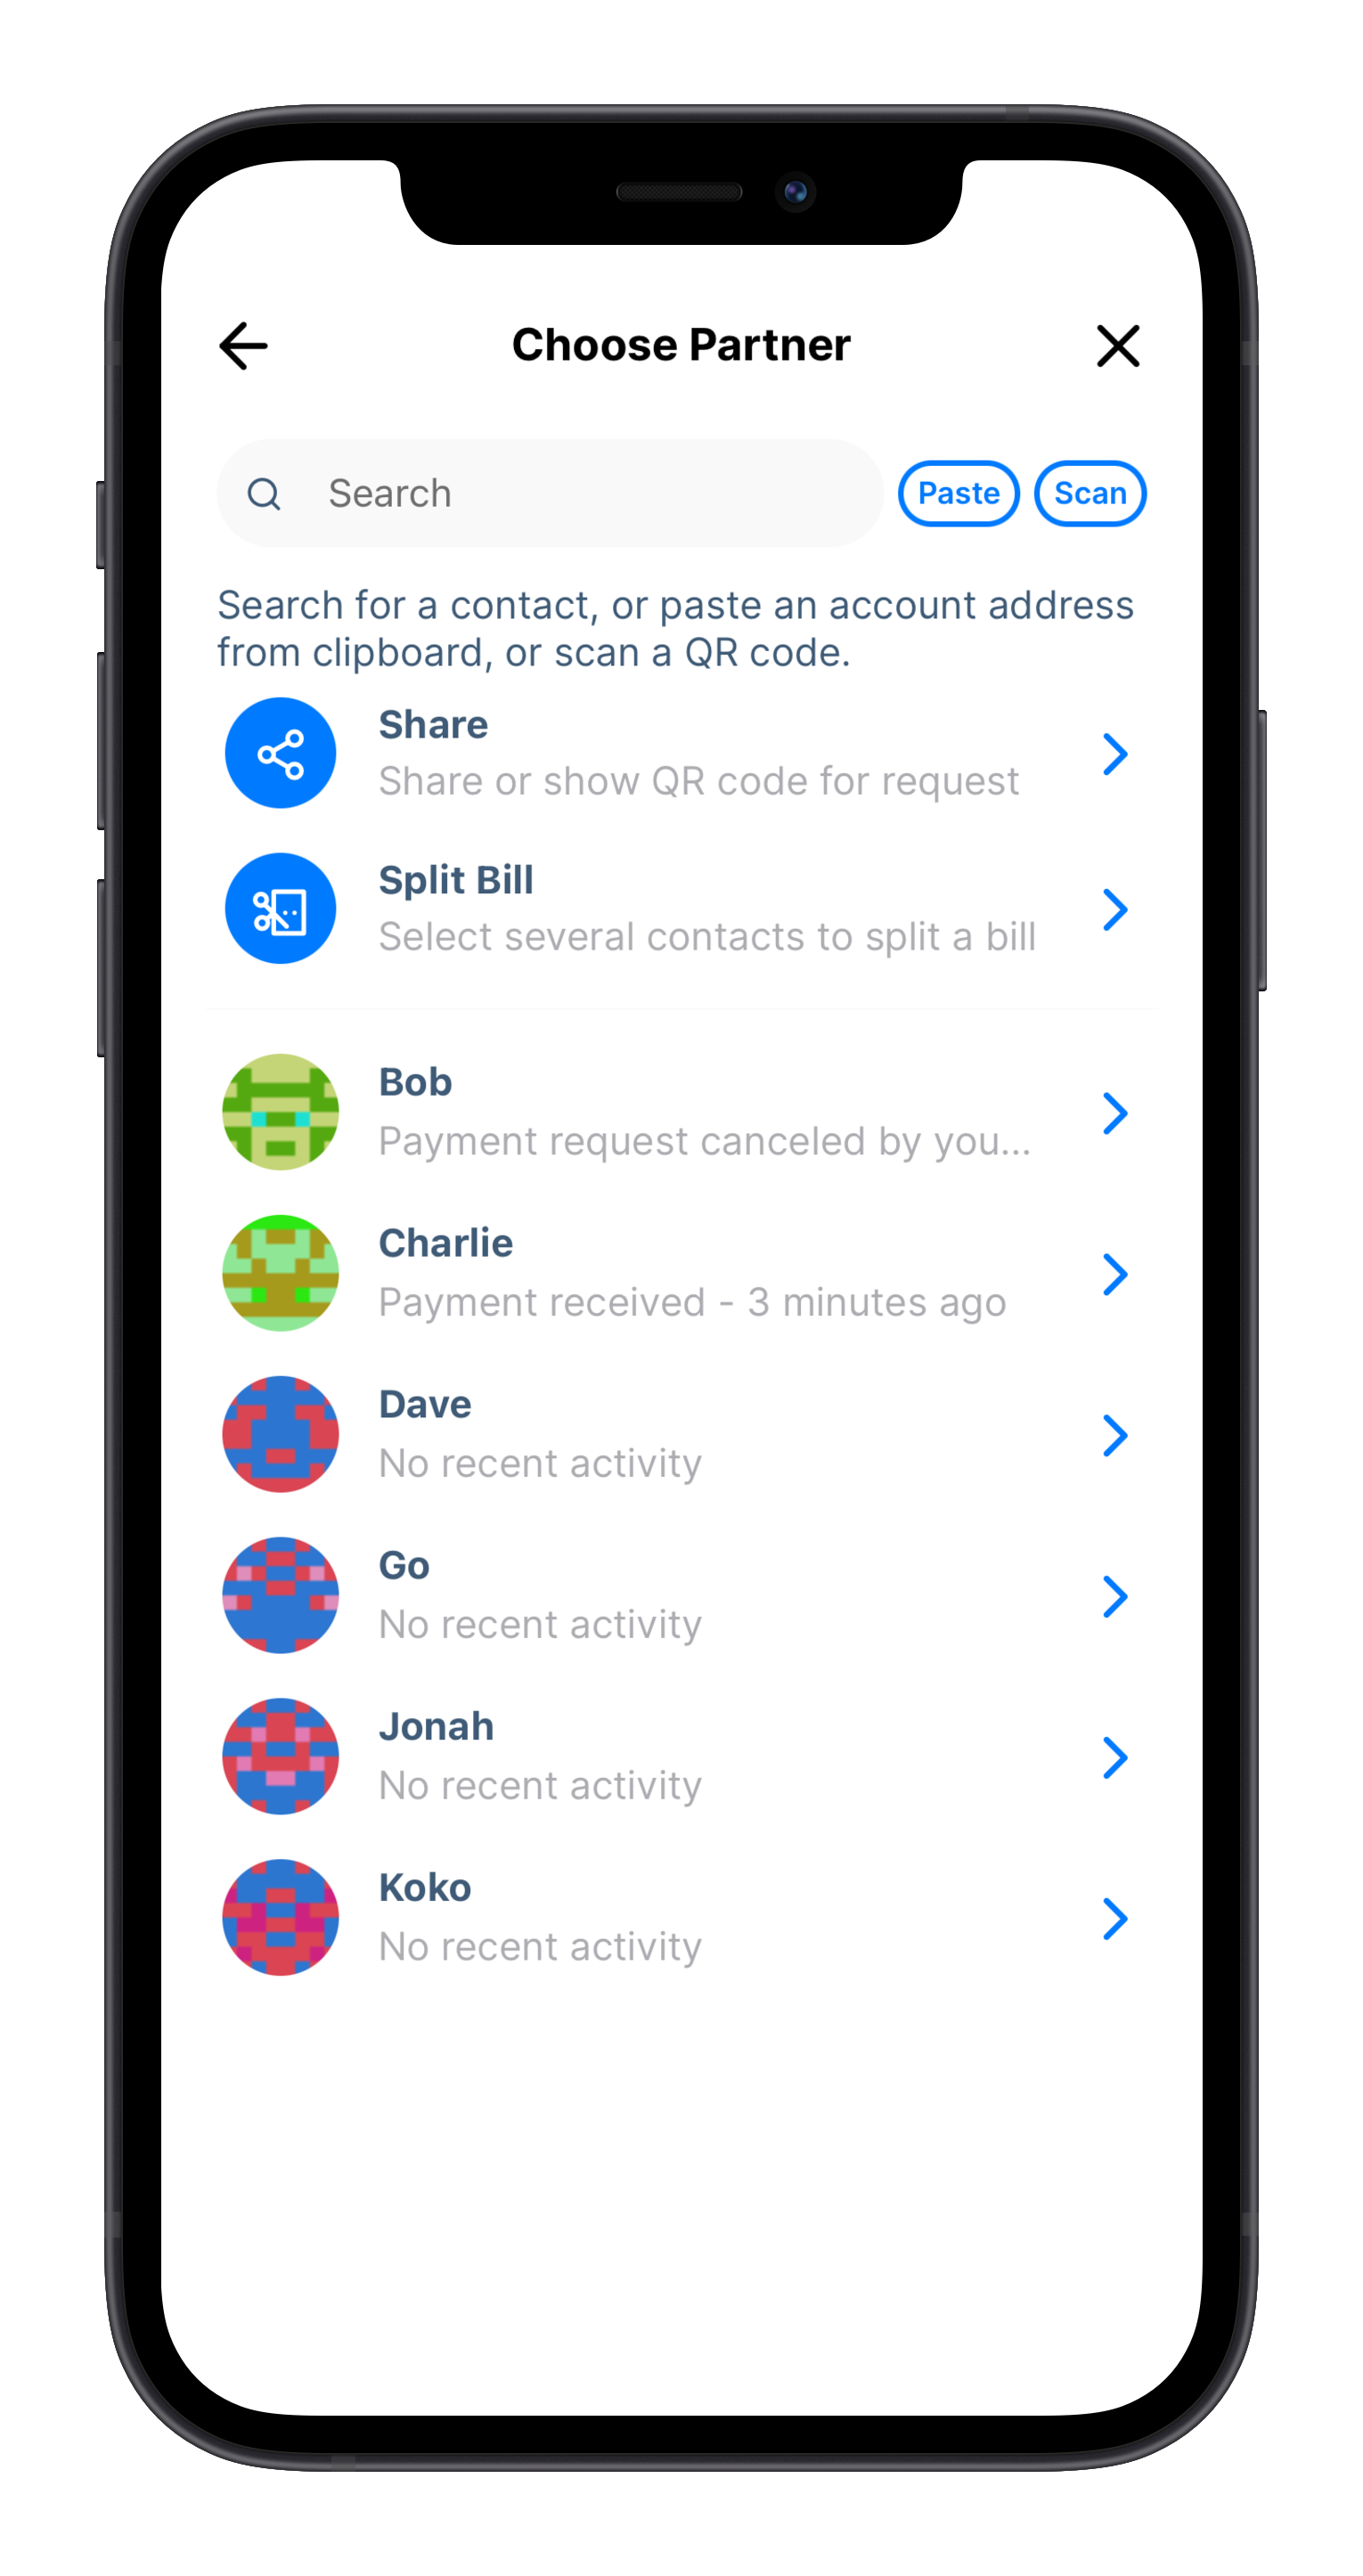
By selecting Share when choosing a partner, you will be shown the option to share your own QR code or to select Share again at the bottom of the screen to send the payment request link to someone. Both of these options will contain the information that you previously selected for the payment request.

Then, if selecting another option like an existing contact, review the details, making sure everything is correct, and send the request!
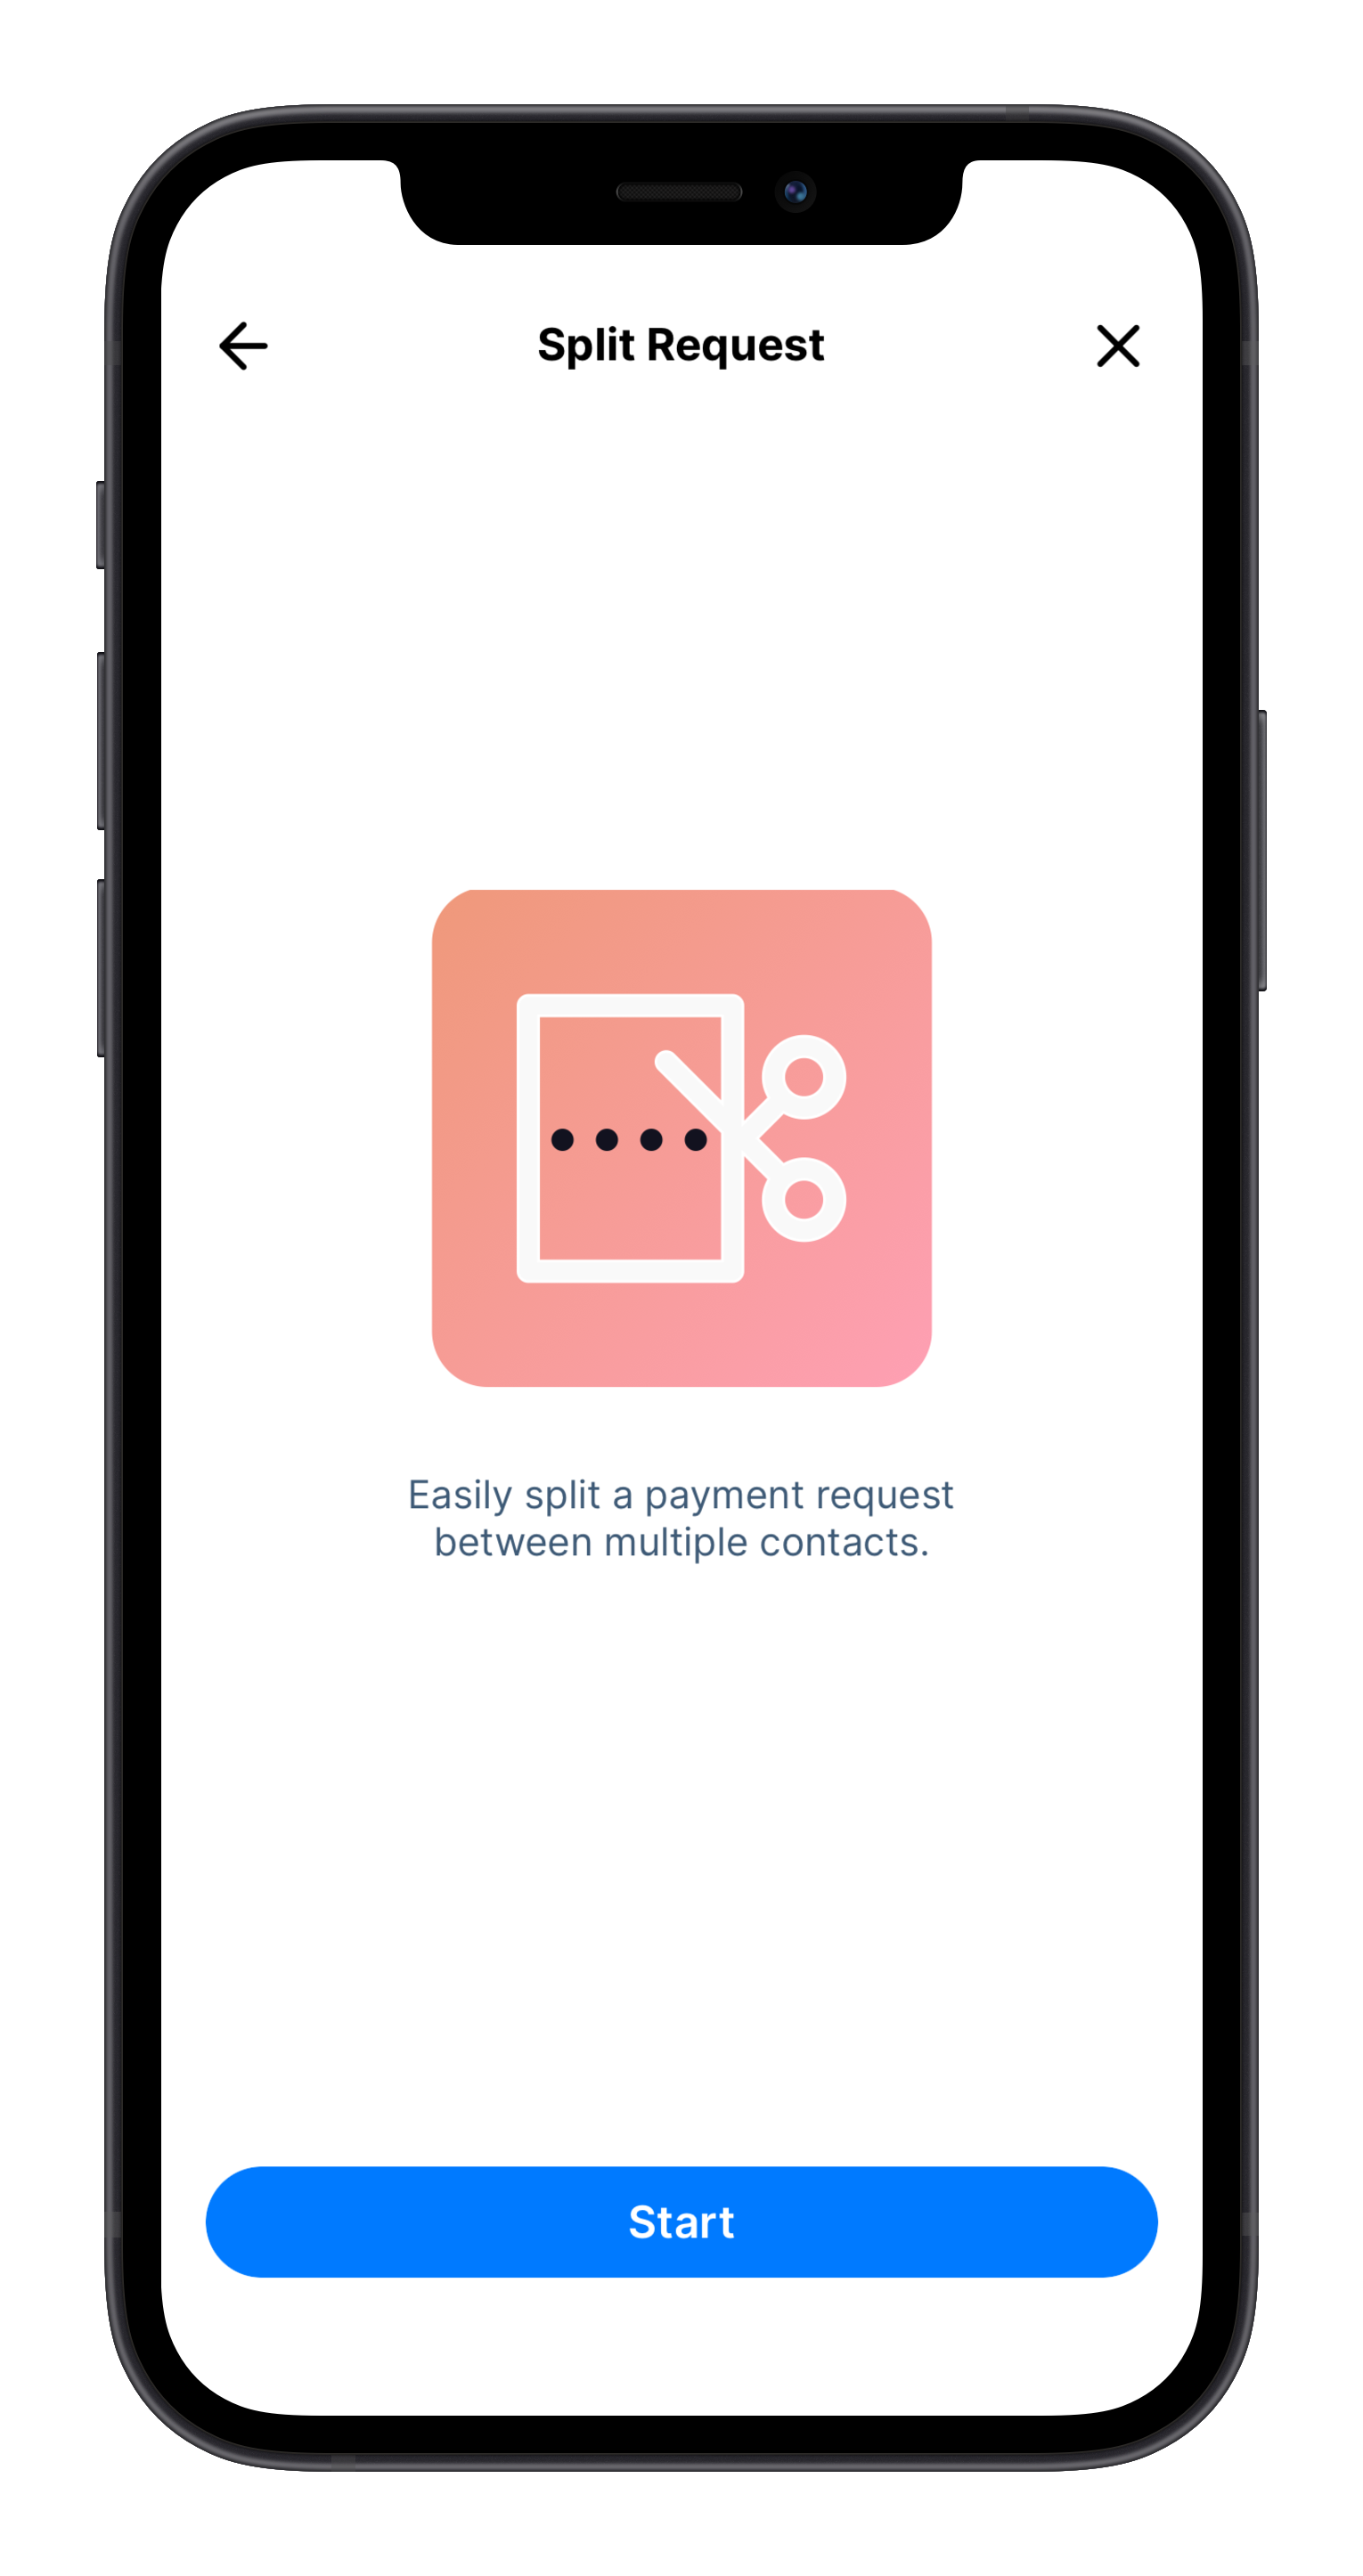
Split request
With the Trustlines App, you can easily split a payment between multiple people. You start requesting payment as you normally would, and when you get to the Choose Partner screen, select the Split Bill option.
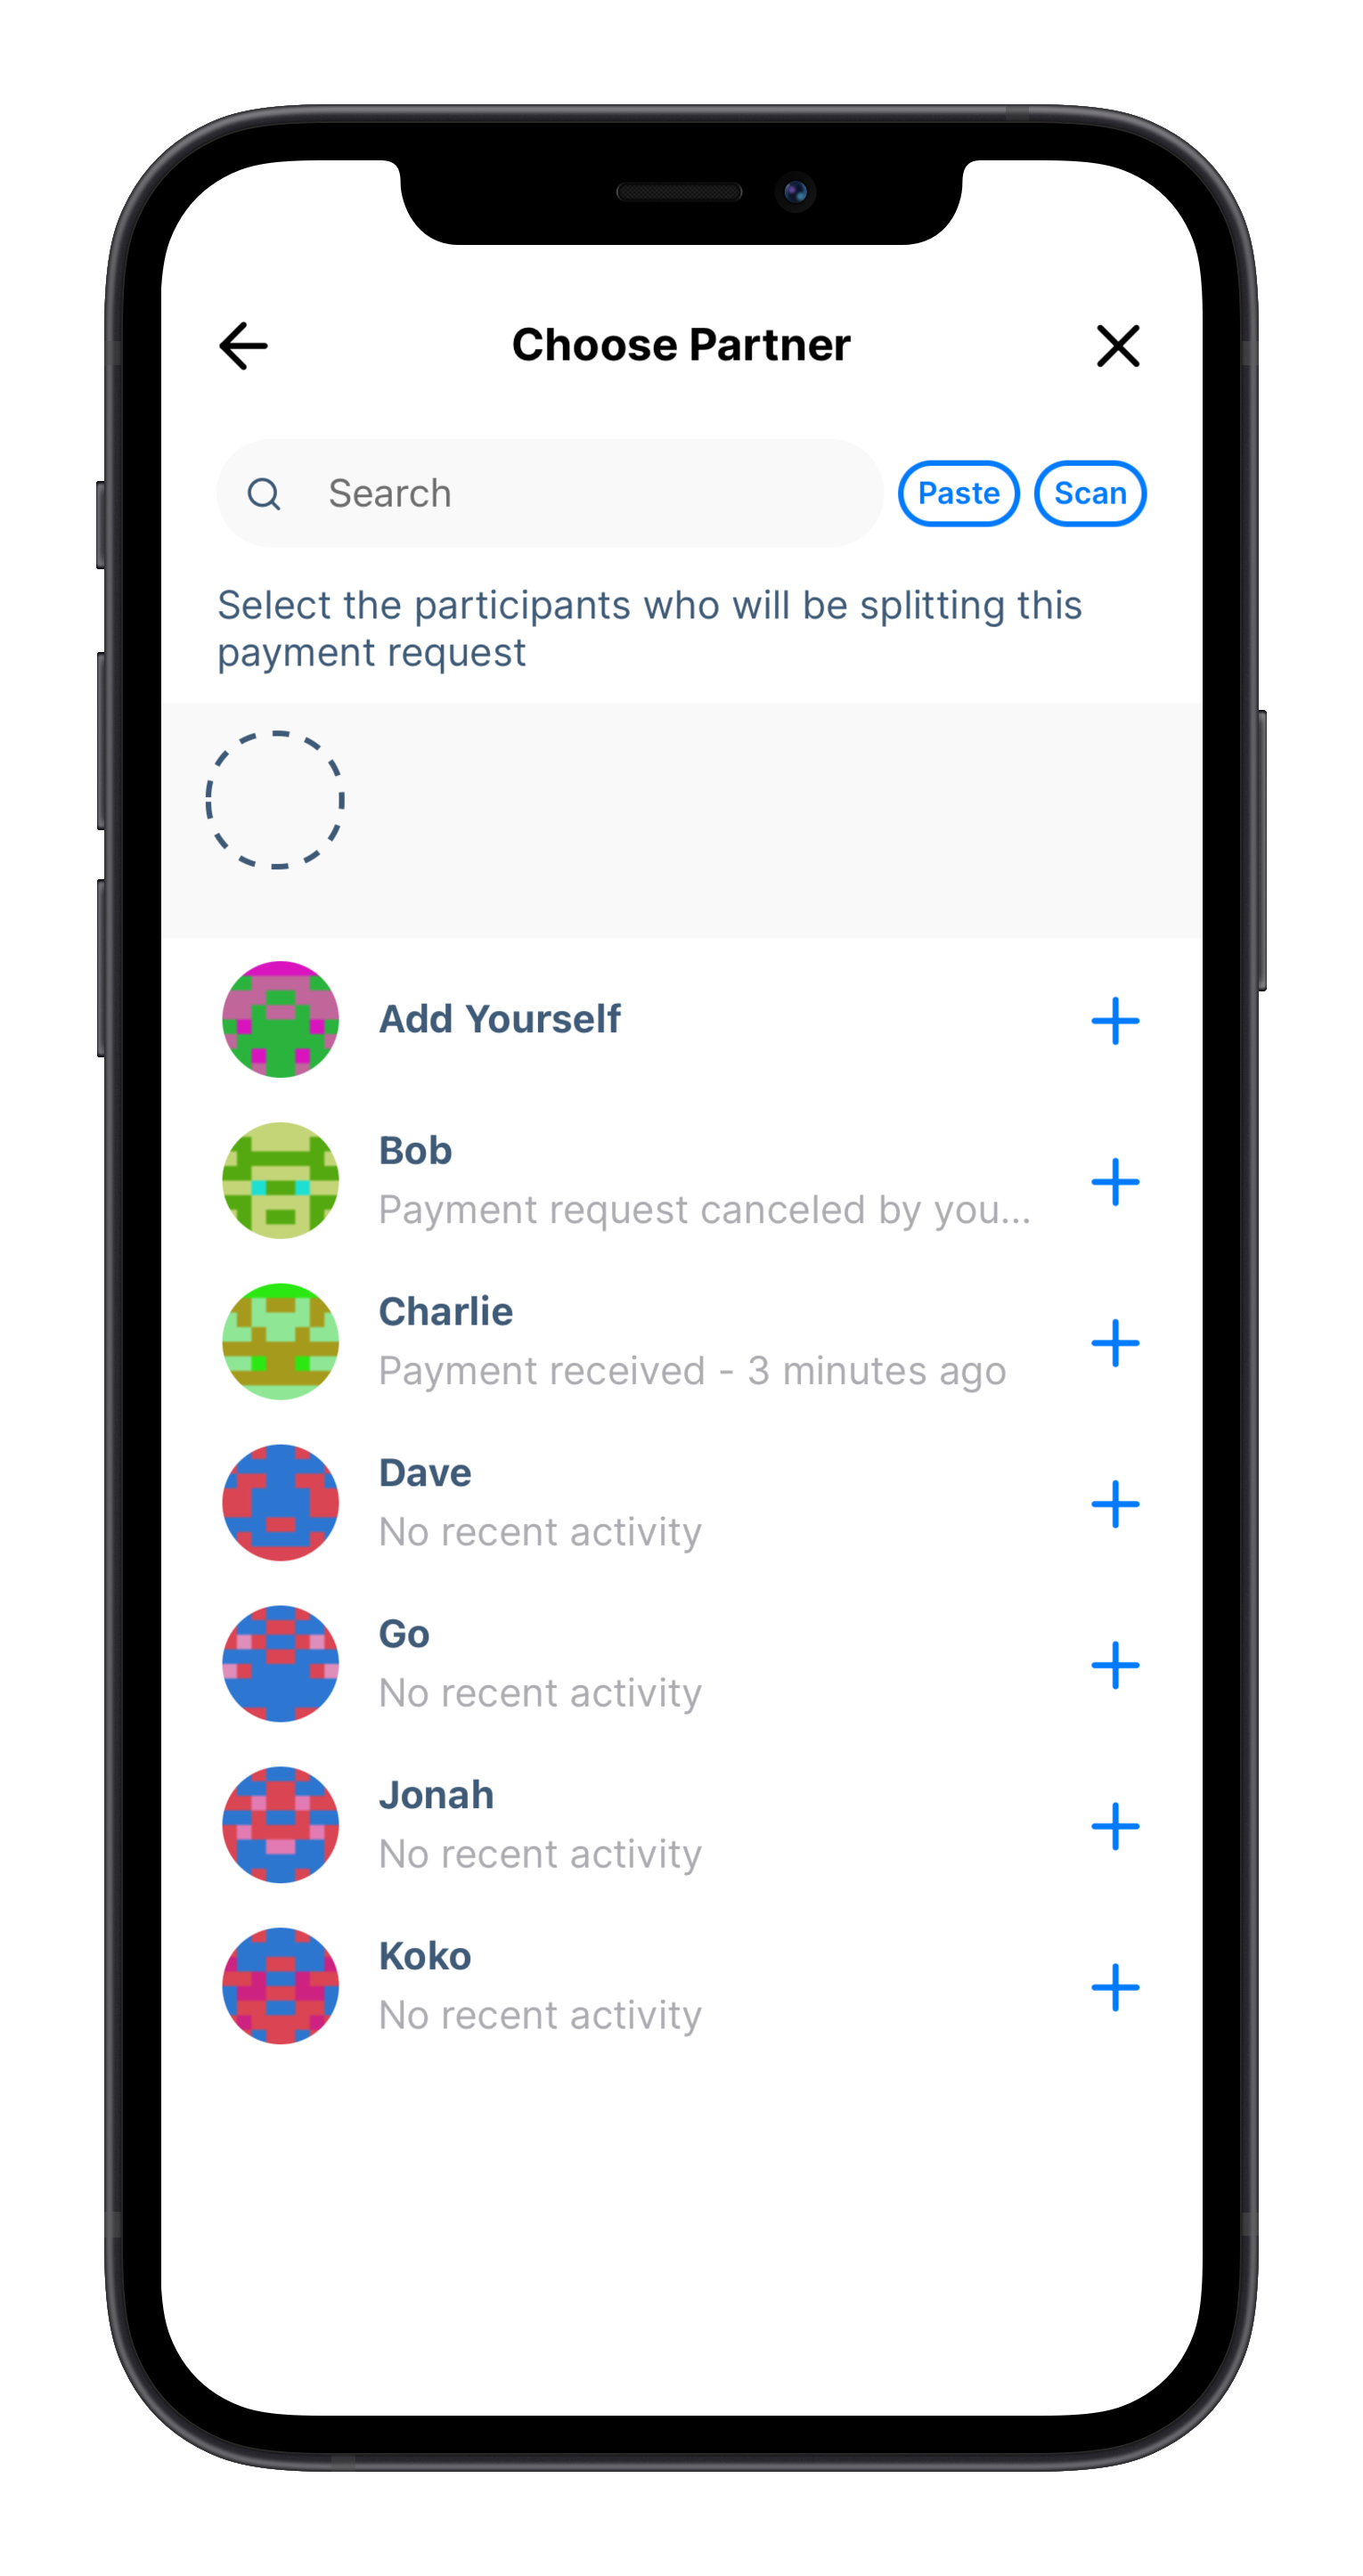
You will be presented with a Split Request screen showing that you will be requesting a payment between multiple contacts. Next, you will select the people you wish to send this payment request to.
You can also include yourself in this split payment request. This is especially useful if you are splitting a payment evenly among the participants.
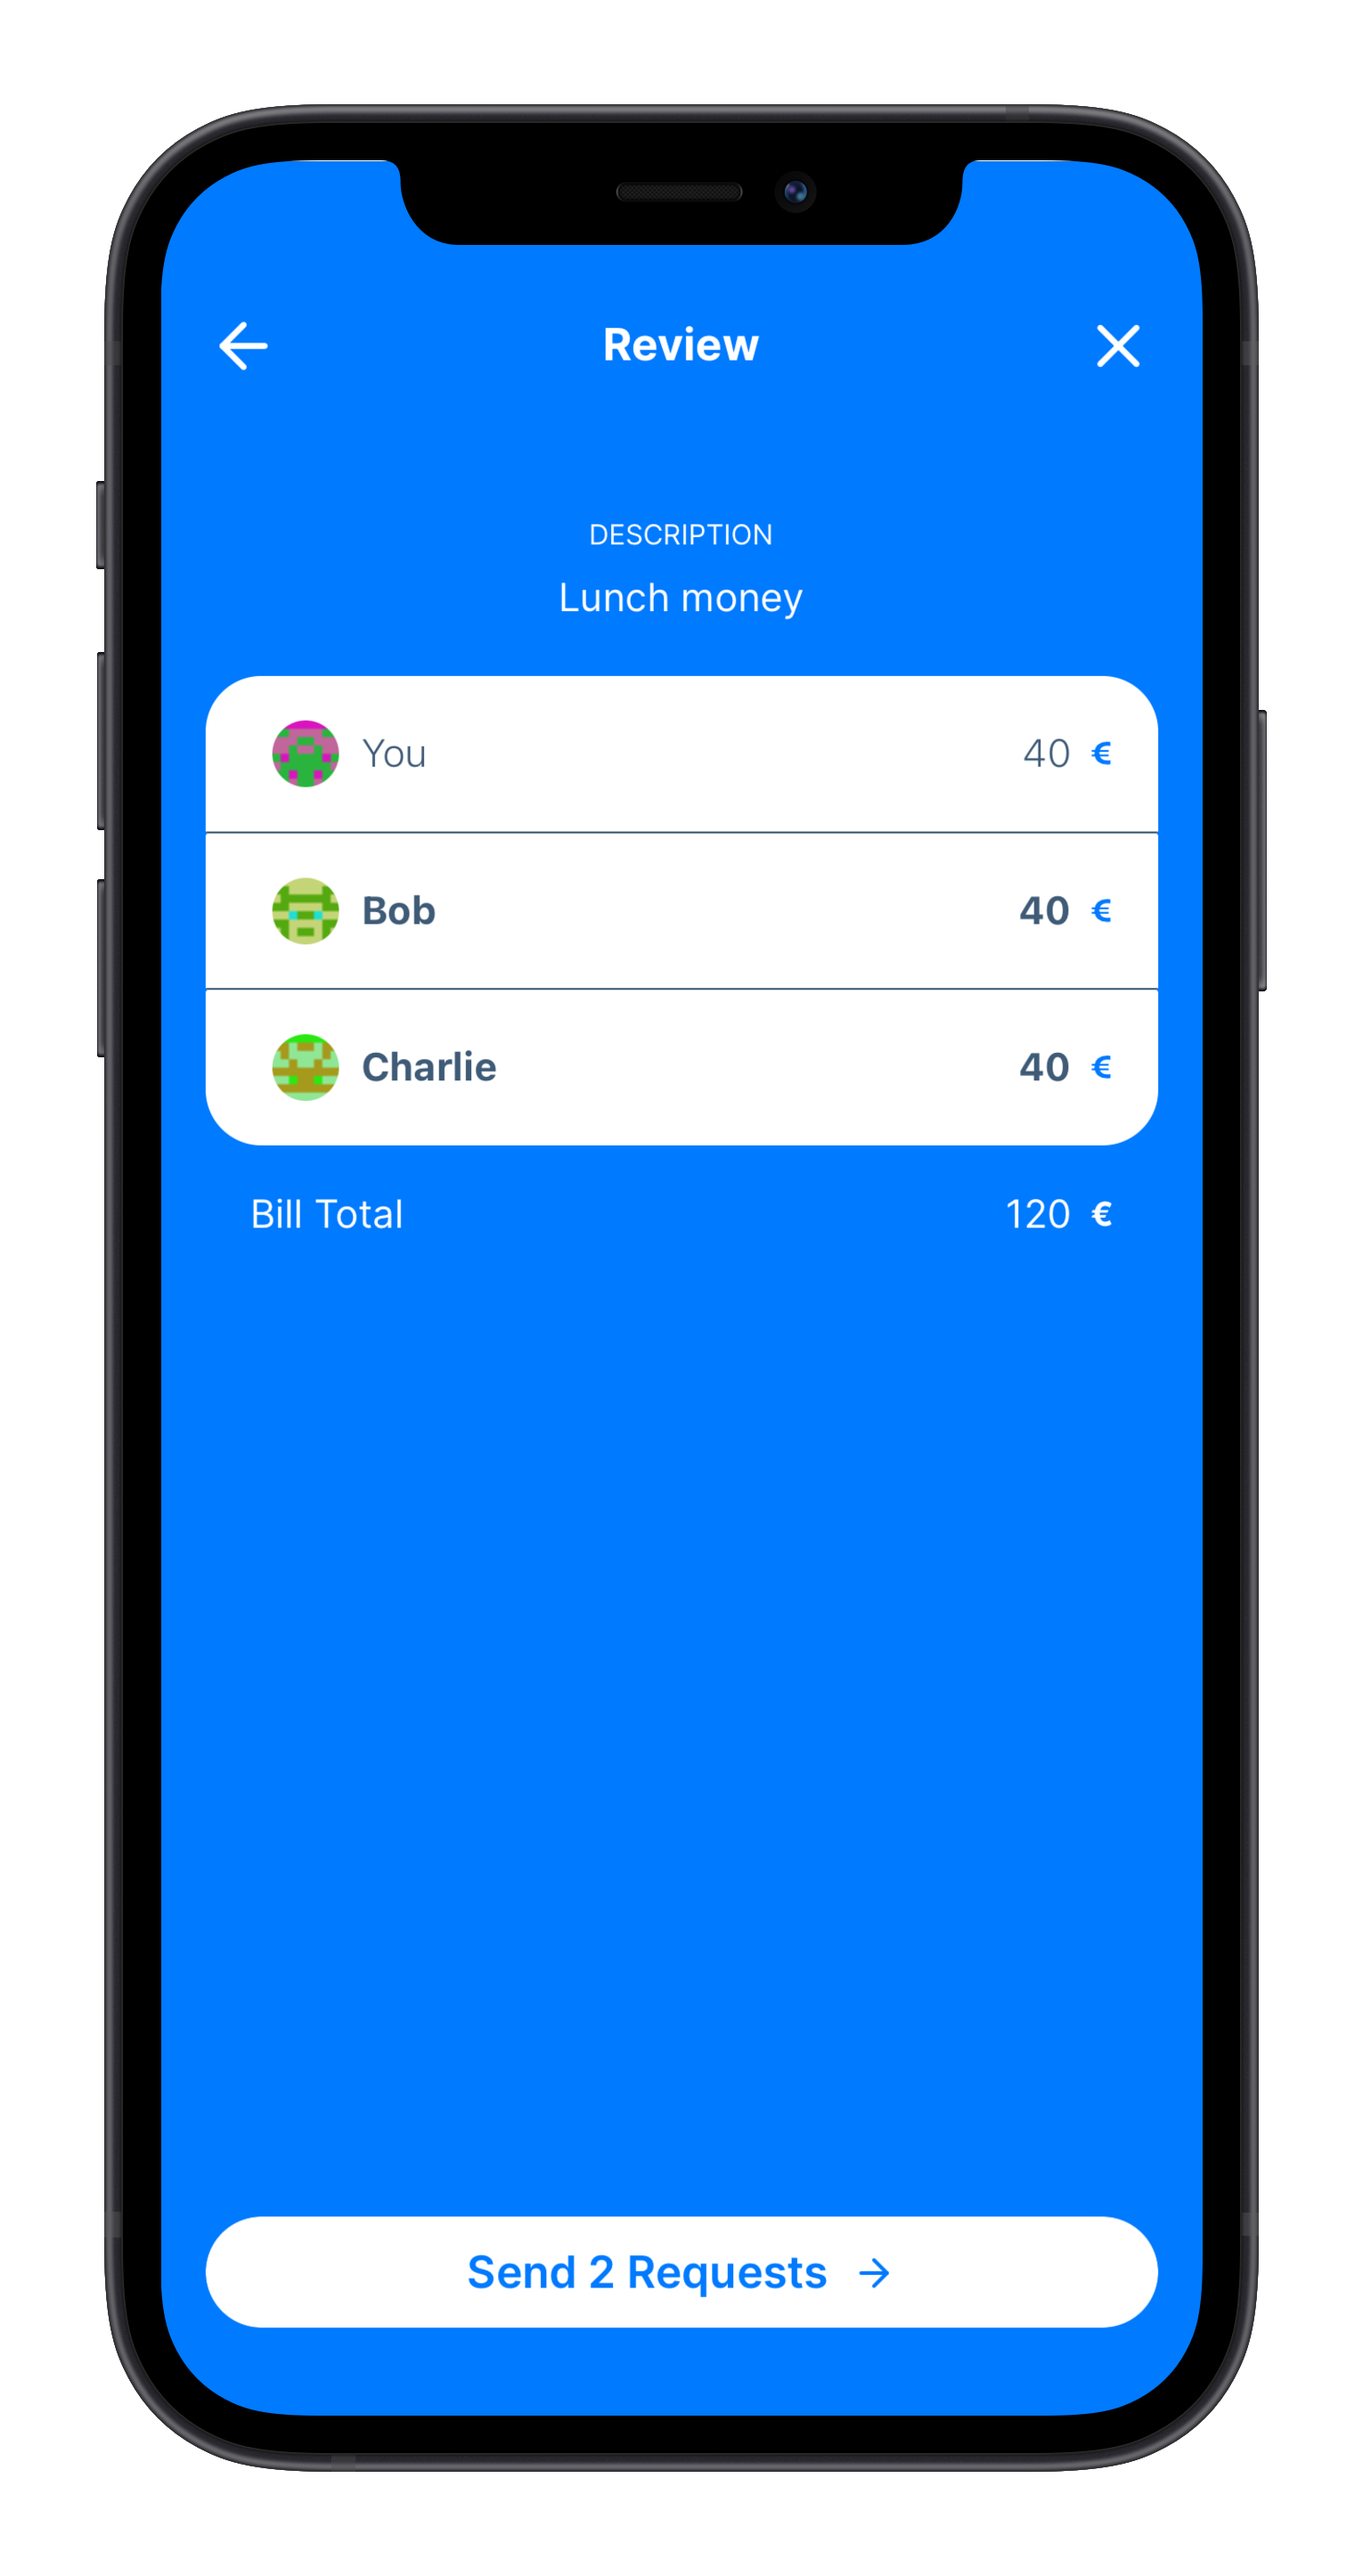
By default, the amount you're requesting will be split evenly between the people you chose. You also have the option here to change the sums manually by entering the amounts per person.


Review the payment request and send multiple requests with a single tap!
Checking balances with contacts
By selecting a contact in the Contacts view, you will be able to view all the trustlines you have with that person. Swipe left and right to view different currency networks. Each trustline will prominently display the available credit at the top. Below are three numbers: Balance, Given credit line, and Received credit line.

The given and received credit line amounts correspond to the two credit limits you and your partner have agreed on for this trustline. In other words, this is the credit line you have given to your partner, and the credit line you have received from your partner.
Your balance indicates the amount "owed." If it is negative, this is the amount you owe your partner. If it is positive, this is the amount your partner owes you. You should only need this information if you decide to settle your balance and close the trustline.
Support and feedback
This is a newly released app. We are very interested in hearing about your experiences, anything you had trouble with, and any feedback you might have.
The Trustlines Forum has sections for Support as well as for Feedback regarding the Trustlines App; come tell us what you think!
This content is created by Auxiliary GmbH and is provided as educational material for Trustlines App users.